Custom Cover Measurement Guide for OEM/ODM Projects
This guide explains how JK Covers collects and uses vehicle and equipment dimensions for custom protective cover projects. Dimensions, photographs, drawings and reference samples all help our team with pattern development, sample discussion and project review. If you do not yet have a complete set of measurements, you can send the material you already have and our team will confirm what else is needed. Records are taken to the nearest centimetre, and every diagram below is for reference only — always measure tight against the body or equipment surface.
Before You Measure
Preparation keeps the readings consistent and repeatable. Set out the tools below, then confirm the vehicle or equipment details you will send with your measurements.
- Tape measure or soft measuring tapeFor straight distances. A tape of 5 m or longer is recommended.
- Laser distance meter (optional)Can be used for more precise length measurement.
- Painter’s tape or marking tapeUsed to mark measurement points without damaging paint.
- Notebook and penUsed to record every reading directly on site.
- Right-angle rulerUsed to keep vertical measurements square to the ground line.
- Two peopleMeasuring with a helper is faster and more consistent — the marking stage takes roughly 10–15 minutes.
Vehicle or equipment information
Alongside the measurements, note the make, model, model year (where applicable) and body or equipment type, so the pattern can be matched to the correct reference. For non-vehicle covers, record the equipment type and the working envelope that the cover has to protect.
Units, orientation and marking principles
- Units: record every reading in centimetres, to the nearest centimetre.
- Orientation: points are described as left and right from the driver’s or operator’s seat facing forward. Front and rear refer to the front and rear of the vehicle.
- Symmetry: most points have a mirrored point on the opposite side of the vehicle. Where a measurement runs to the opposite side, measure to the matching point on the other side.
- Marking: mark each point with painter’s or marking tape so it is clearly visible and does not damage the paint.
- Accuracy: keep the tape tight against the body panel or equipment surface, not floating across a gap.
- Photographs: photograph each marked point with the tape visible, so the position of the point can be confirmed later.
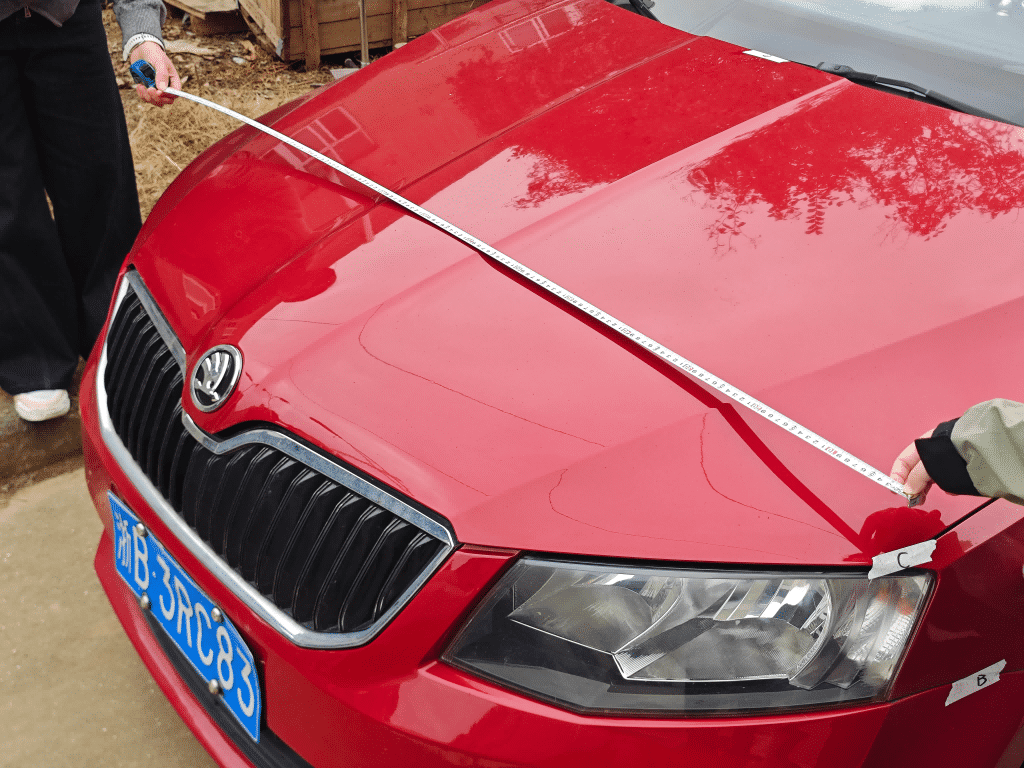
Measurement Points and Recording Method
The diagram below shows the standard A–L point set used for custom vehicle covers. Each point is described with its position on the vehicle, how to mark it, and what to measure there. Mirror positions (recorded as MP) are measured separately. Point K is the centre of the front edge of the bonnet and is used as the reference for the J–K length.
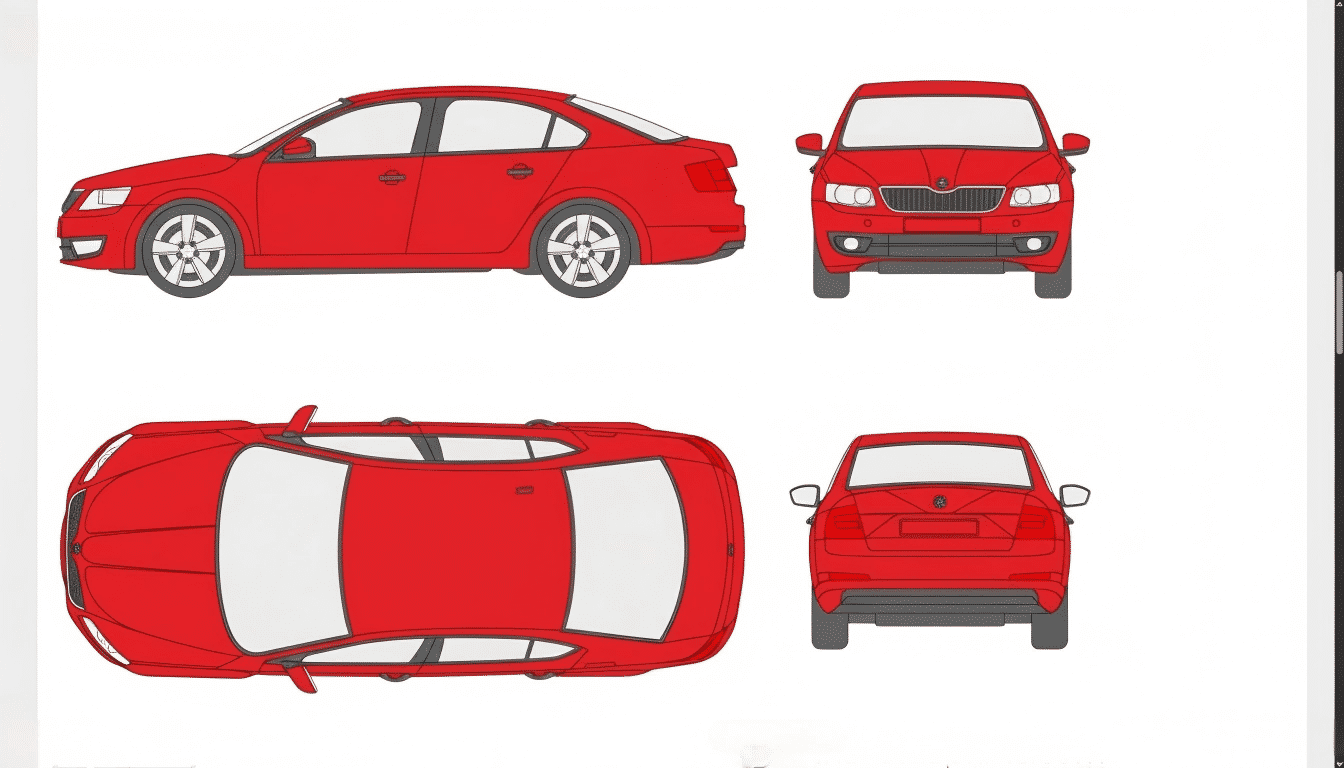
Images are for reference only. During actual measurement, always keep the tape tight against the vehicle body.
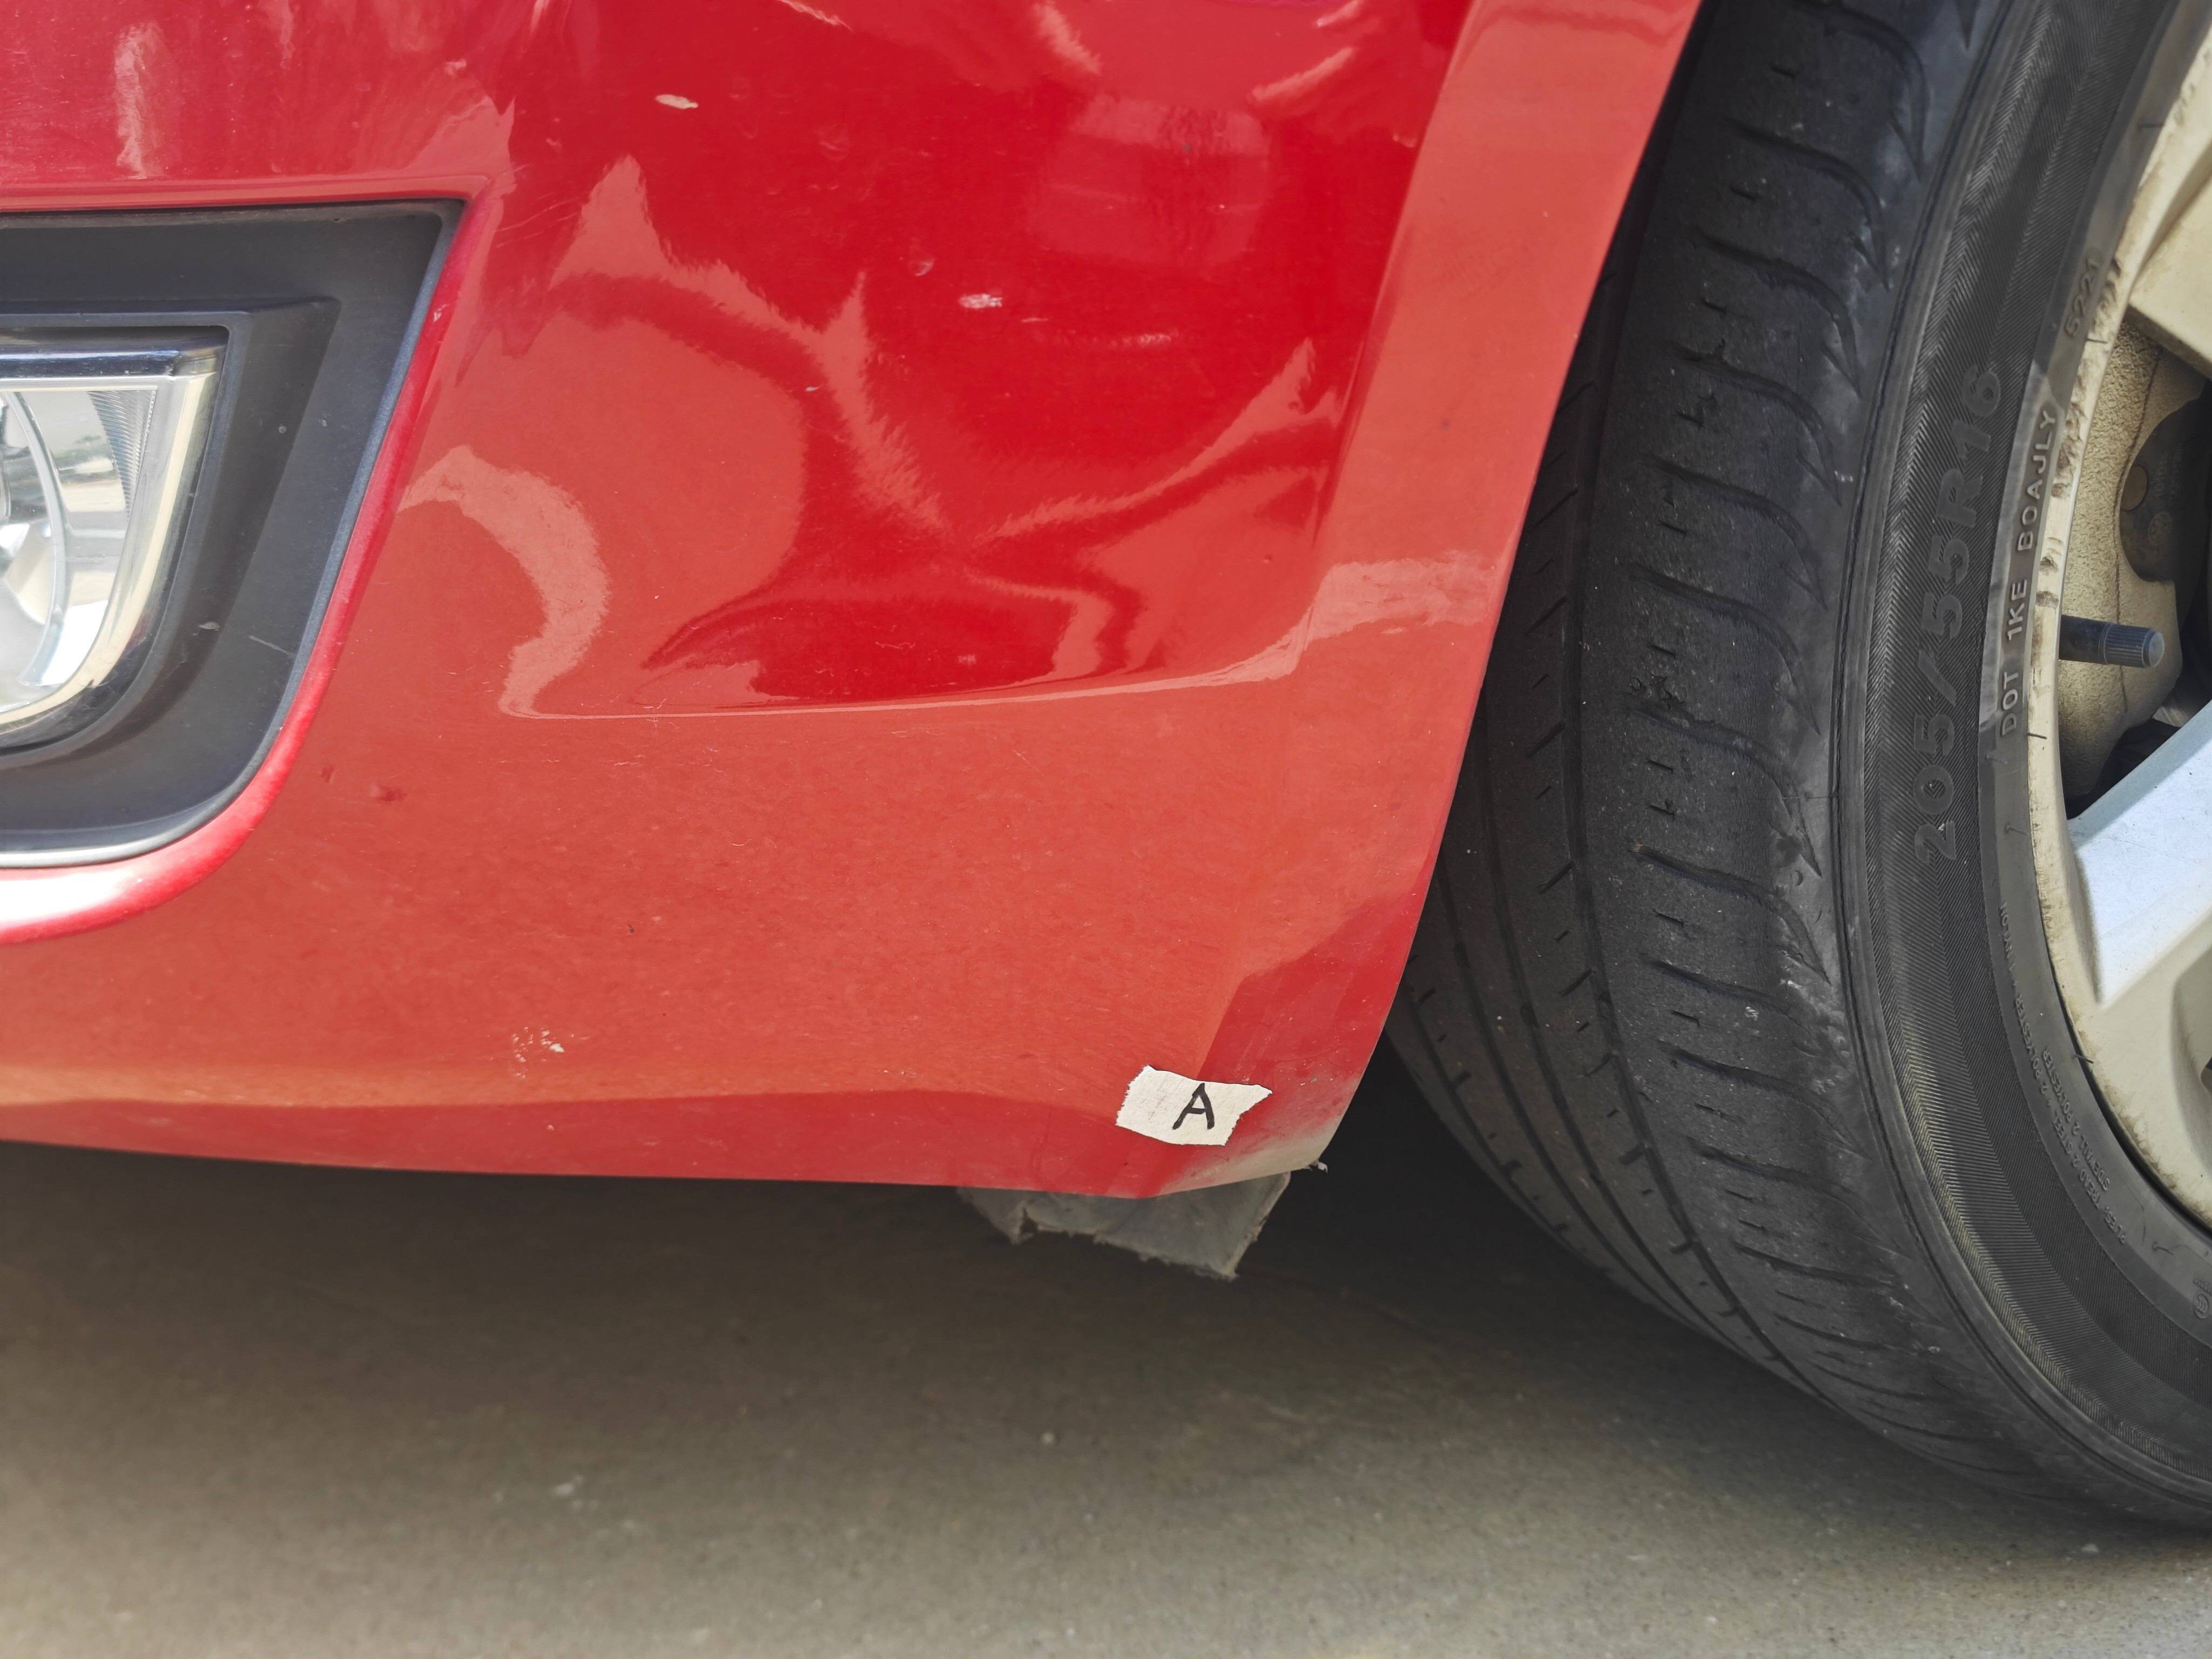
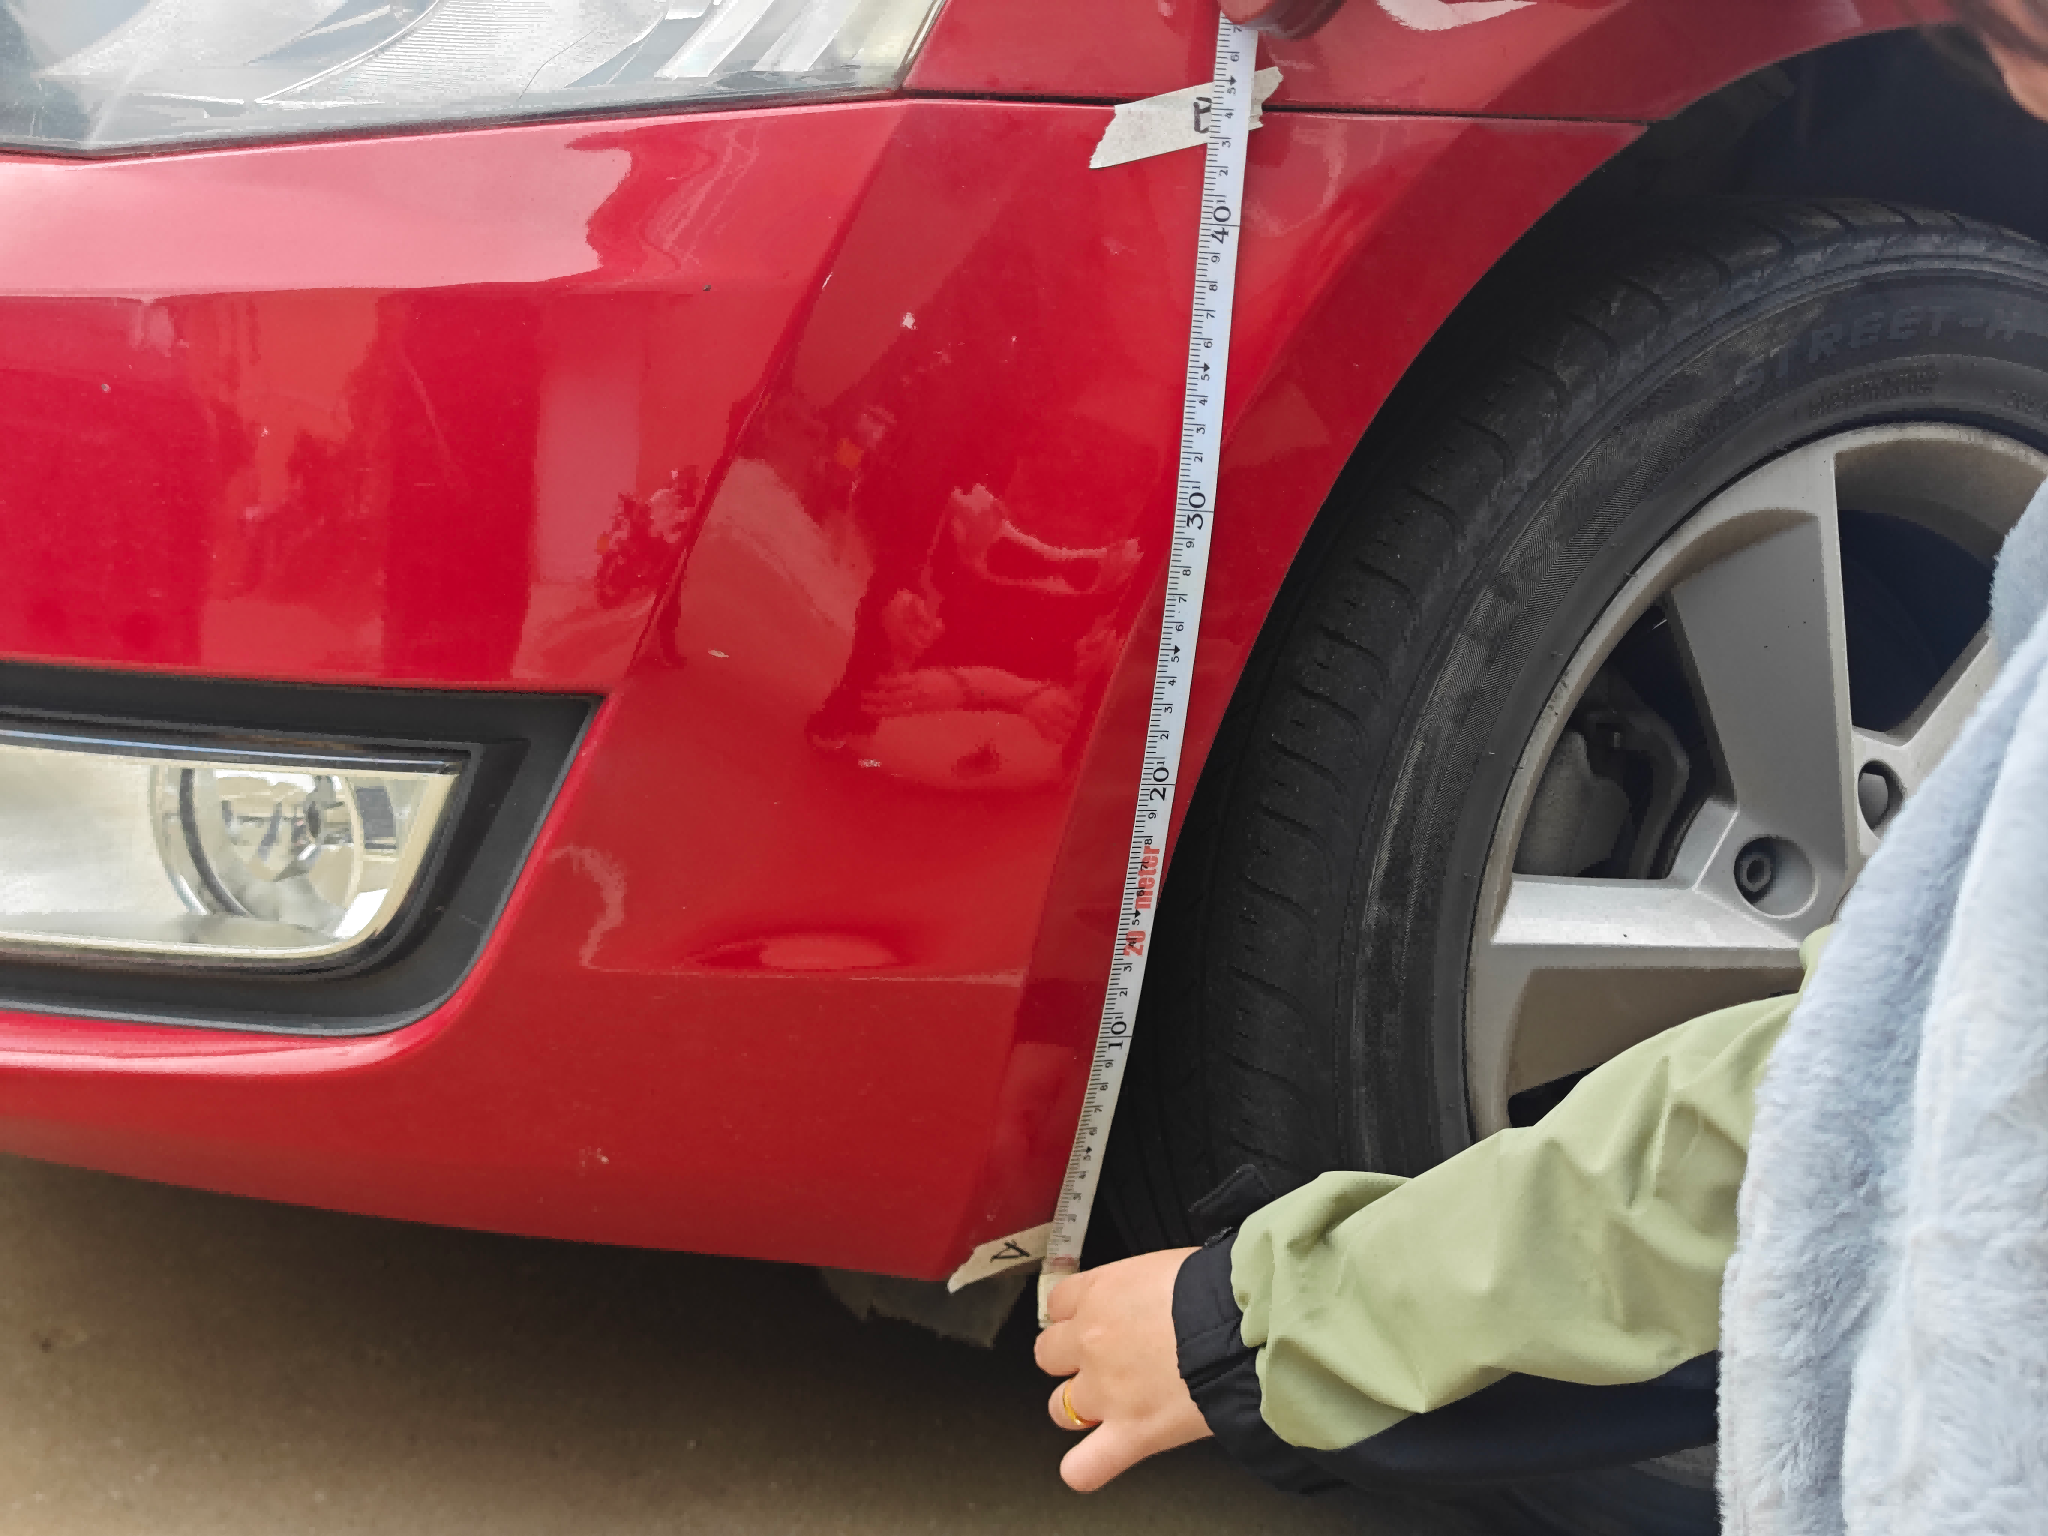
Point AFront left fender crease
How to mark: find the area around the front-left wheel, then apply painter’s tape on the crease at that position. Keep the mark clearly visible without damaging the paint.
What to measure:
- Vertical height from point A to the ground.
- Arc length from point A across the front of the vehicle (at the badge line) to the matching point on the opposite side, using a soft tape.

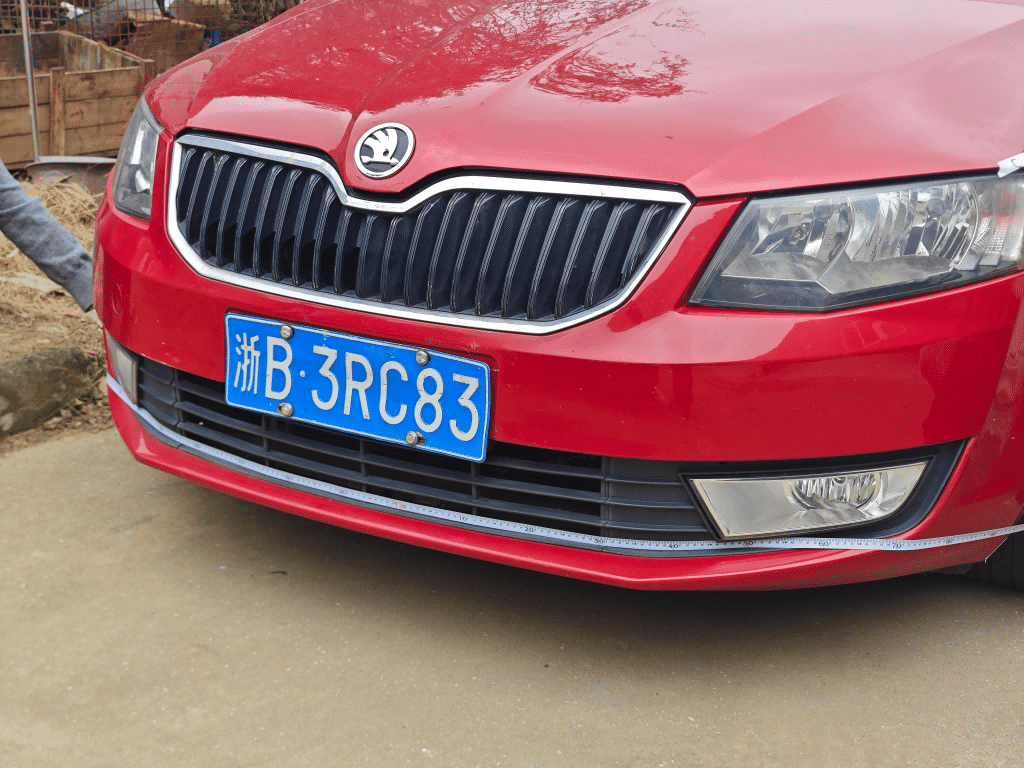
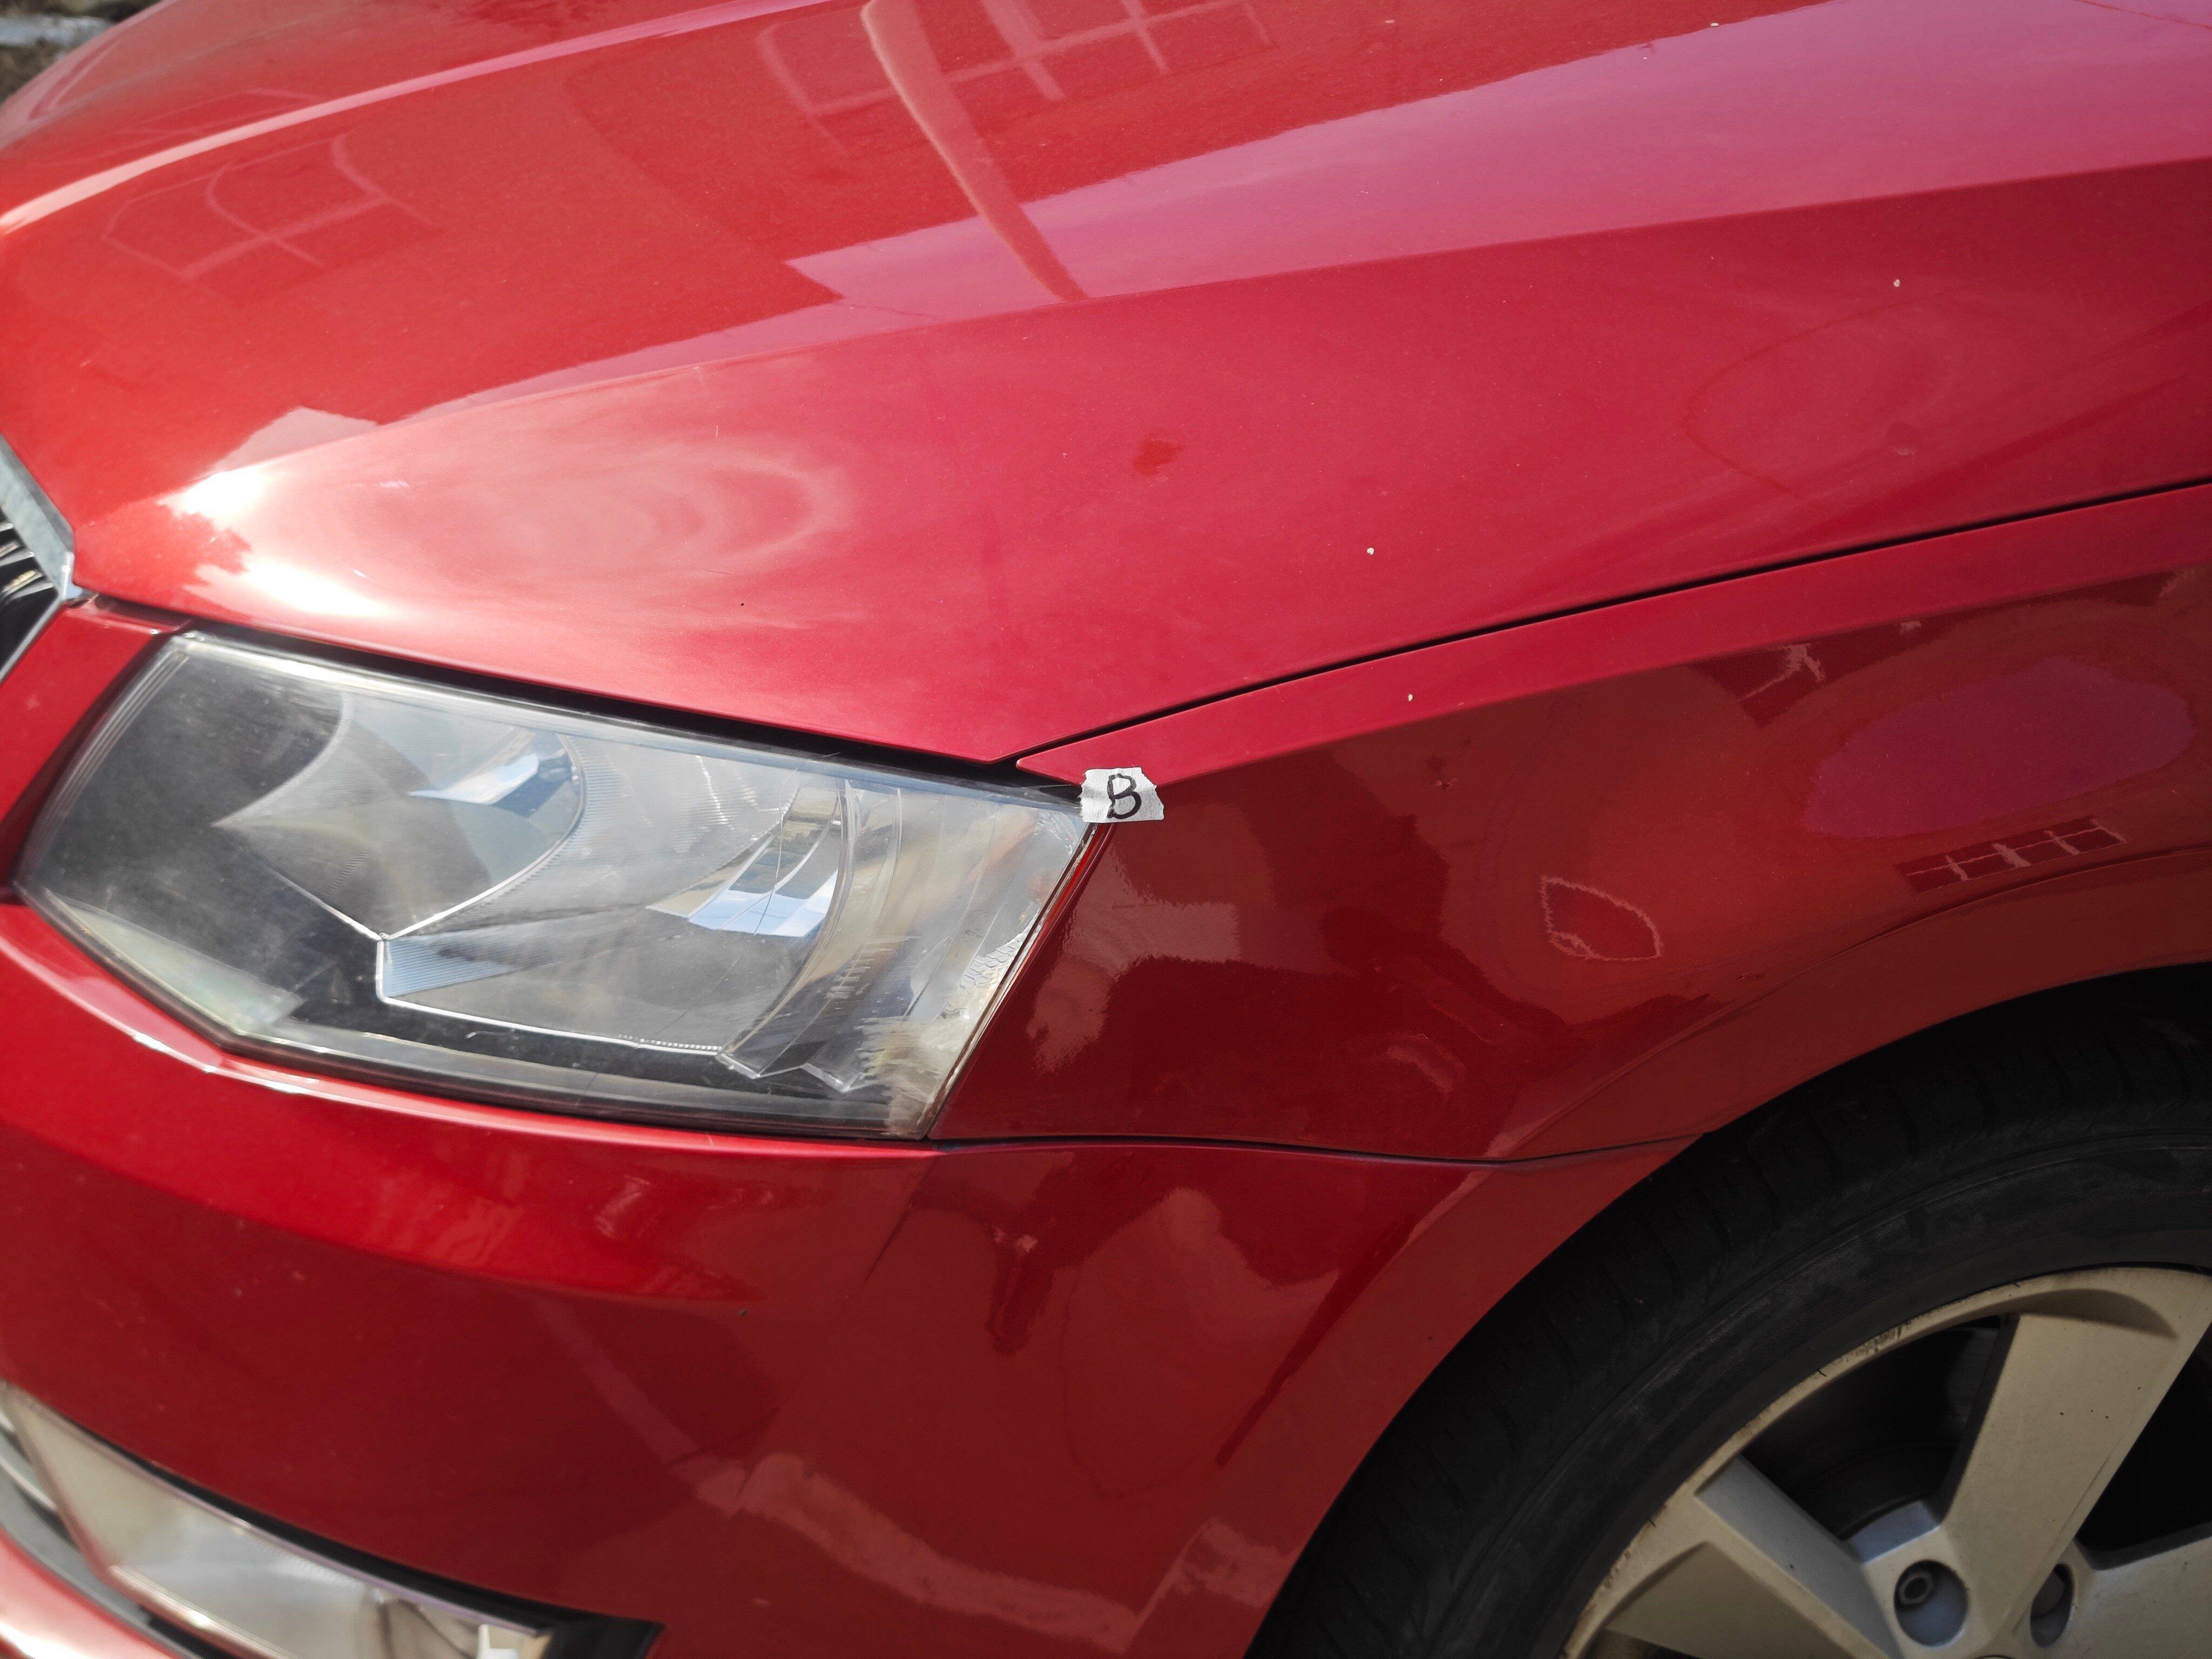
Point BOuter corner of the front headlight assembly (widest point)
How to mark: look at the left-hand headlight assembly and follow the upper-right edge of the headlight toward the bonnet. Point B sits on the bonnet, immediately to the upper right of the headlight. Apply painter’s tape at that position.
What to measure:
- Vertical height from point B to the ground.
- Straight-line width from point B to the matching point on the opposite side.
- Arc length from point B to the matching point on the opposite side, using a soft tape.
- Distance from point B to point A, using a soft tape.
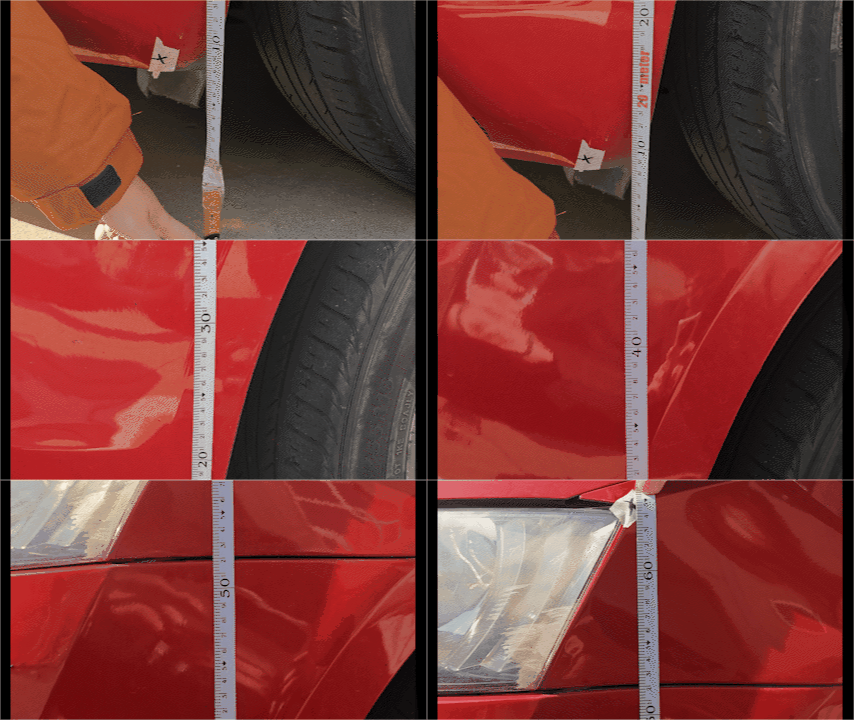
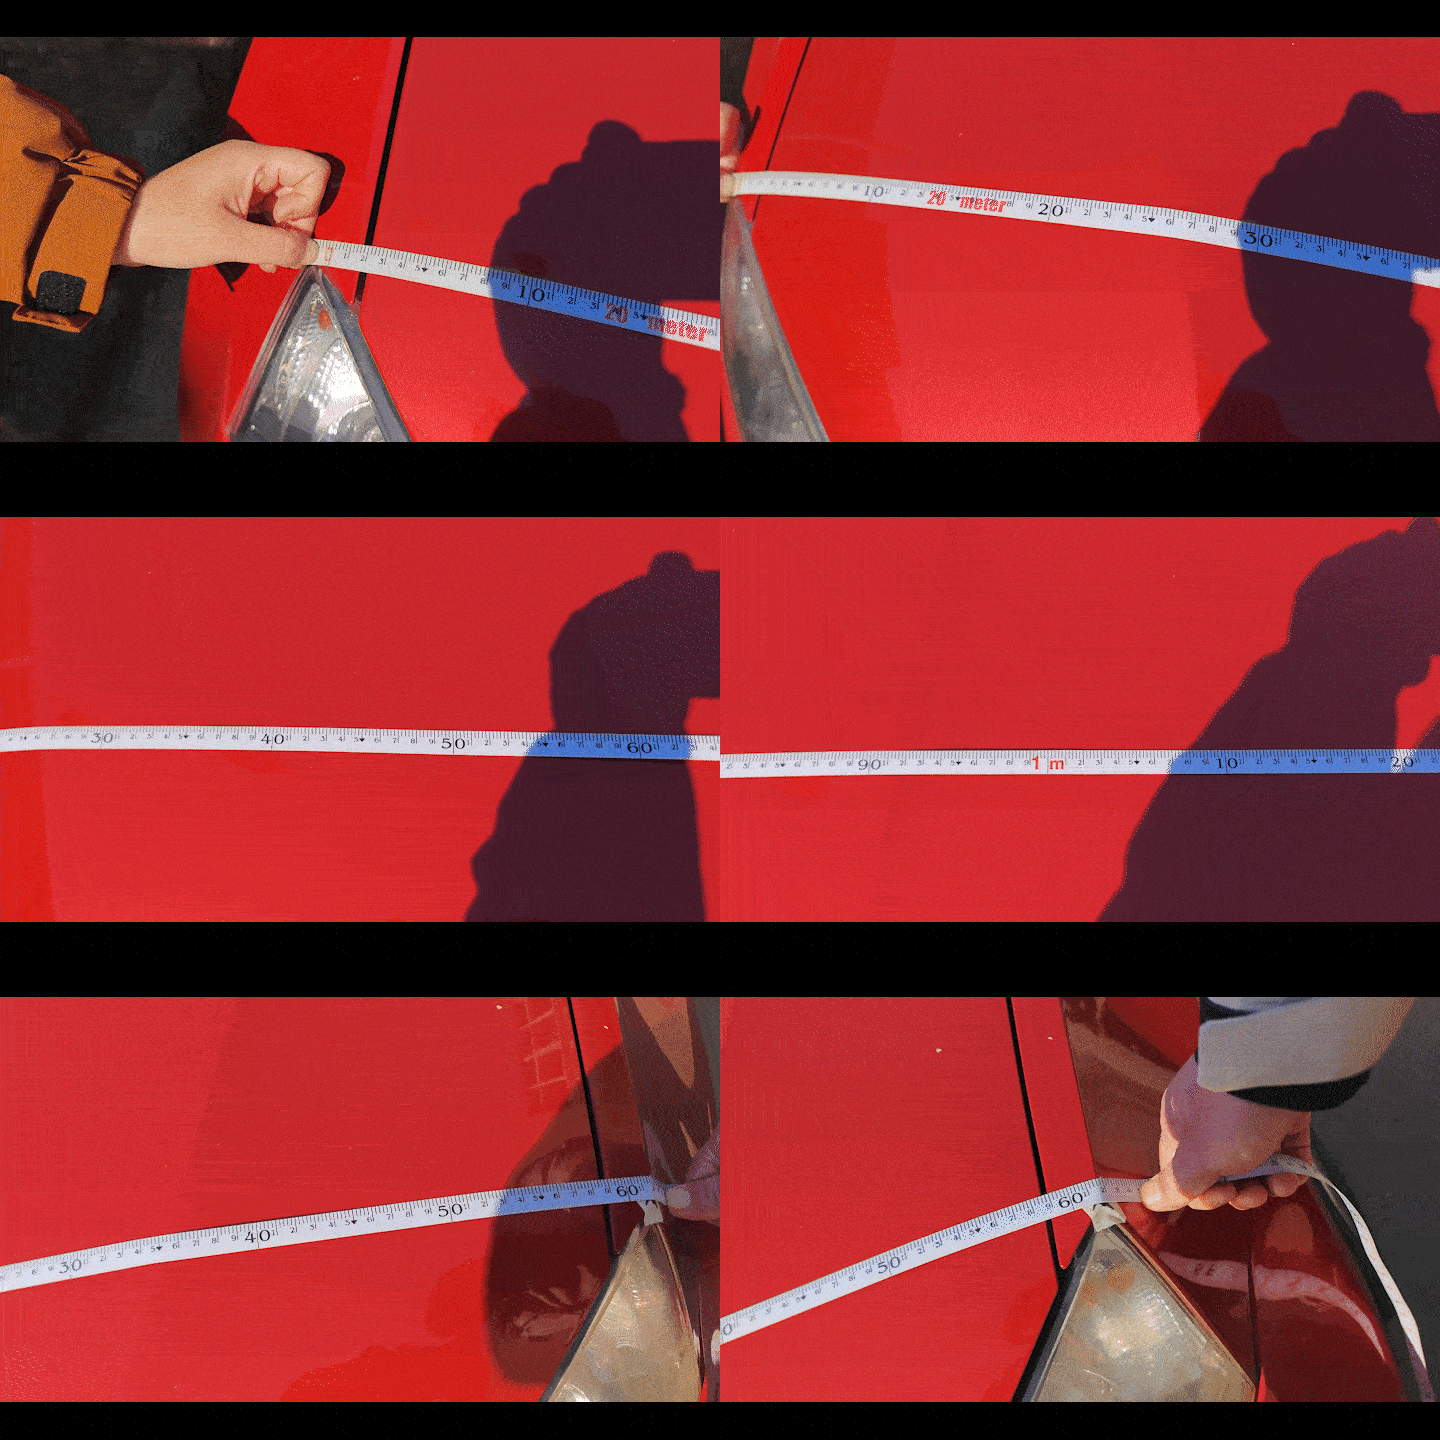
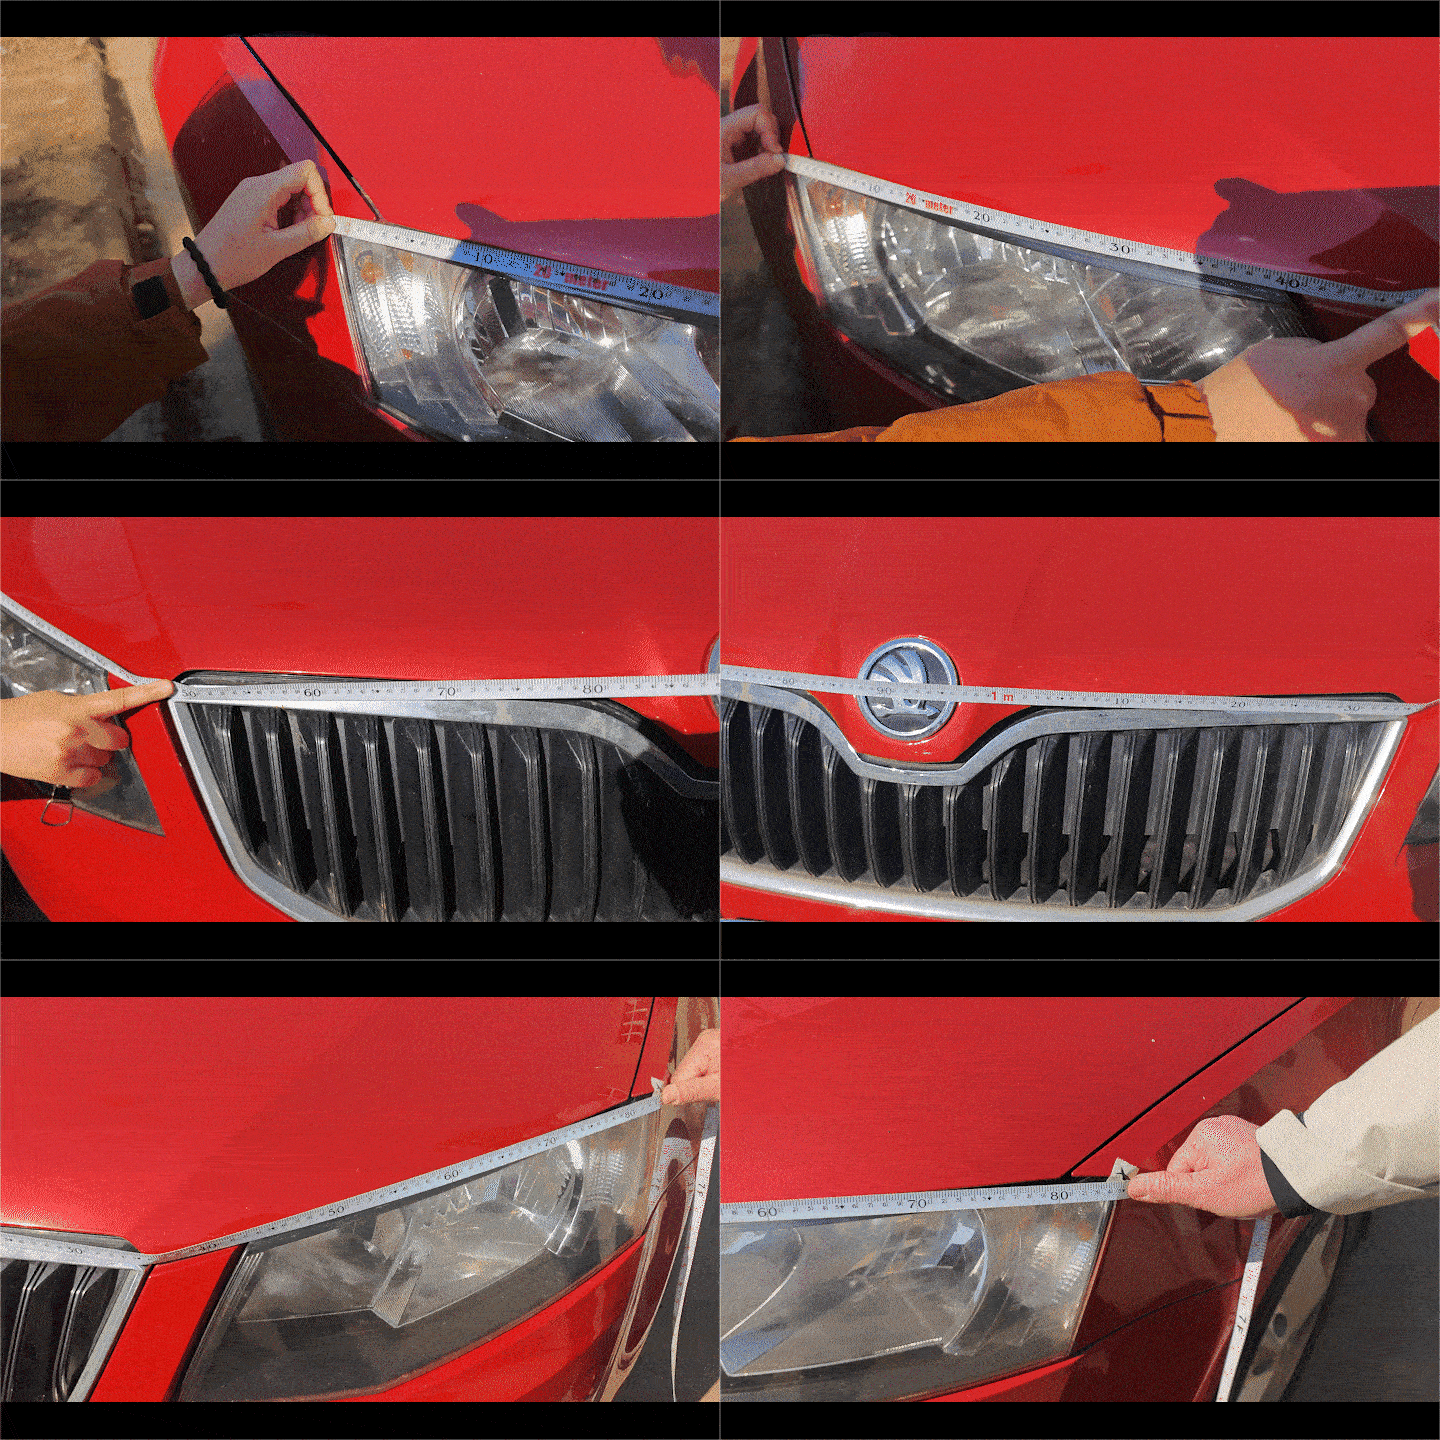
Point CCorner where the windscreen meets the bonnet
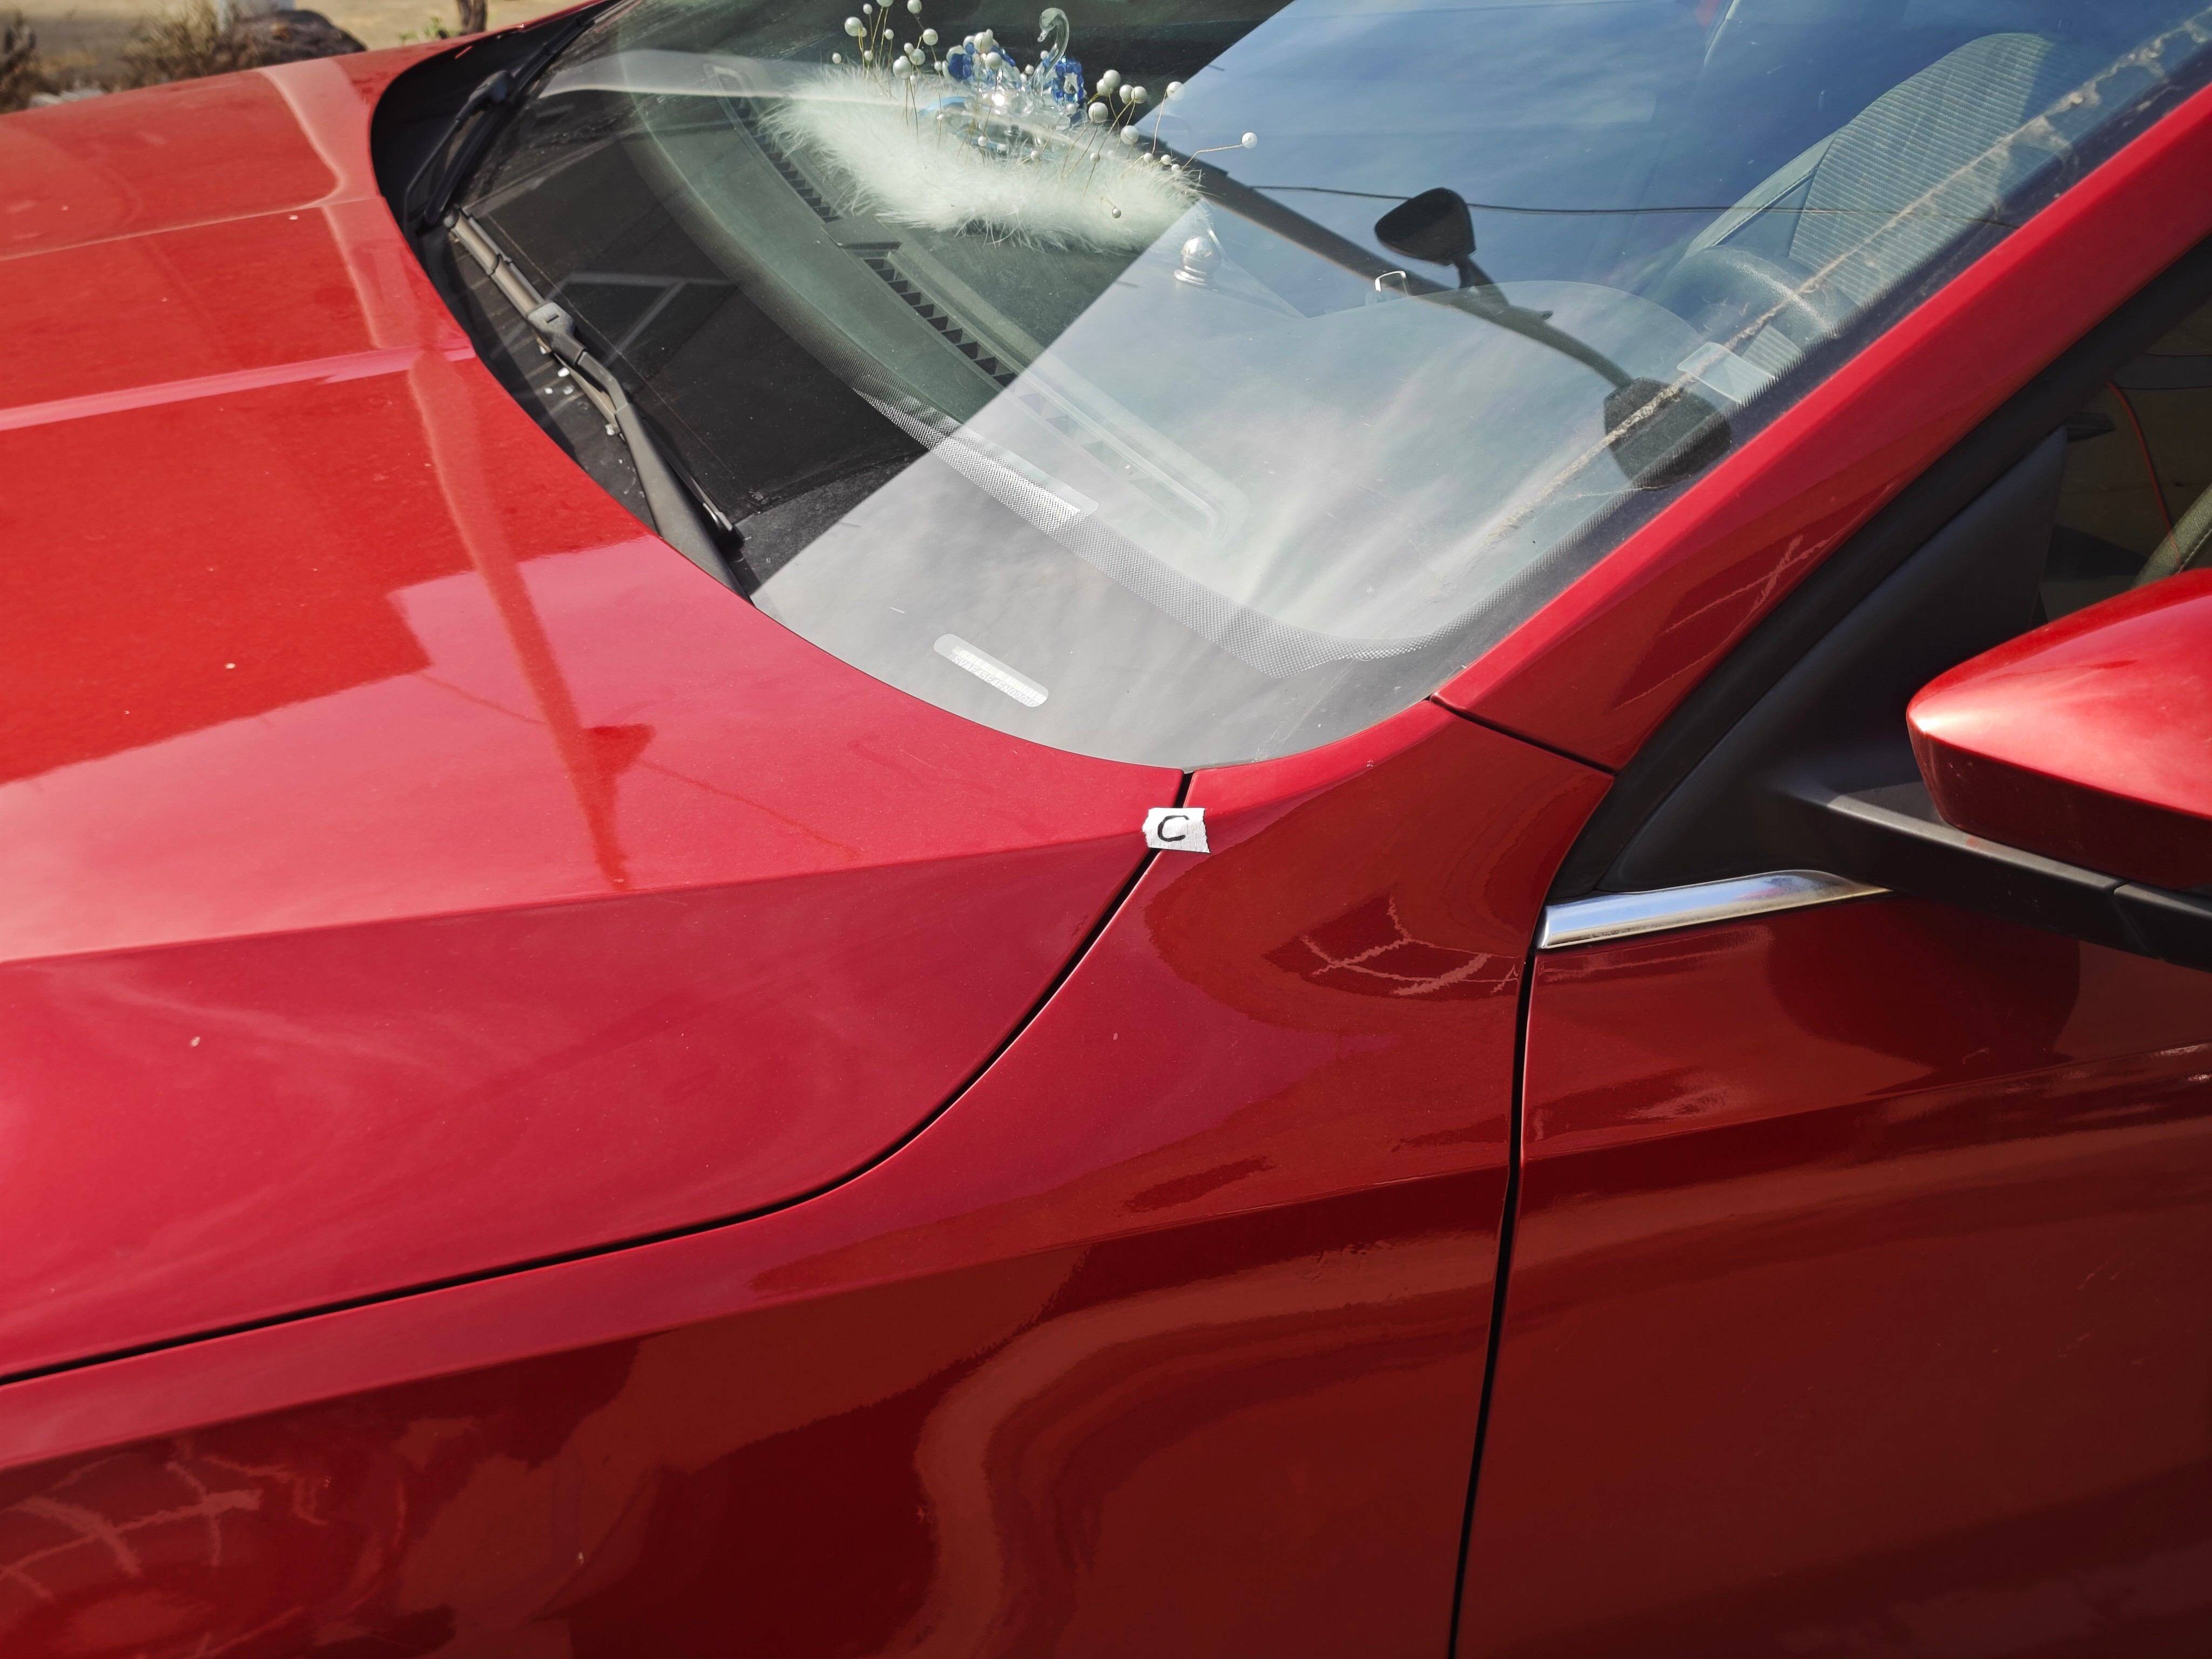
How to mark: find that corner on the left side, then project straight down: point C sits in the corner formed by the lower edge of the windscreen and the edge of the bonnet. Apply painter’s tape at that position.
What to measure:
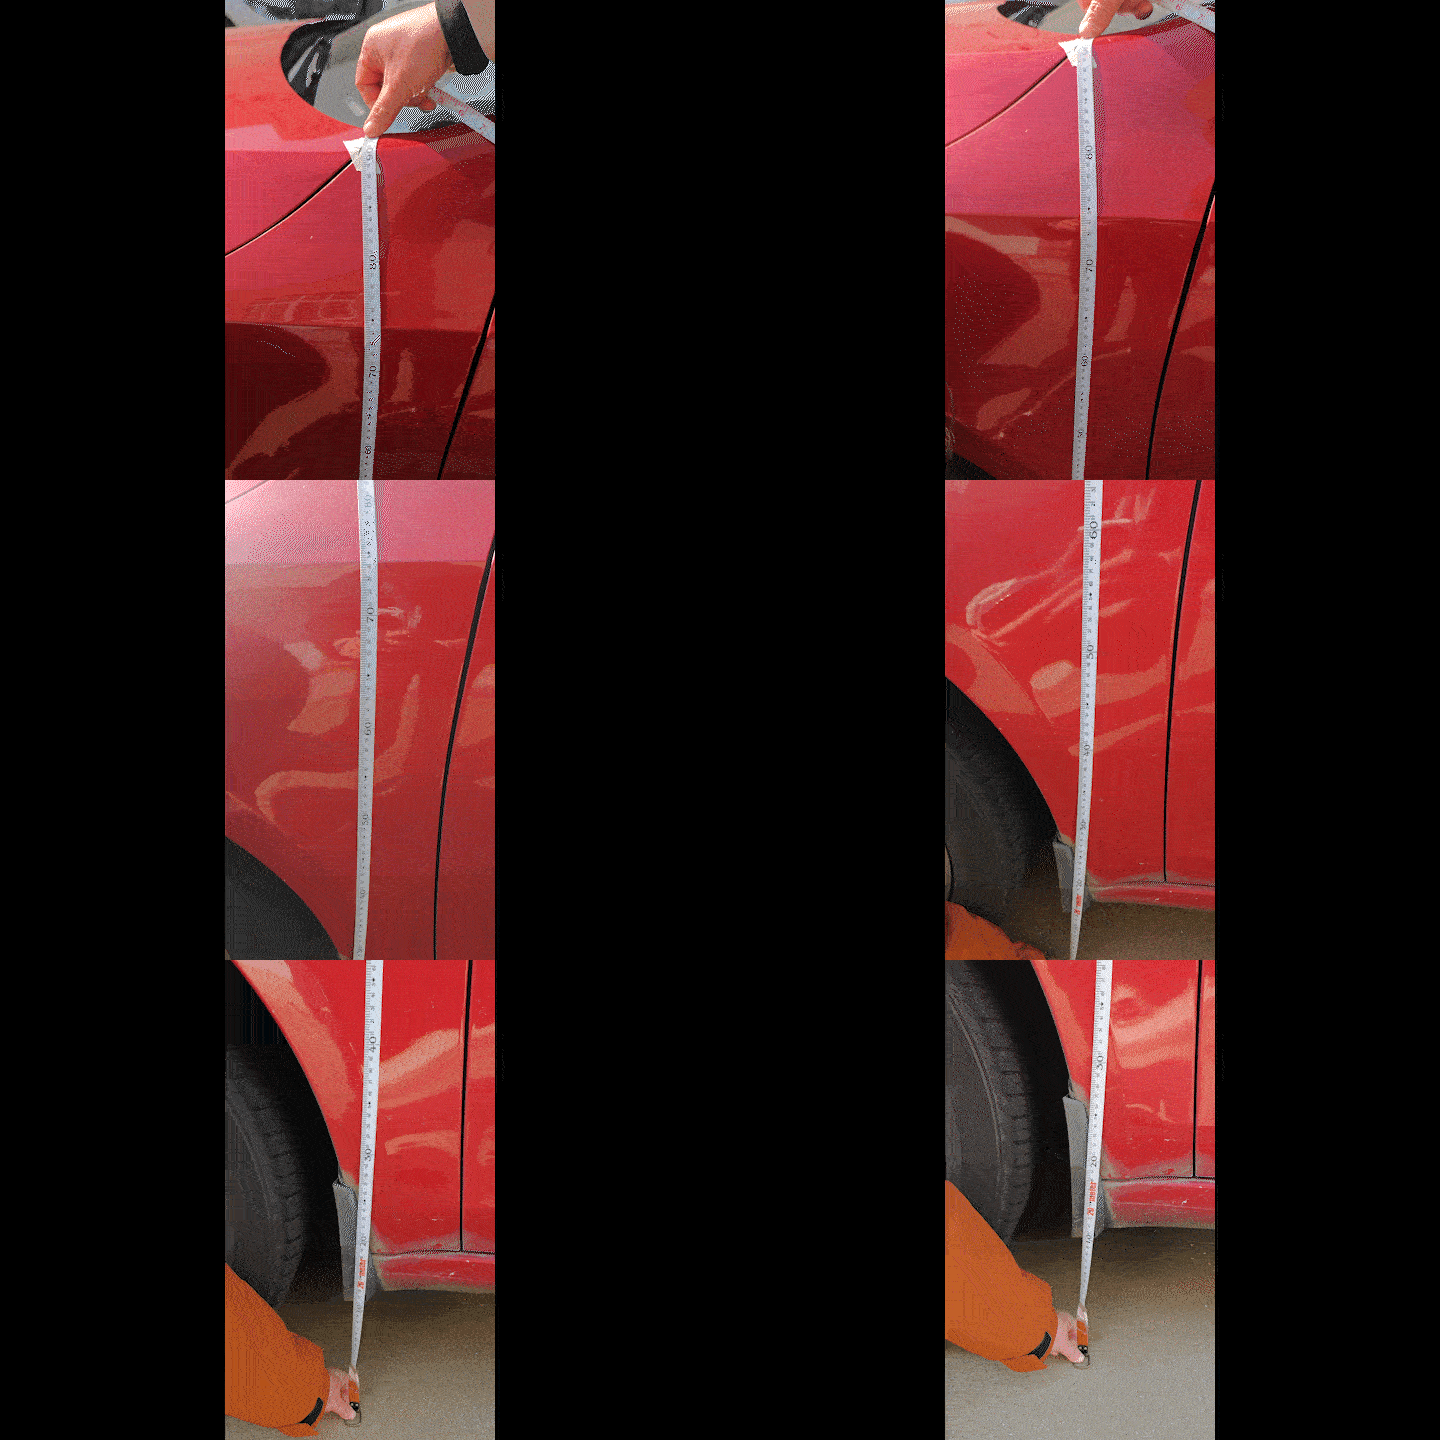
- Vertical height from point C to the ground.
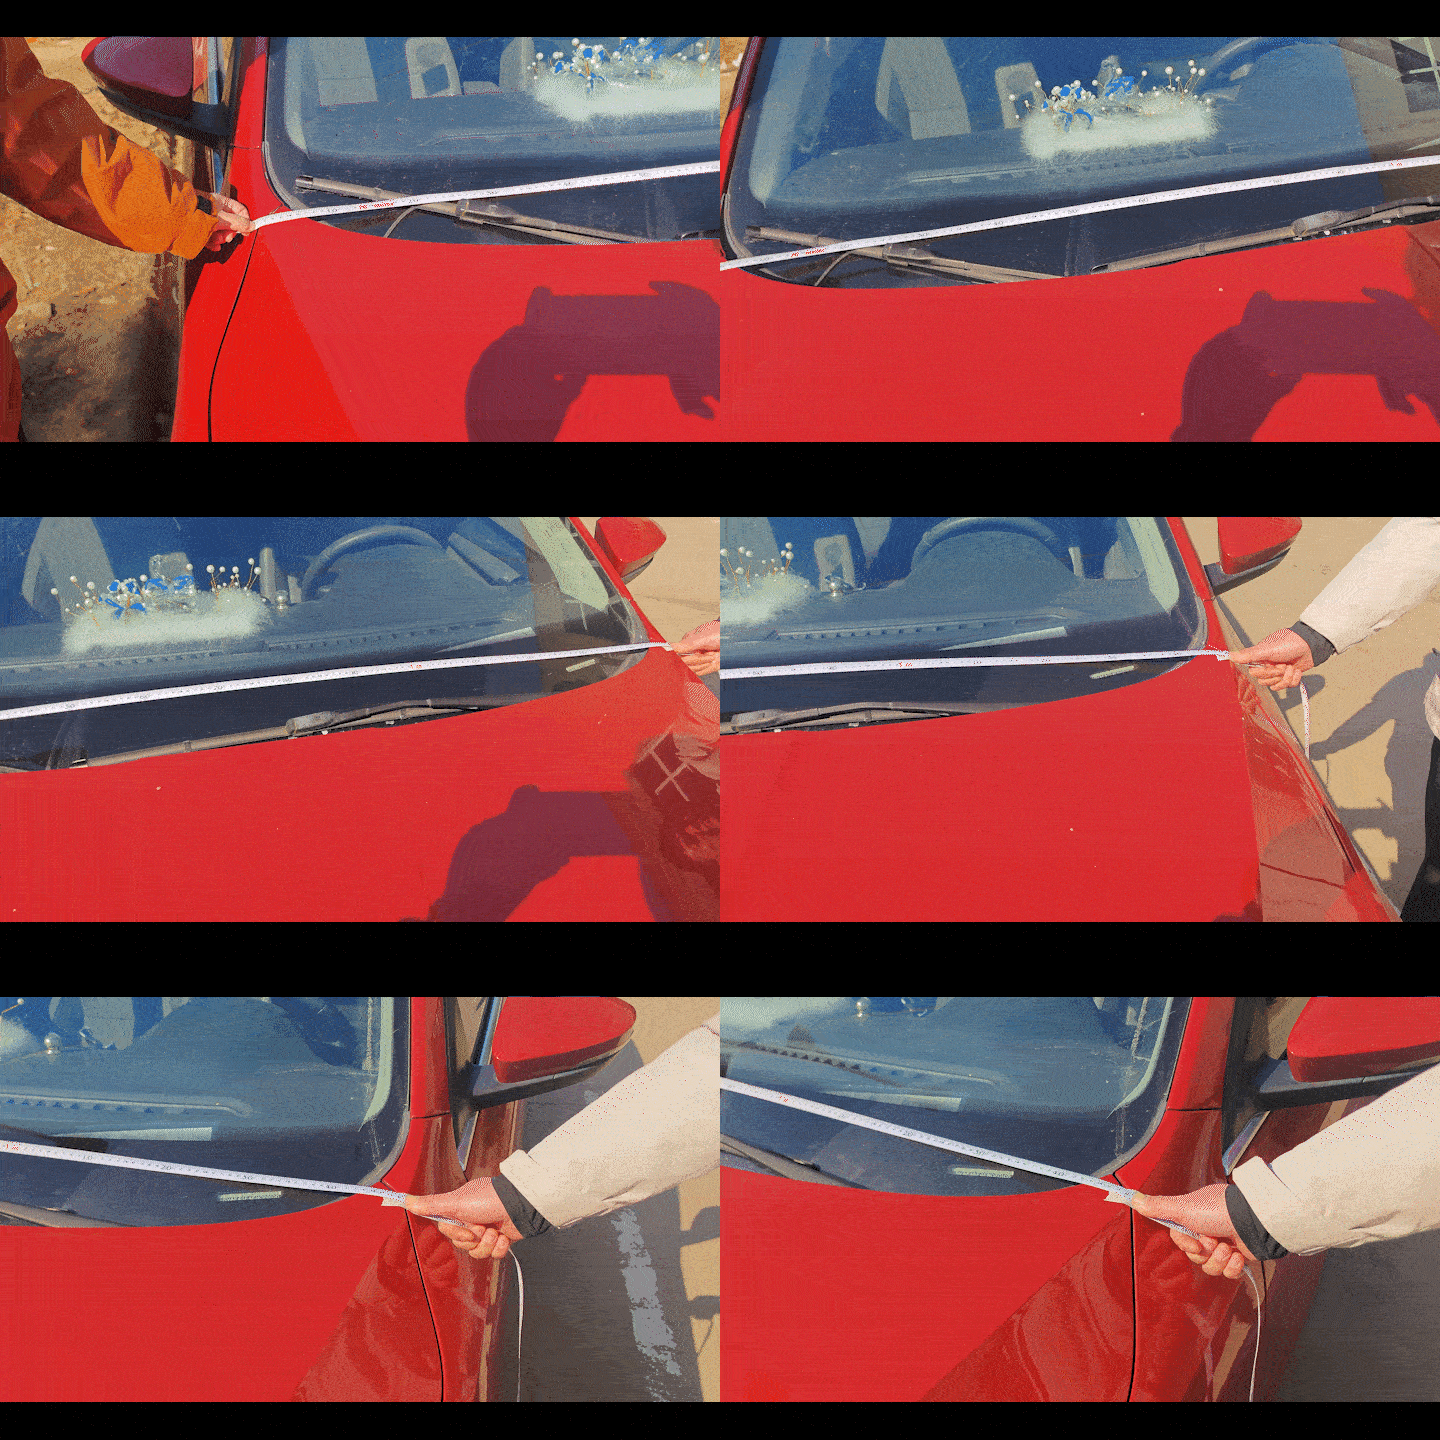
- Straight-line width from point C to the matching point on the opposite side.
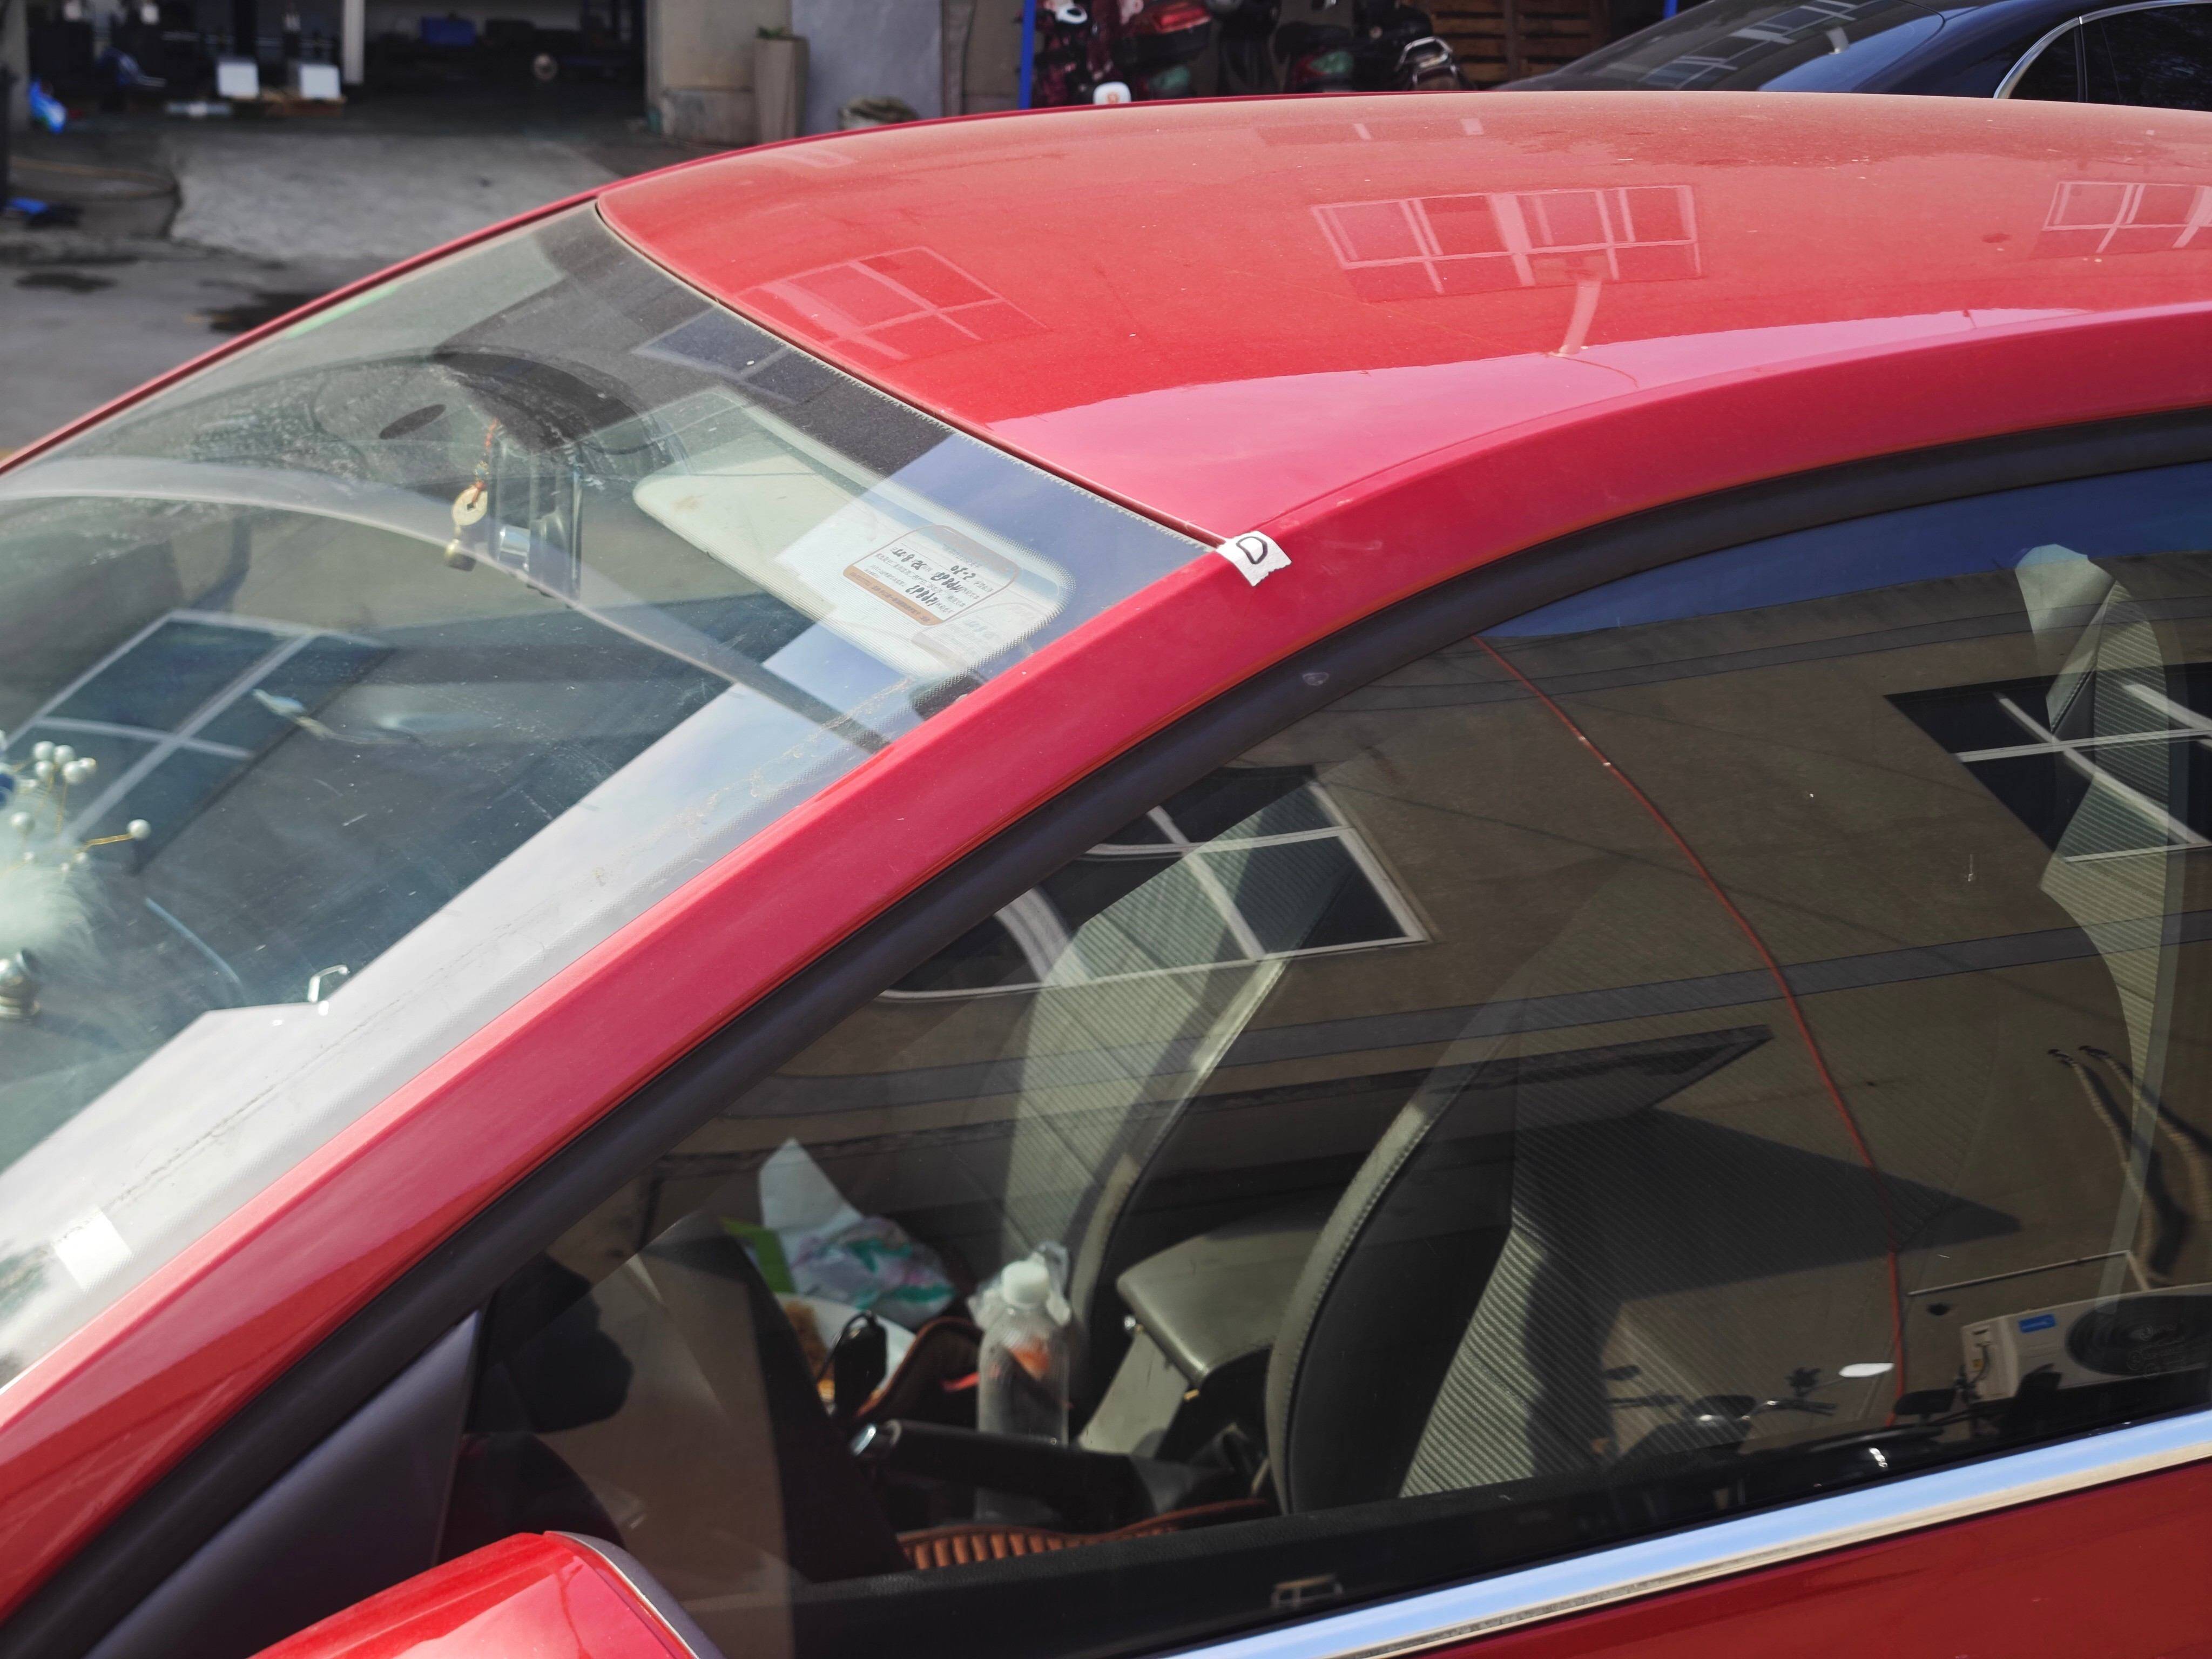
Point DTop-left corner of the windscreen where it meets the roof
How to mark: mark that junction with painter’s tape, keeping the mark clearly visible without damaging the paint.
What to measure:
- Vertical height from point D to the ground.
- Straight-line width from point D to the matching point on the opposite side.
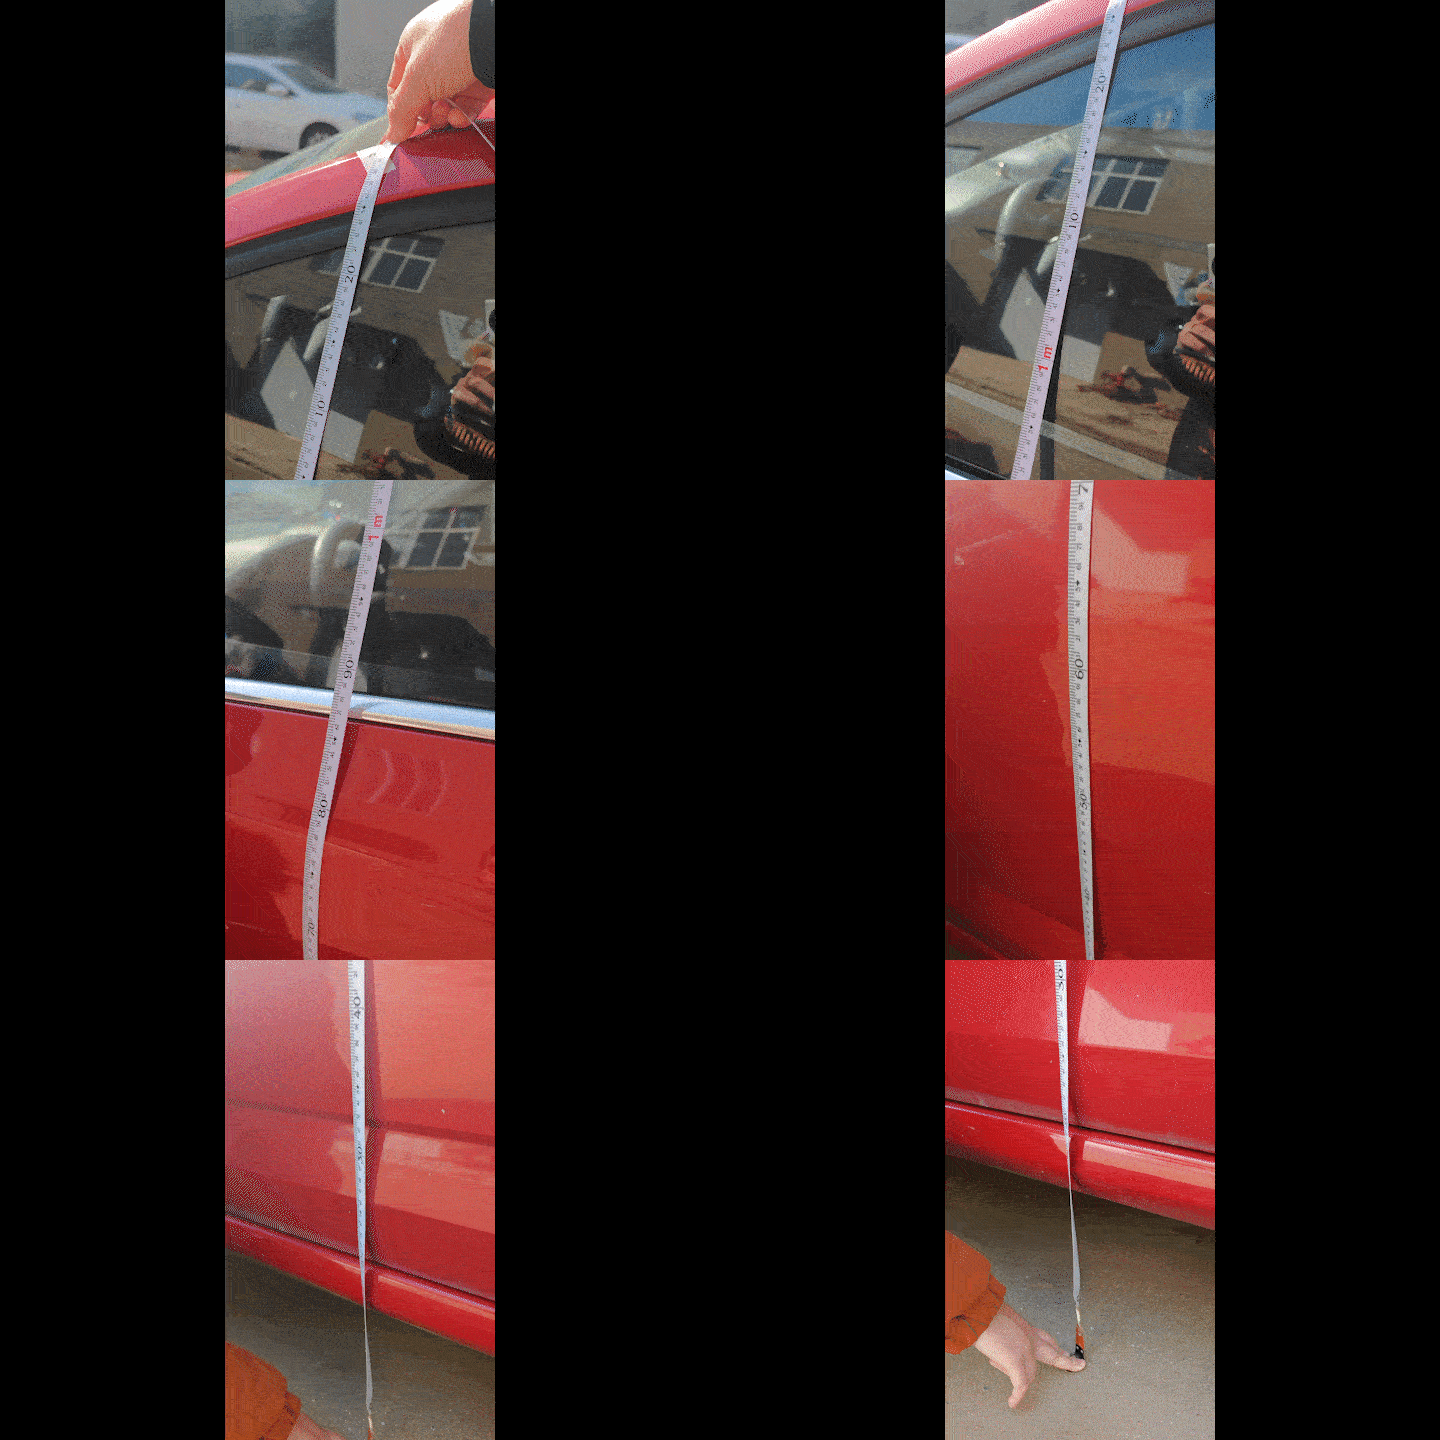
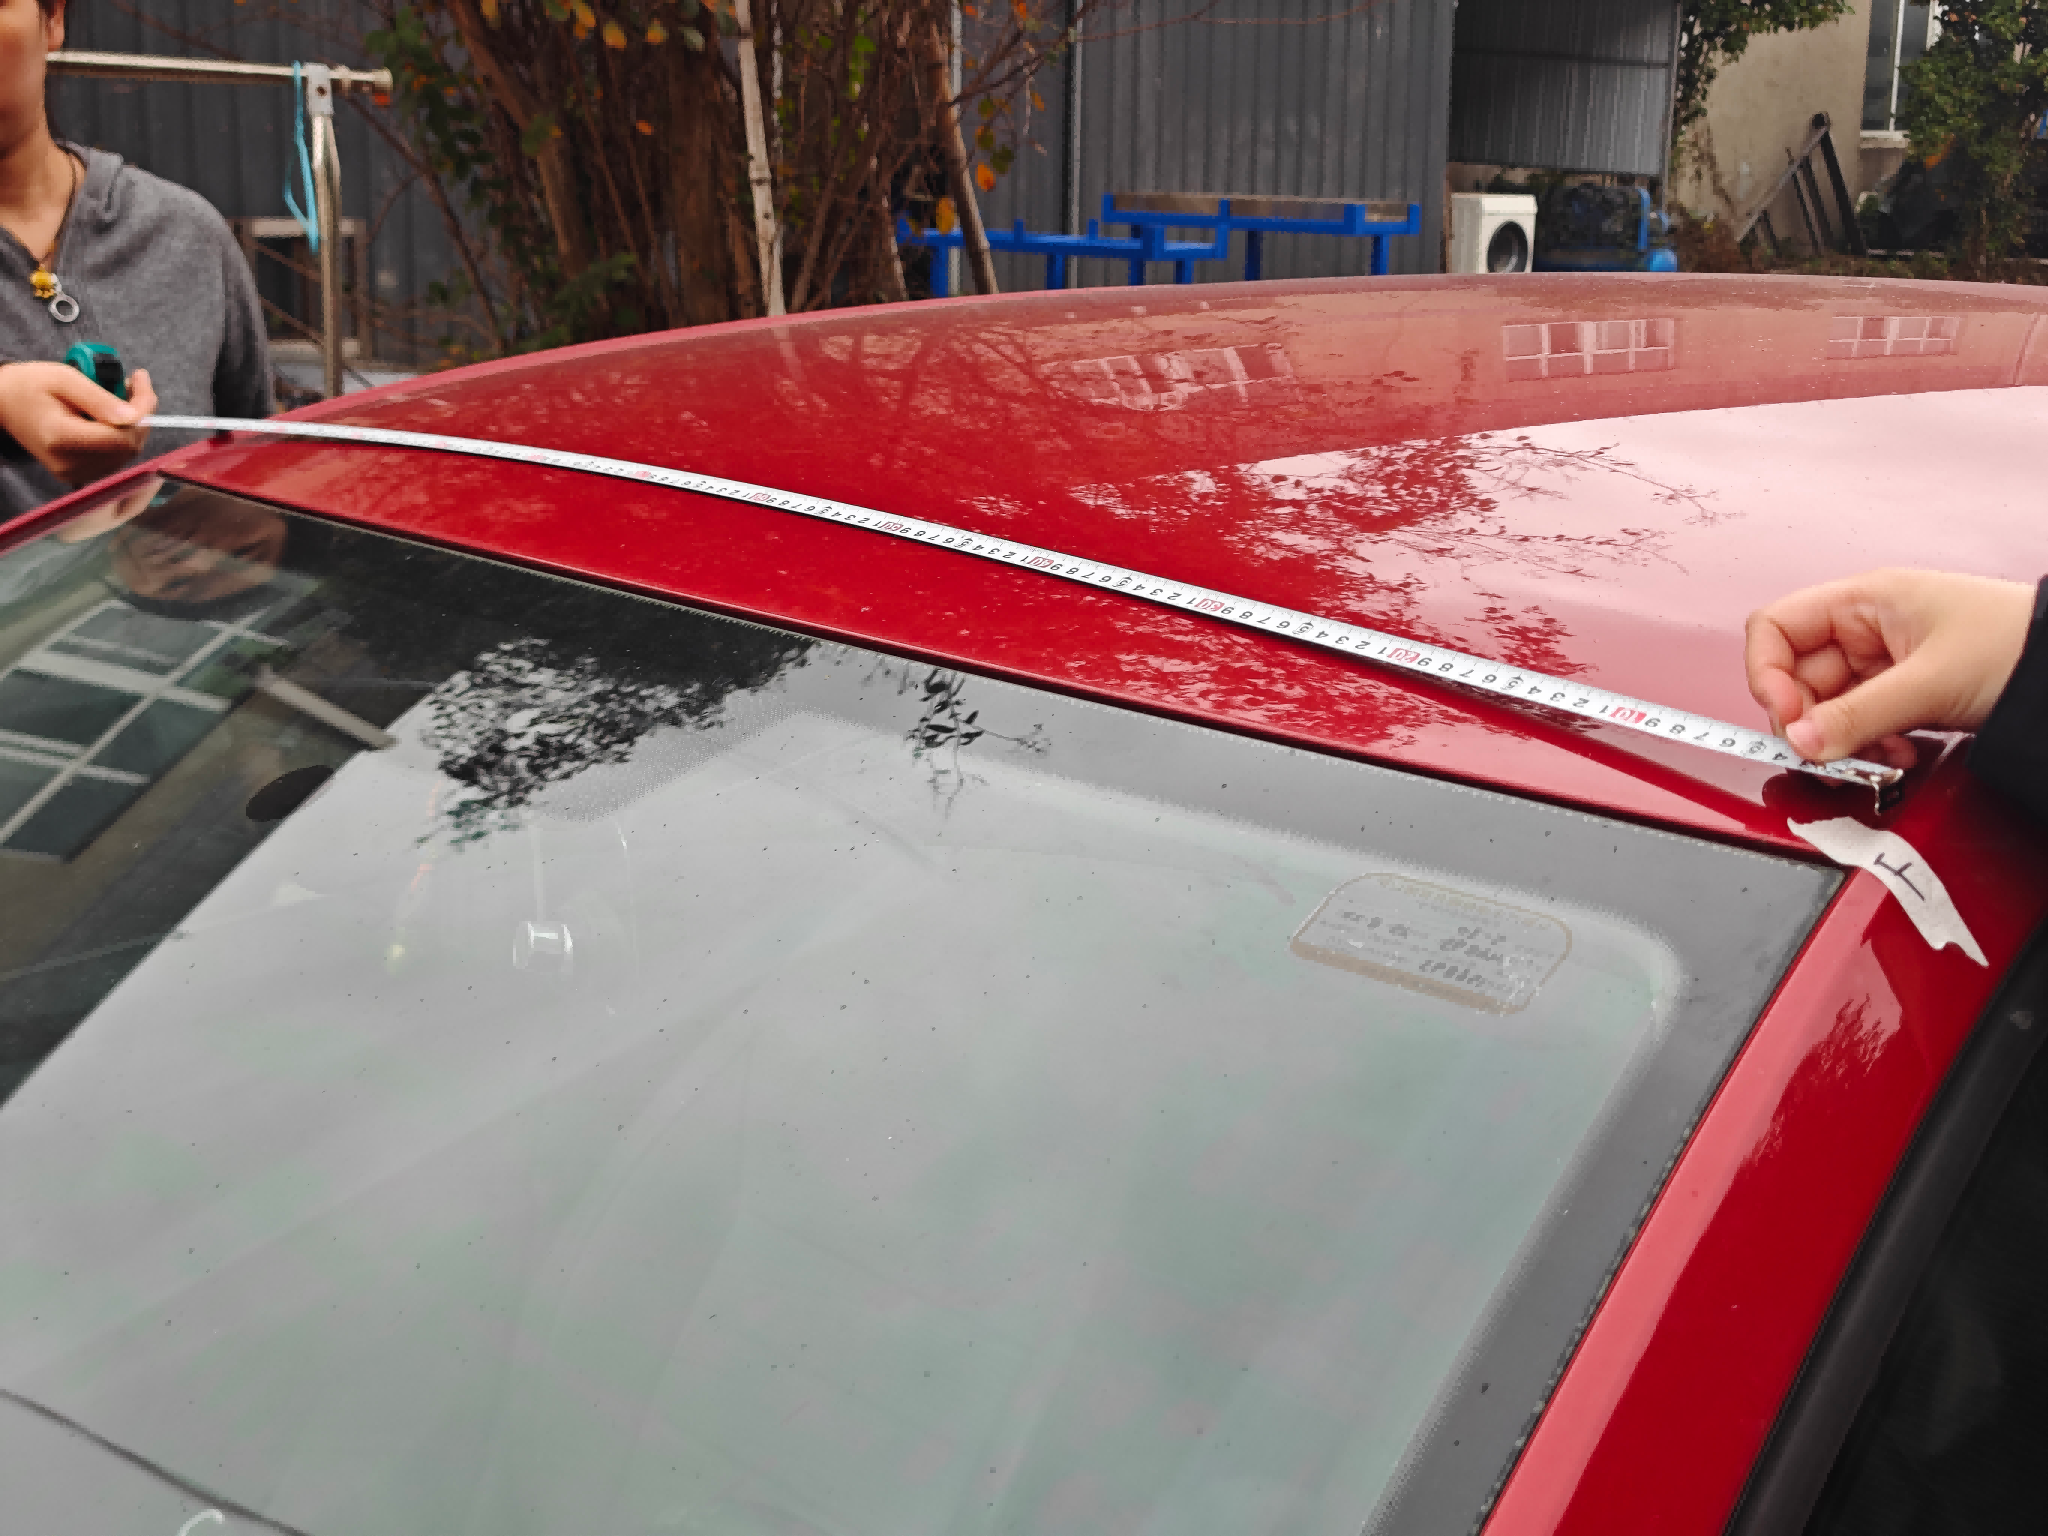
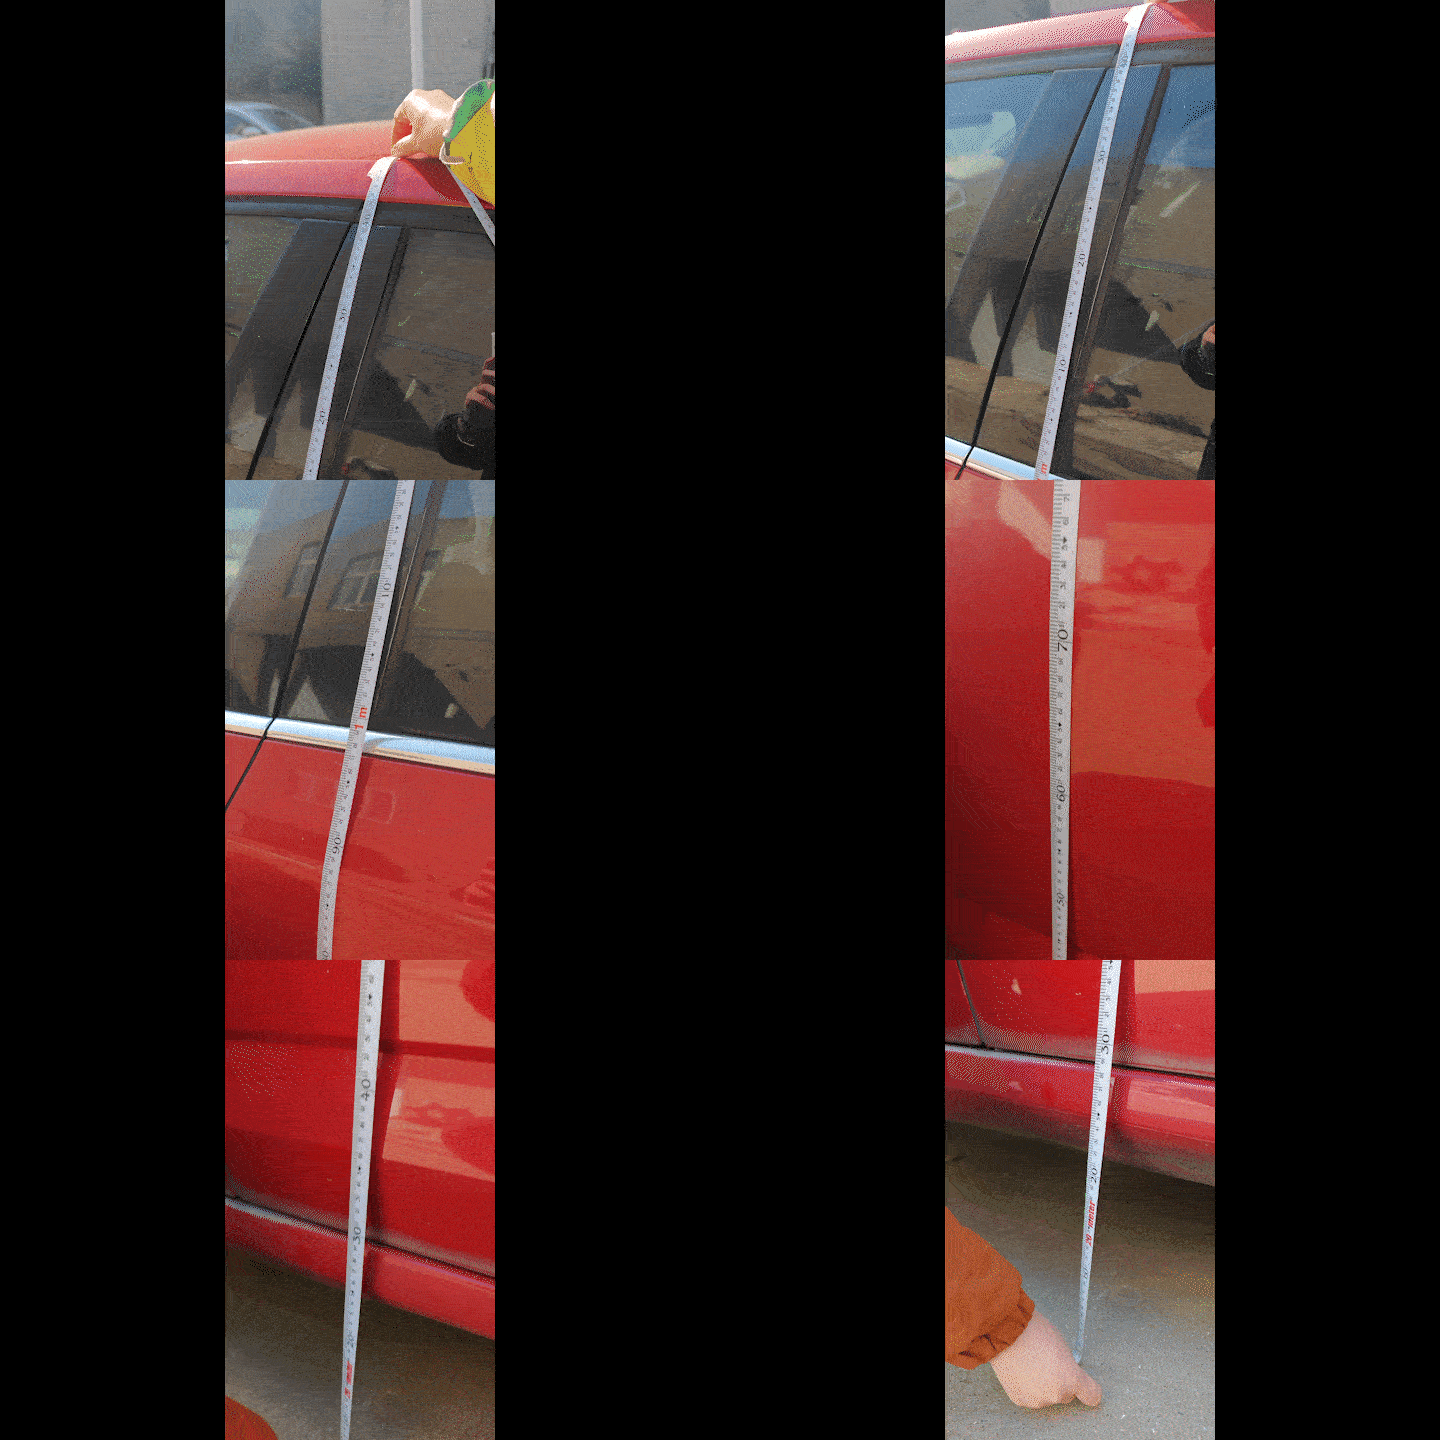
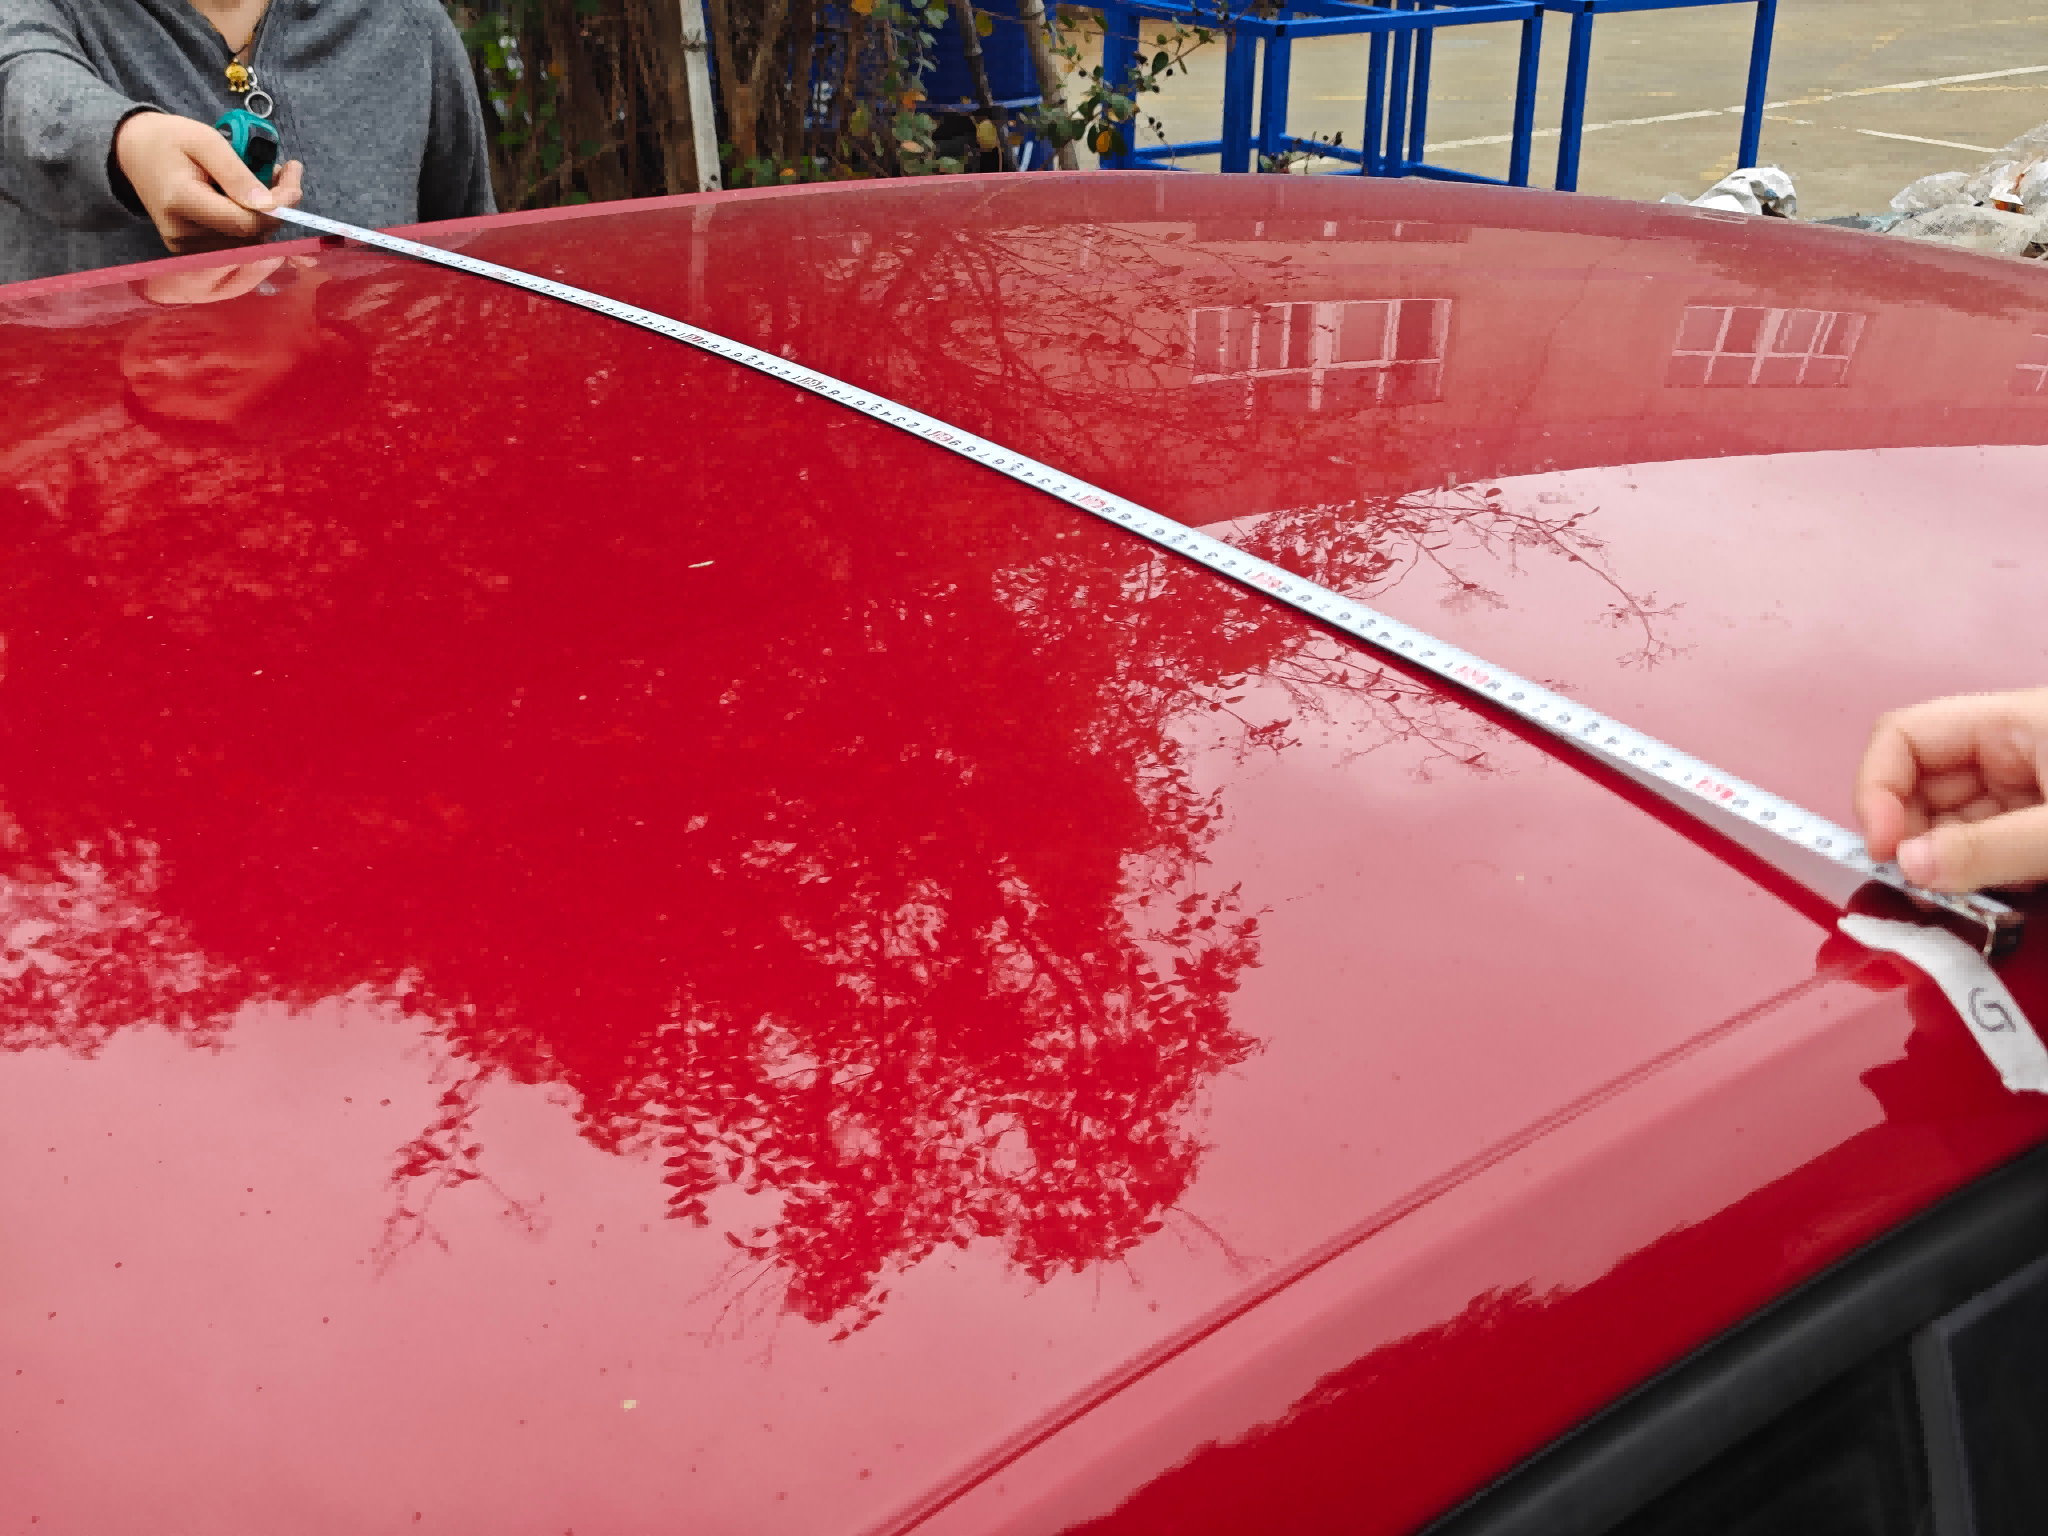
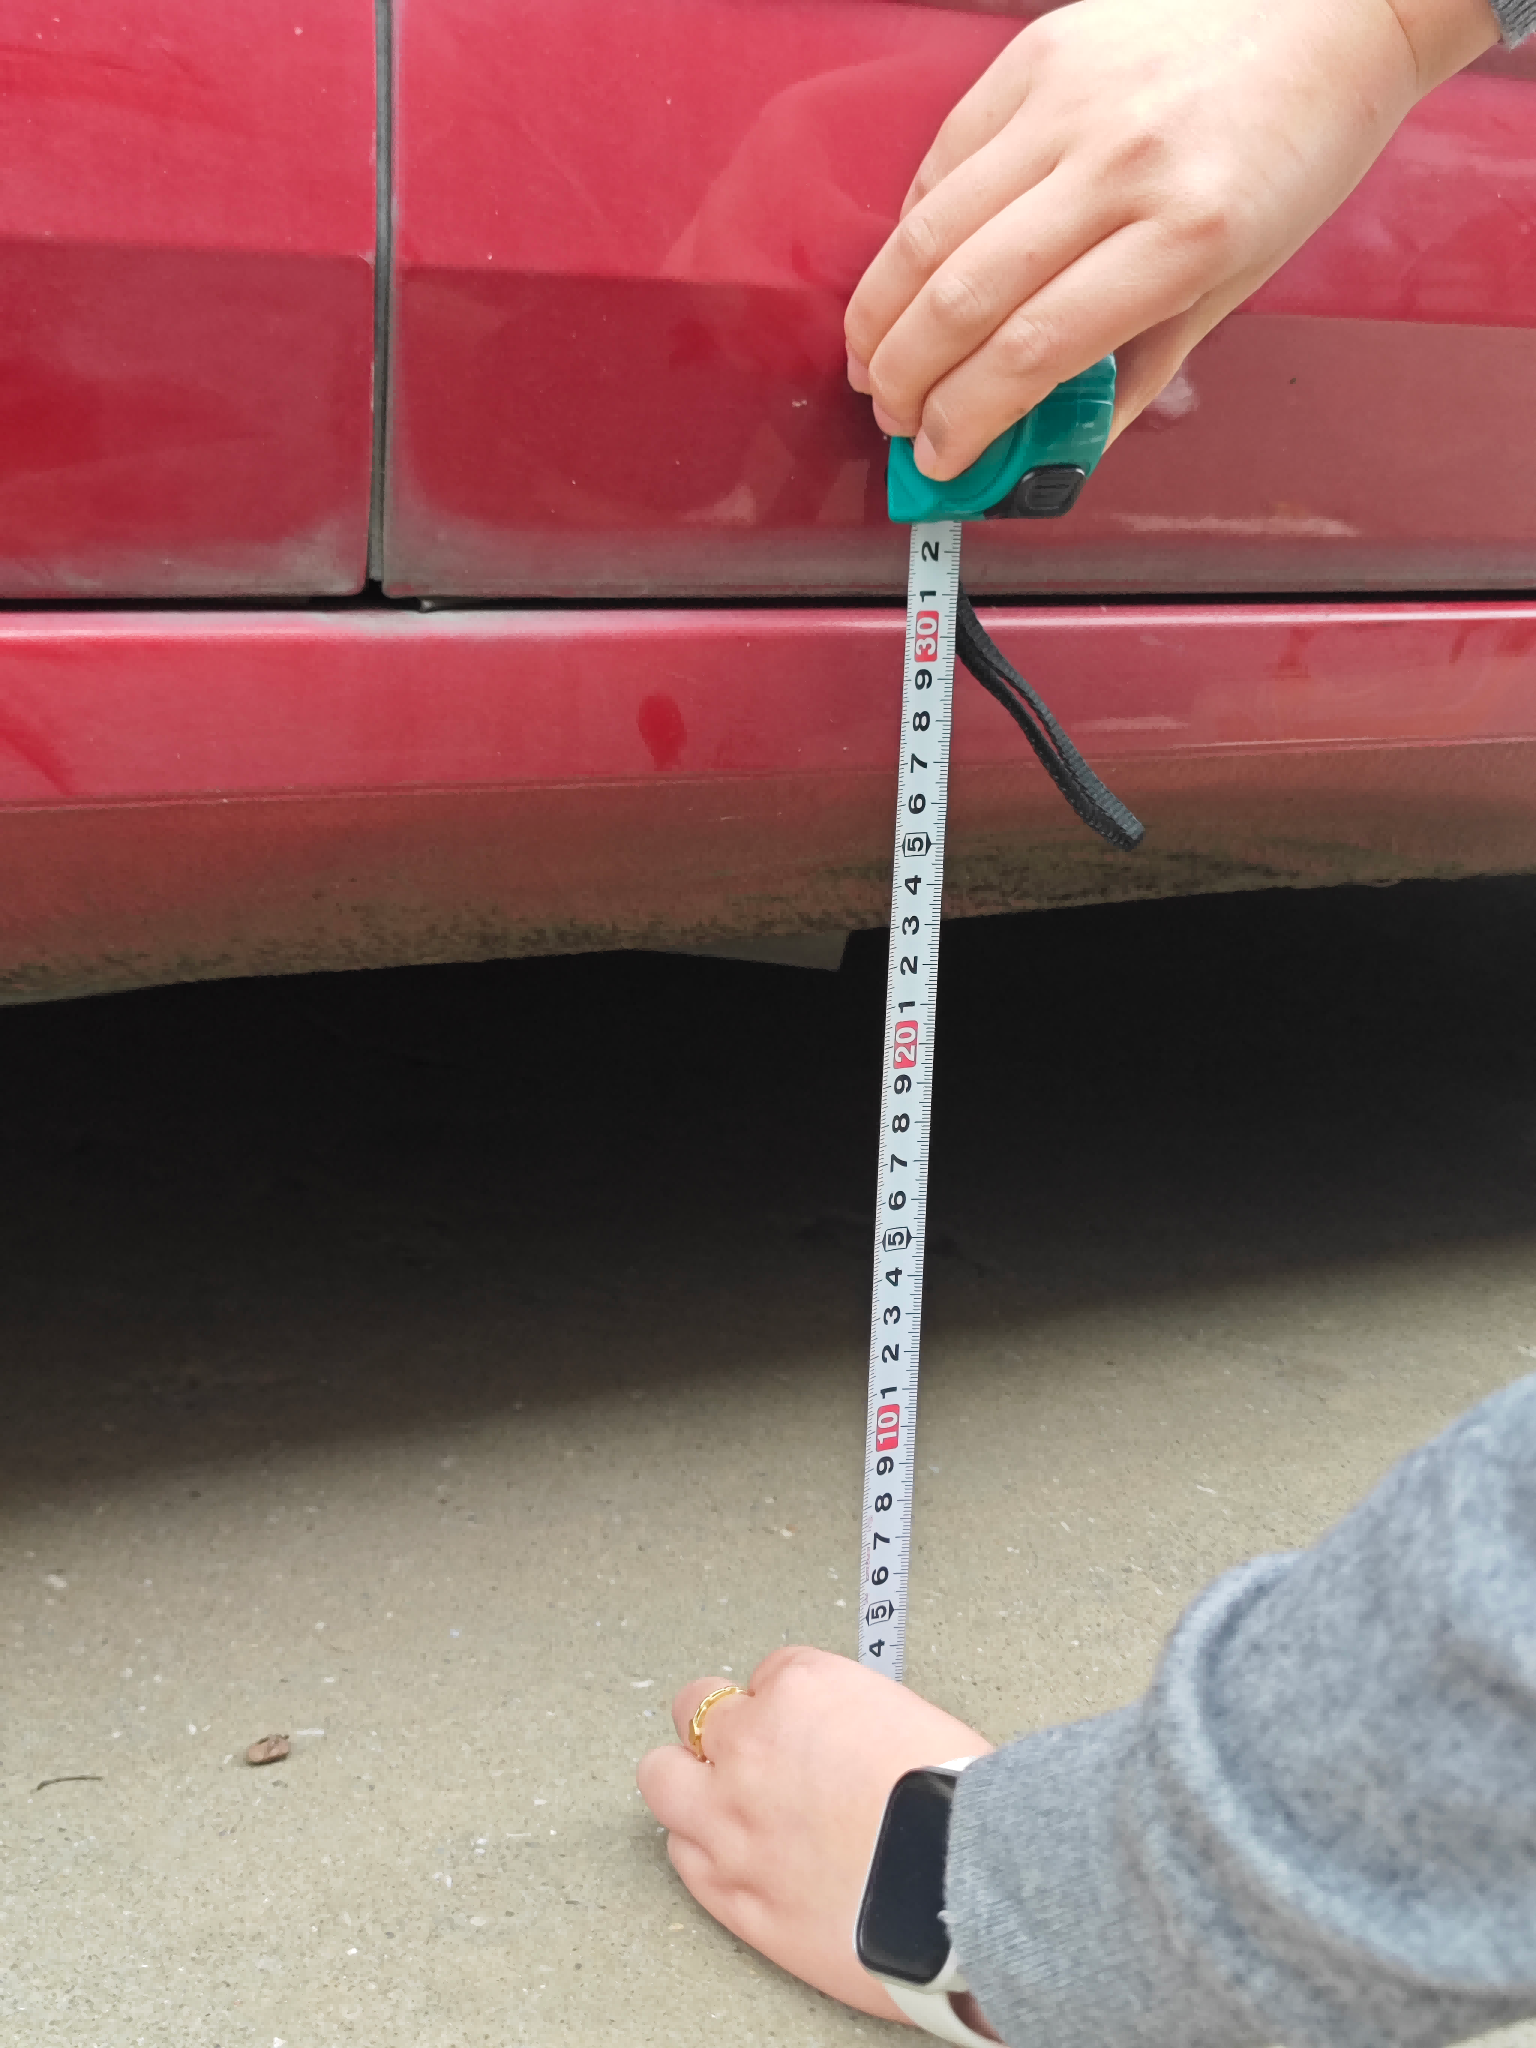
Point EMid B-pillar — midpoint of the door seam
How to mark: find the midpoint of the front / rear door dividing line, then apply painter’s tape at that position.
What to measure:
- Vertical height from point E to the ground.
- Straight-line width from point E to the matching point on the opposite side.
- Vertical height from point E down to the underside of the vehicle body (vehicle height), using a soft tape.
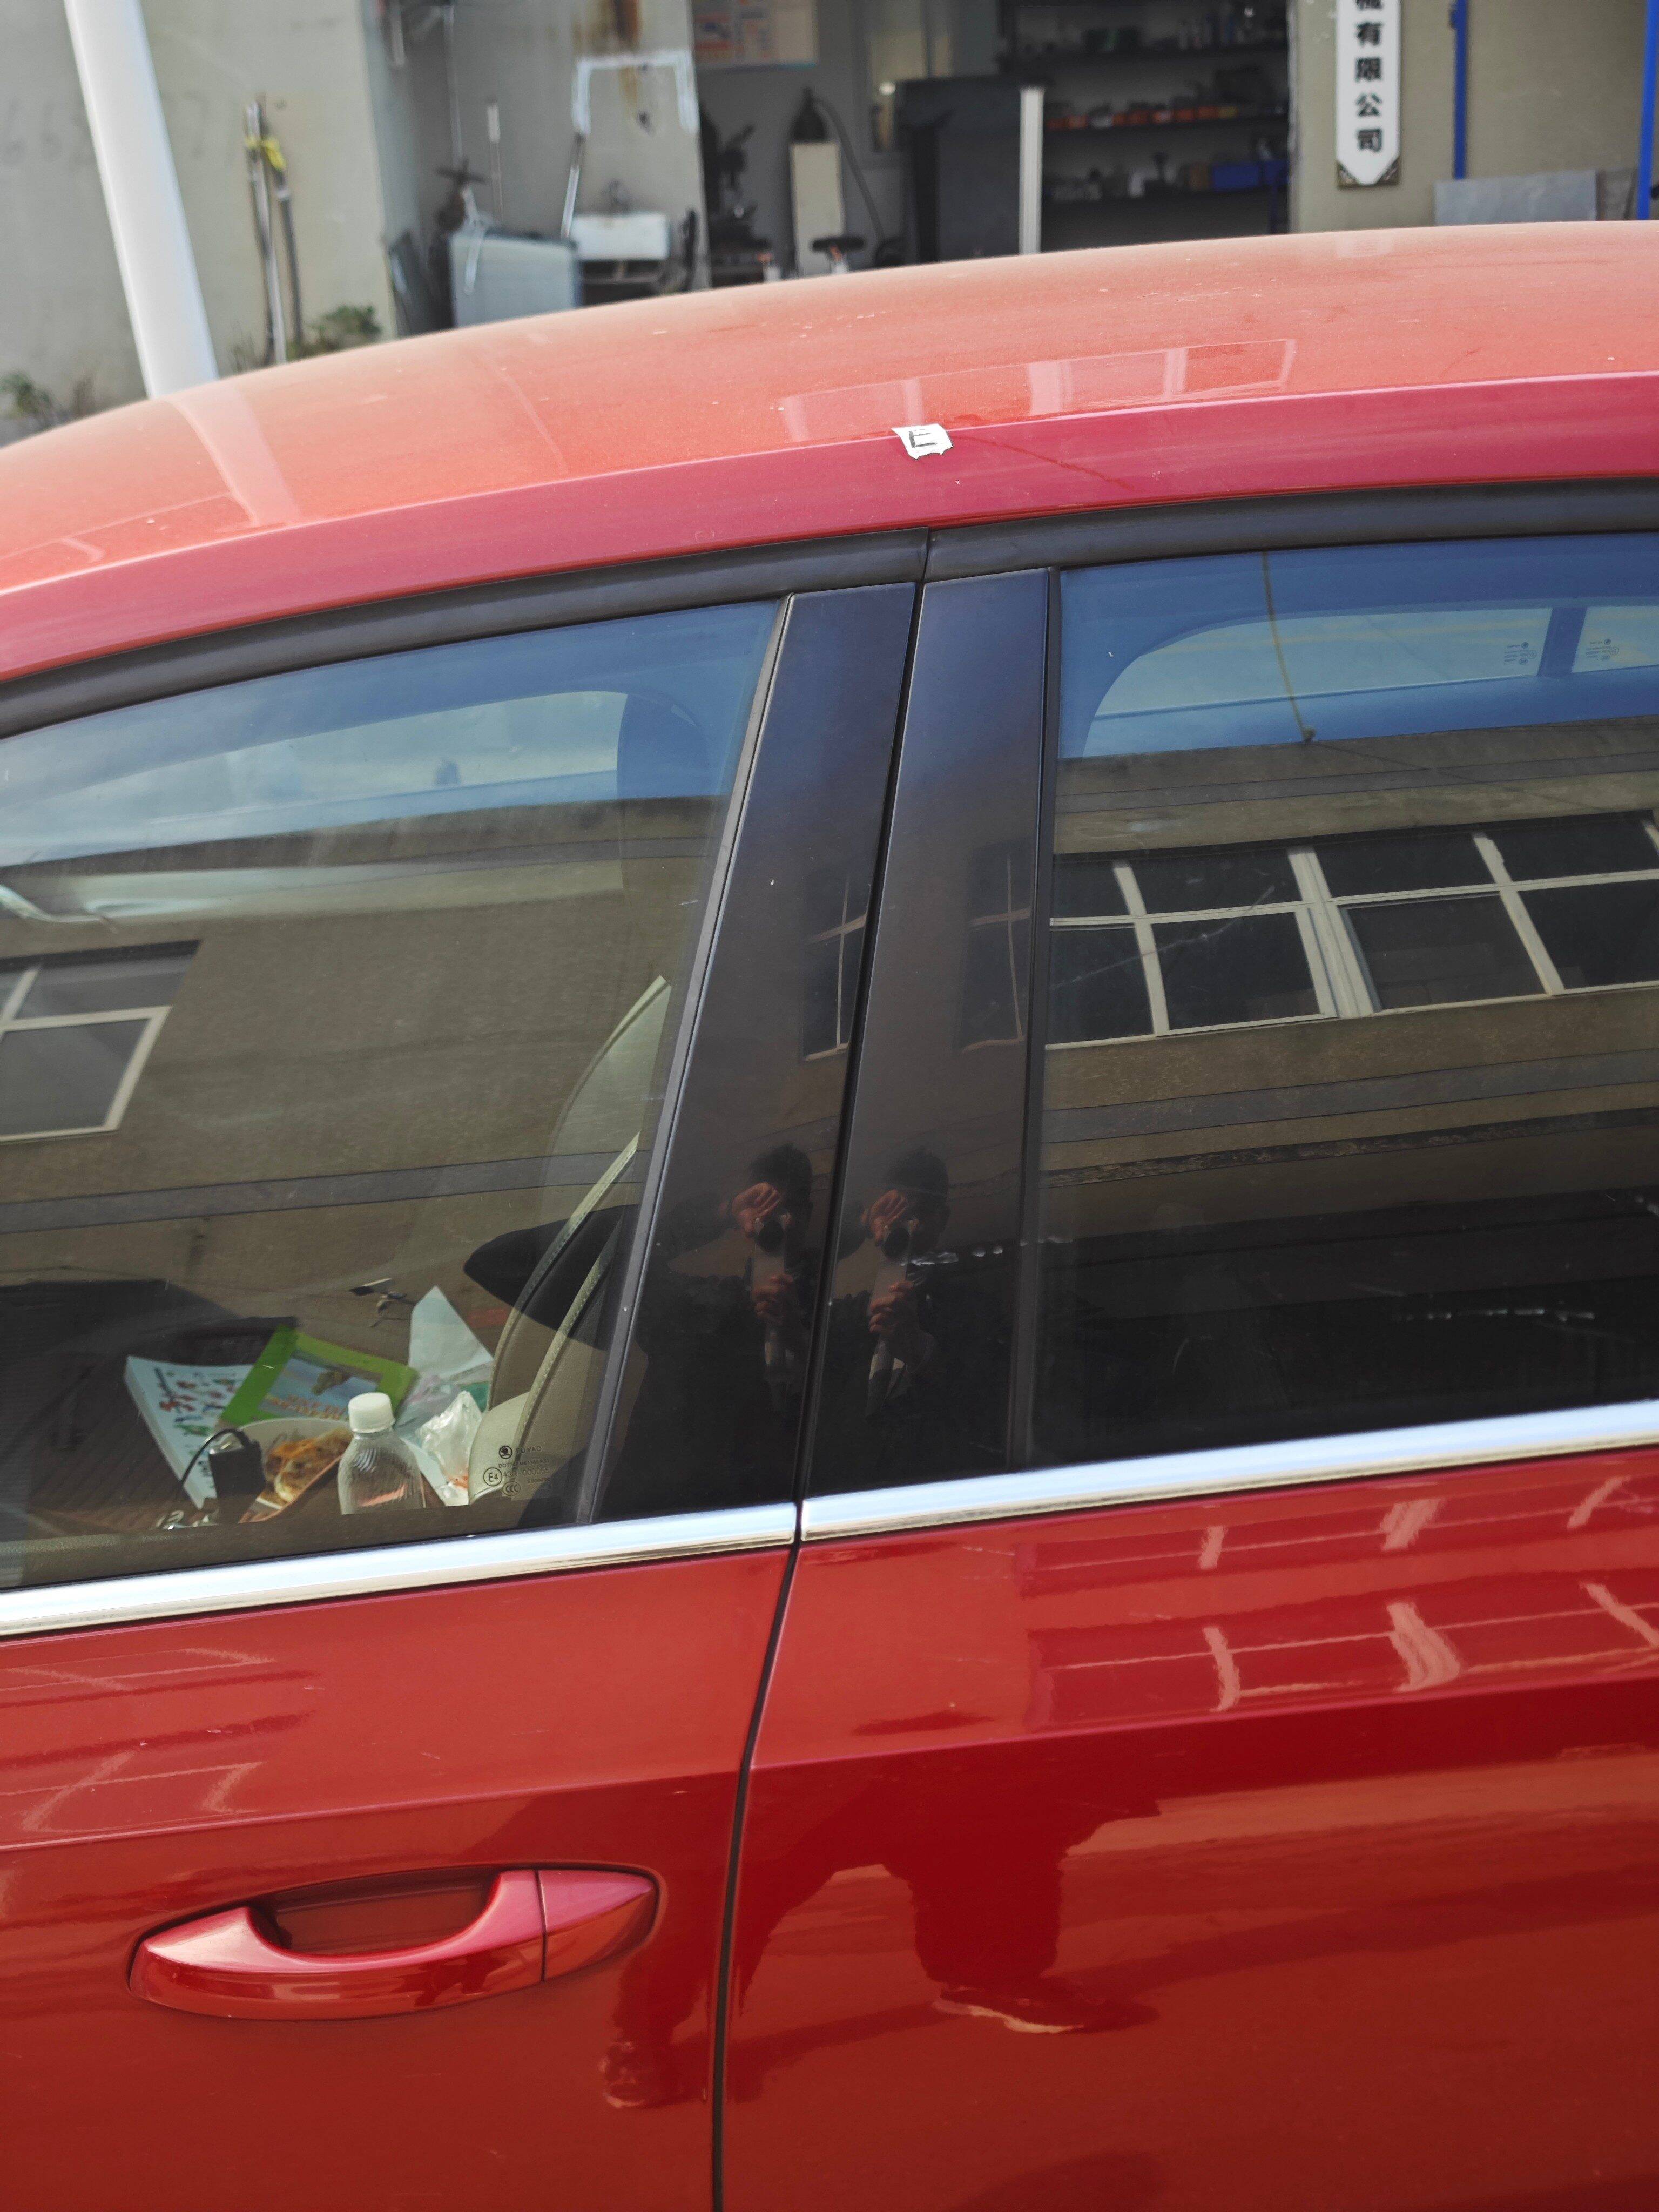
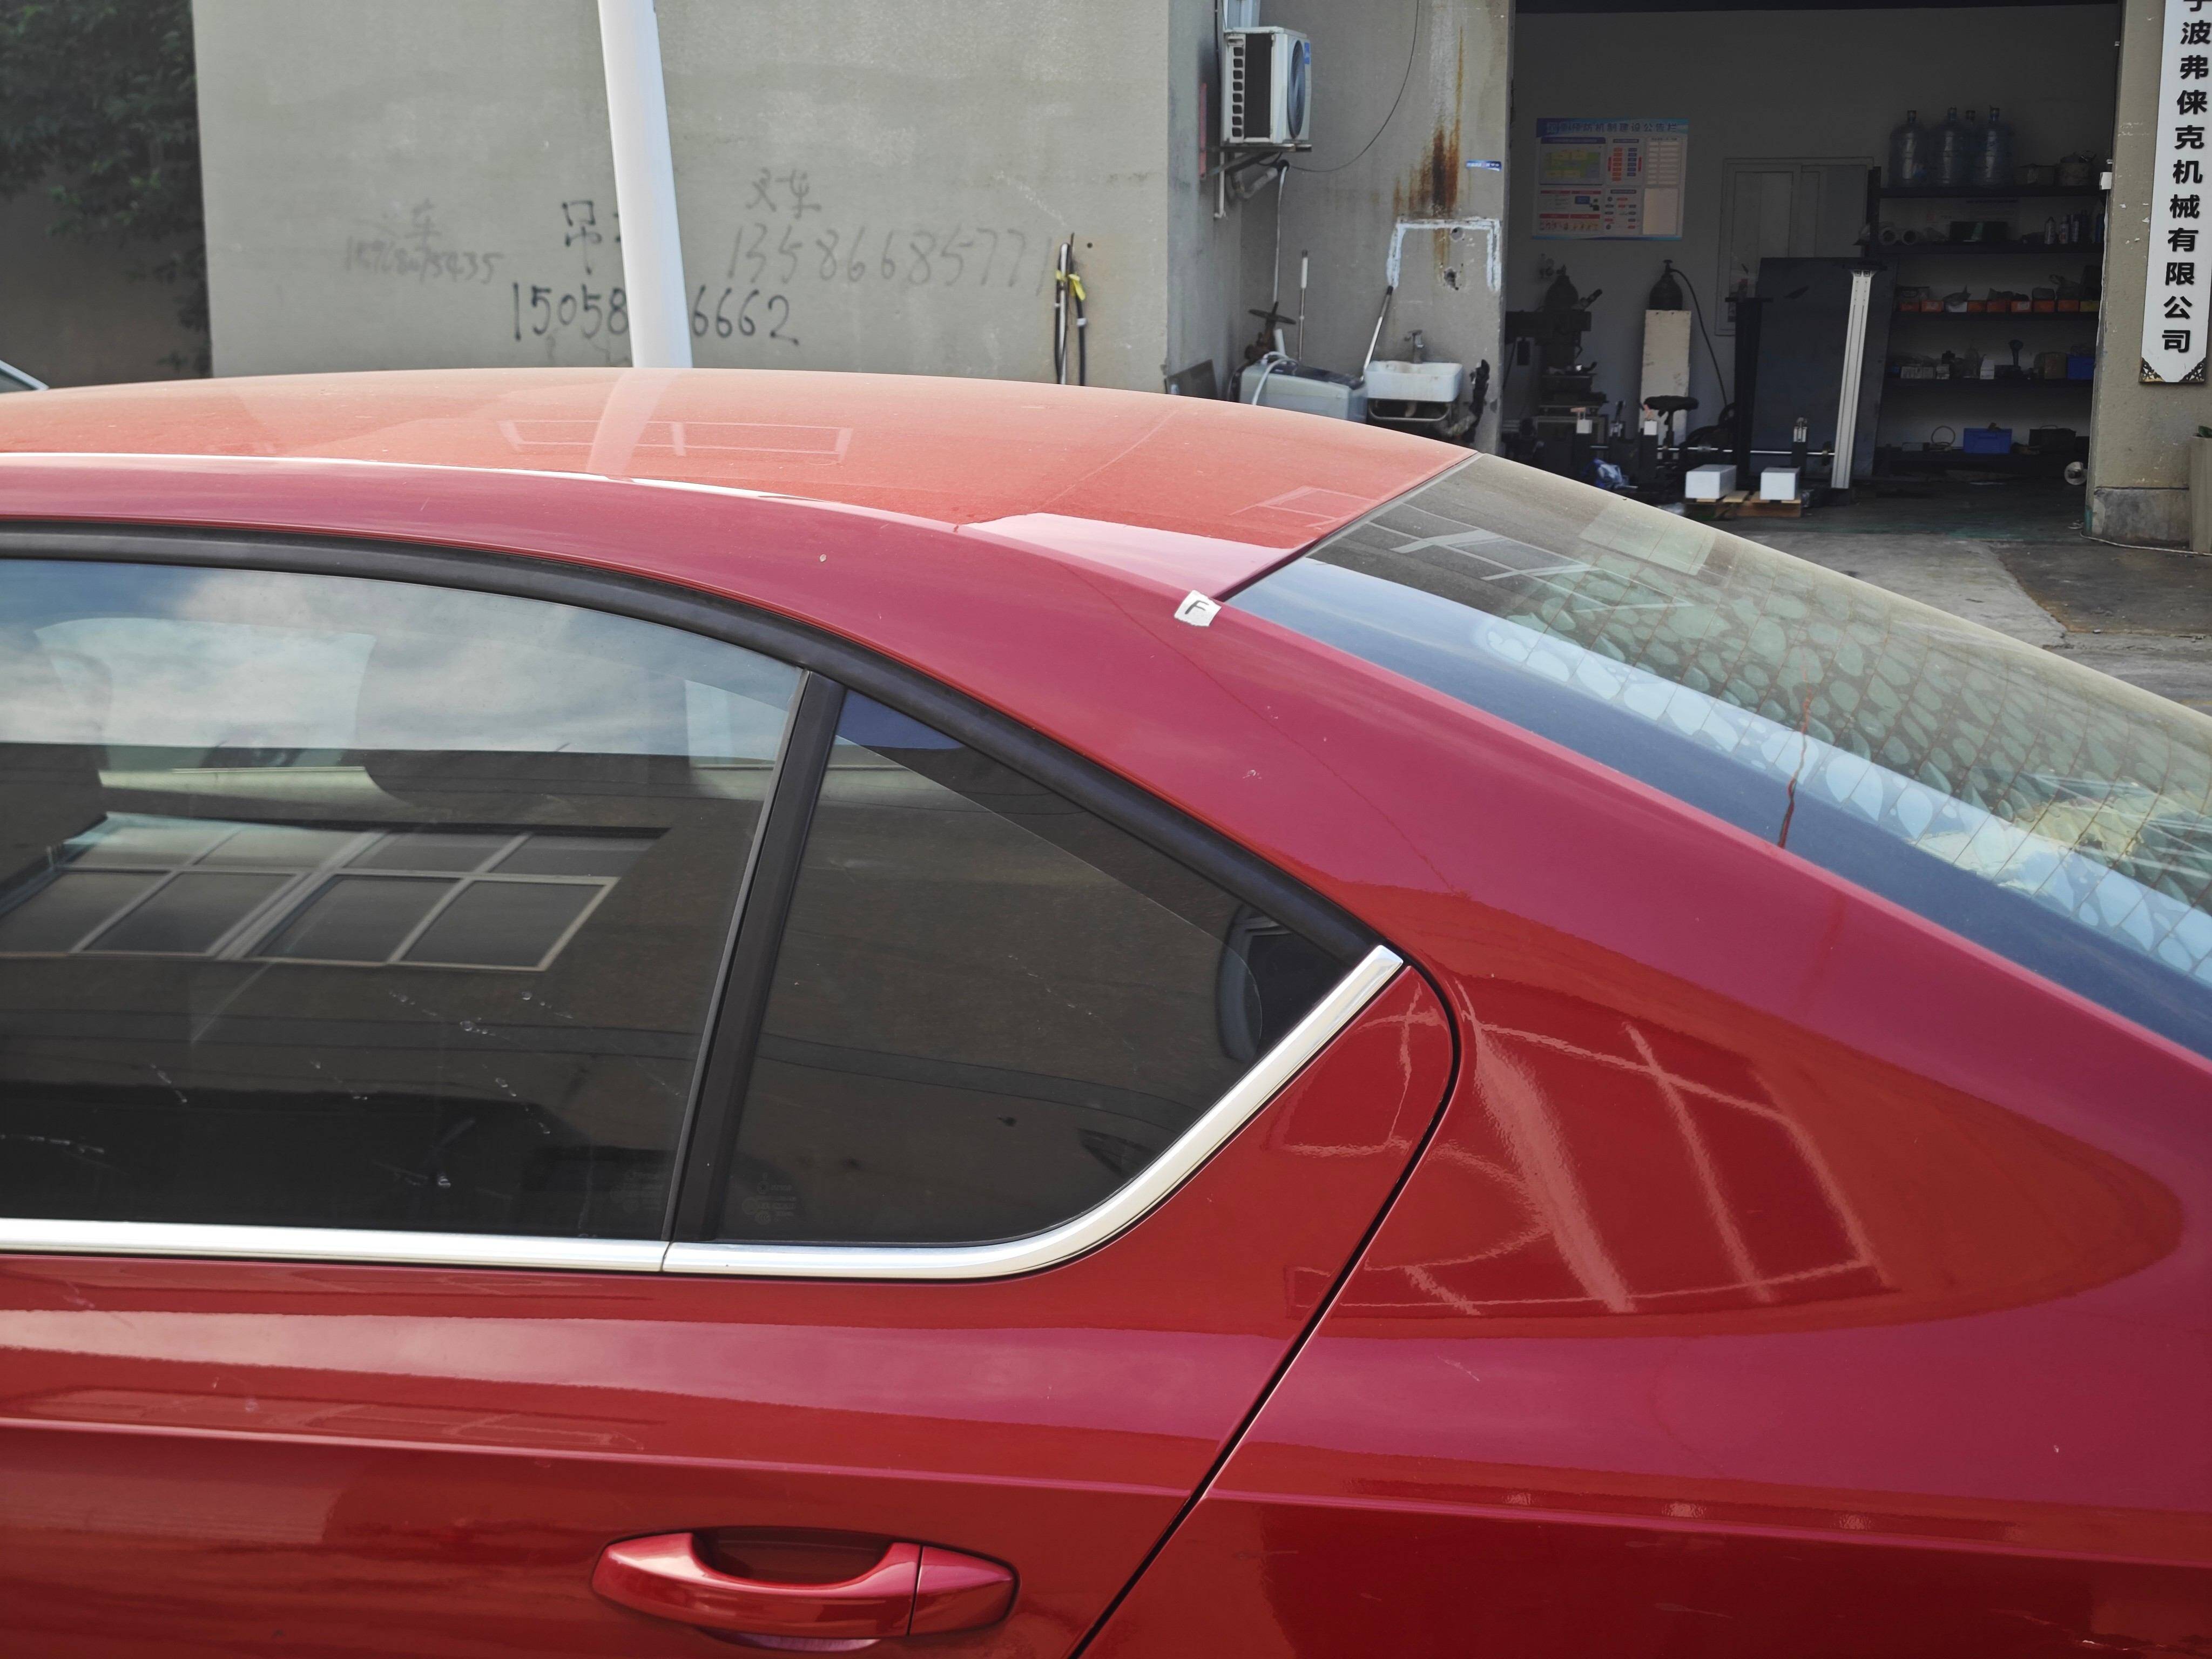
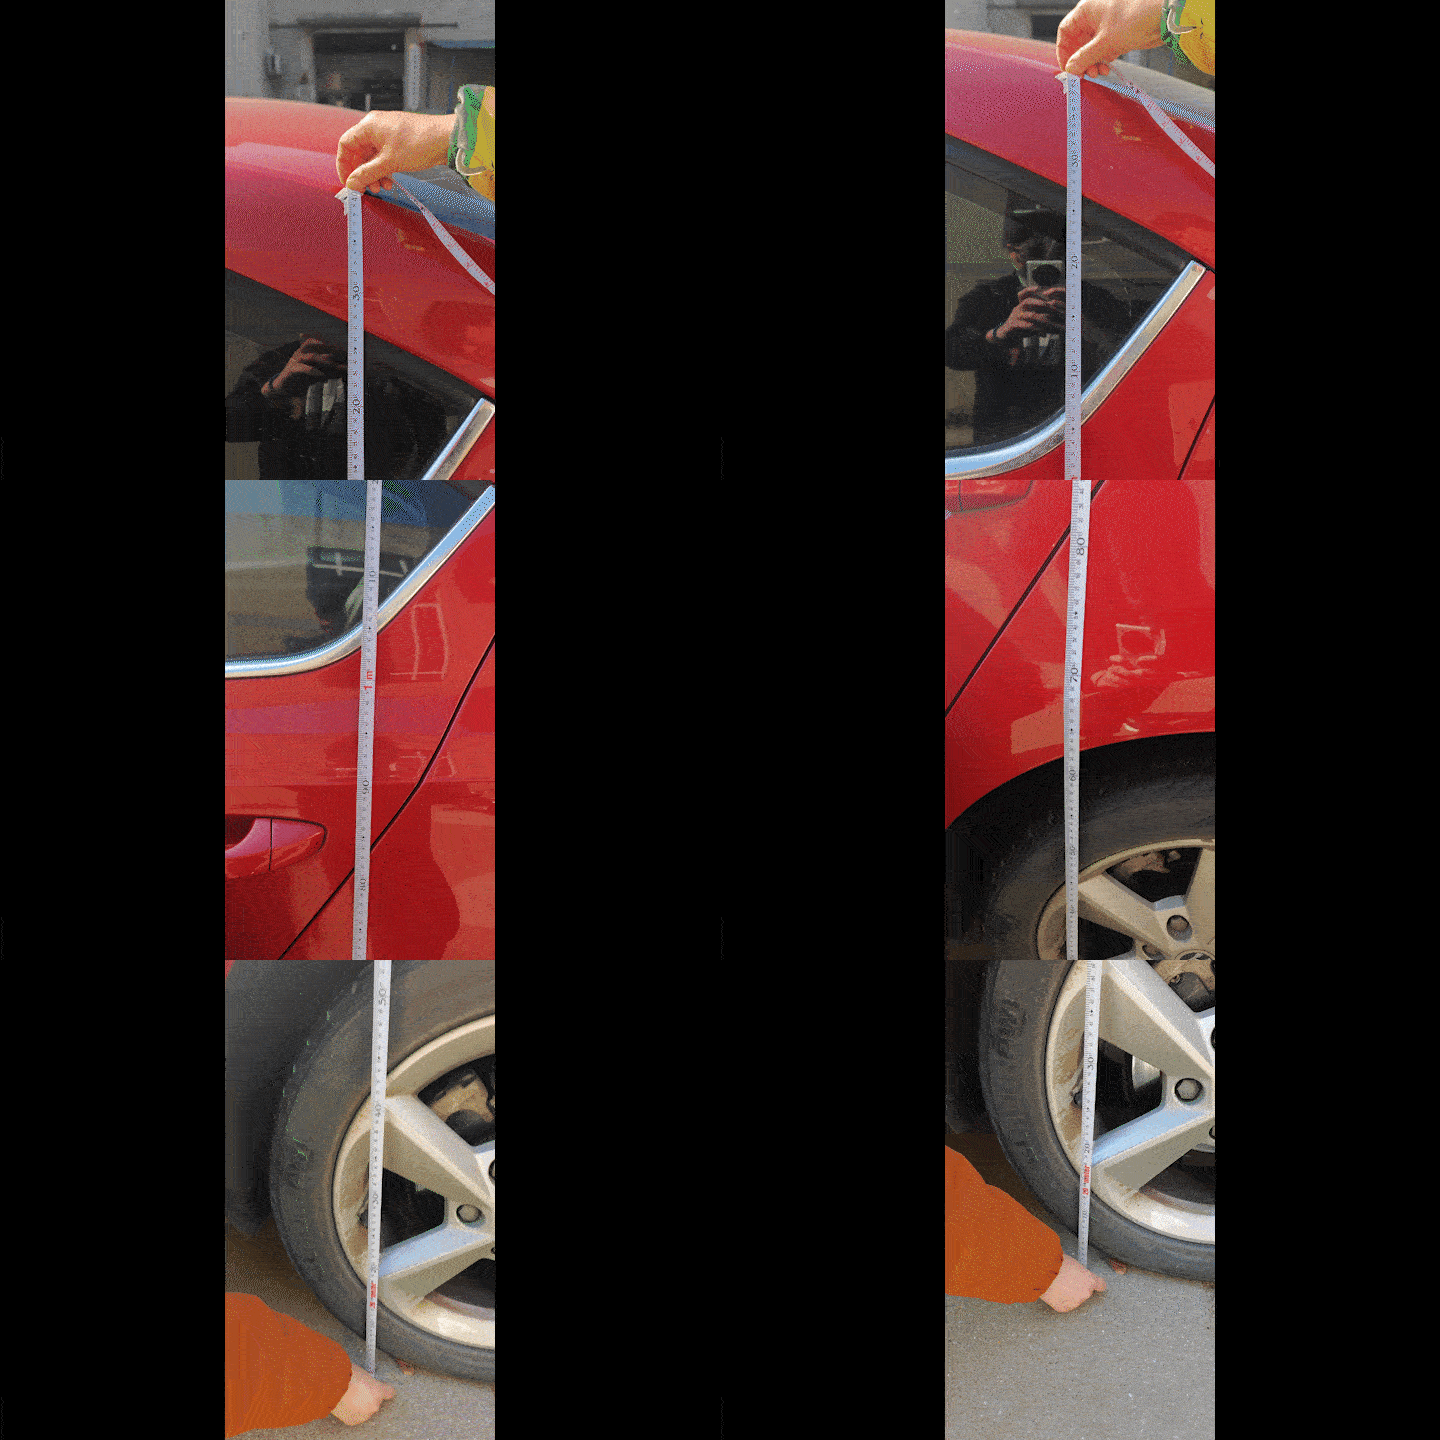
Point FJunction of the C-pillar and the rear door
How to mark: locate the top of the rear side window and mark that position with painter’s tape, keeping the position accurate.
What to measure:
- Vertical height from point F to the ground.
- Straight-line width from point F to the matching point on the opposite side.
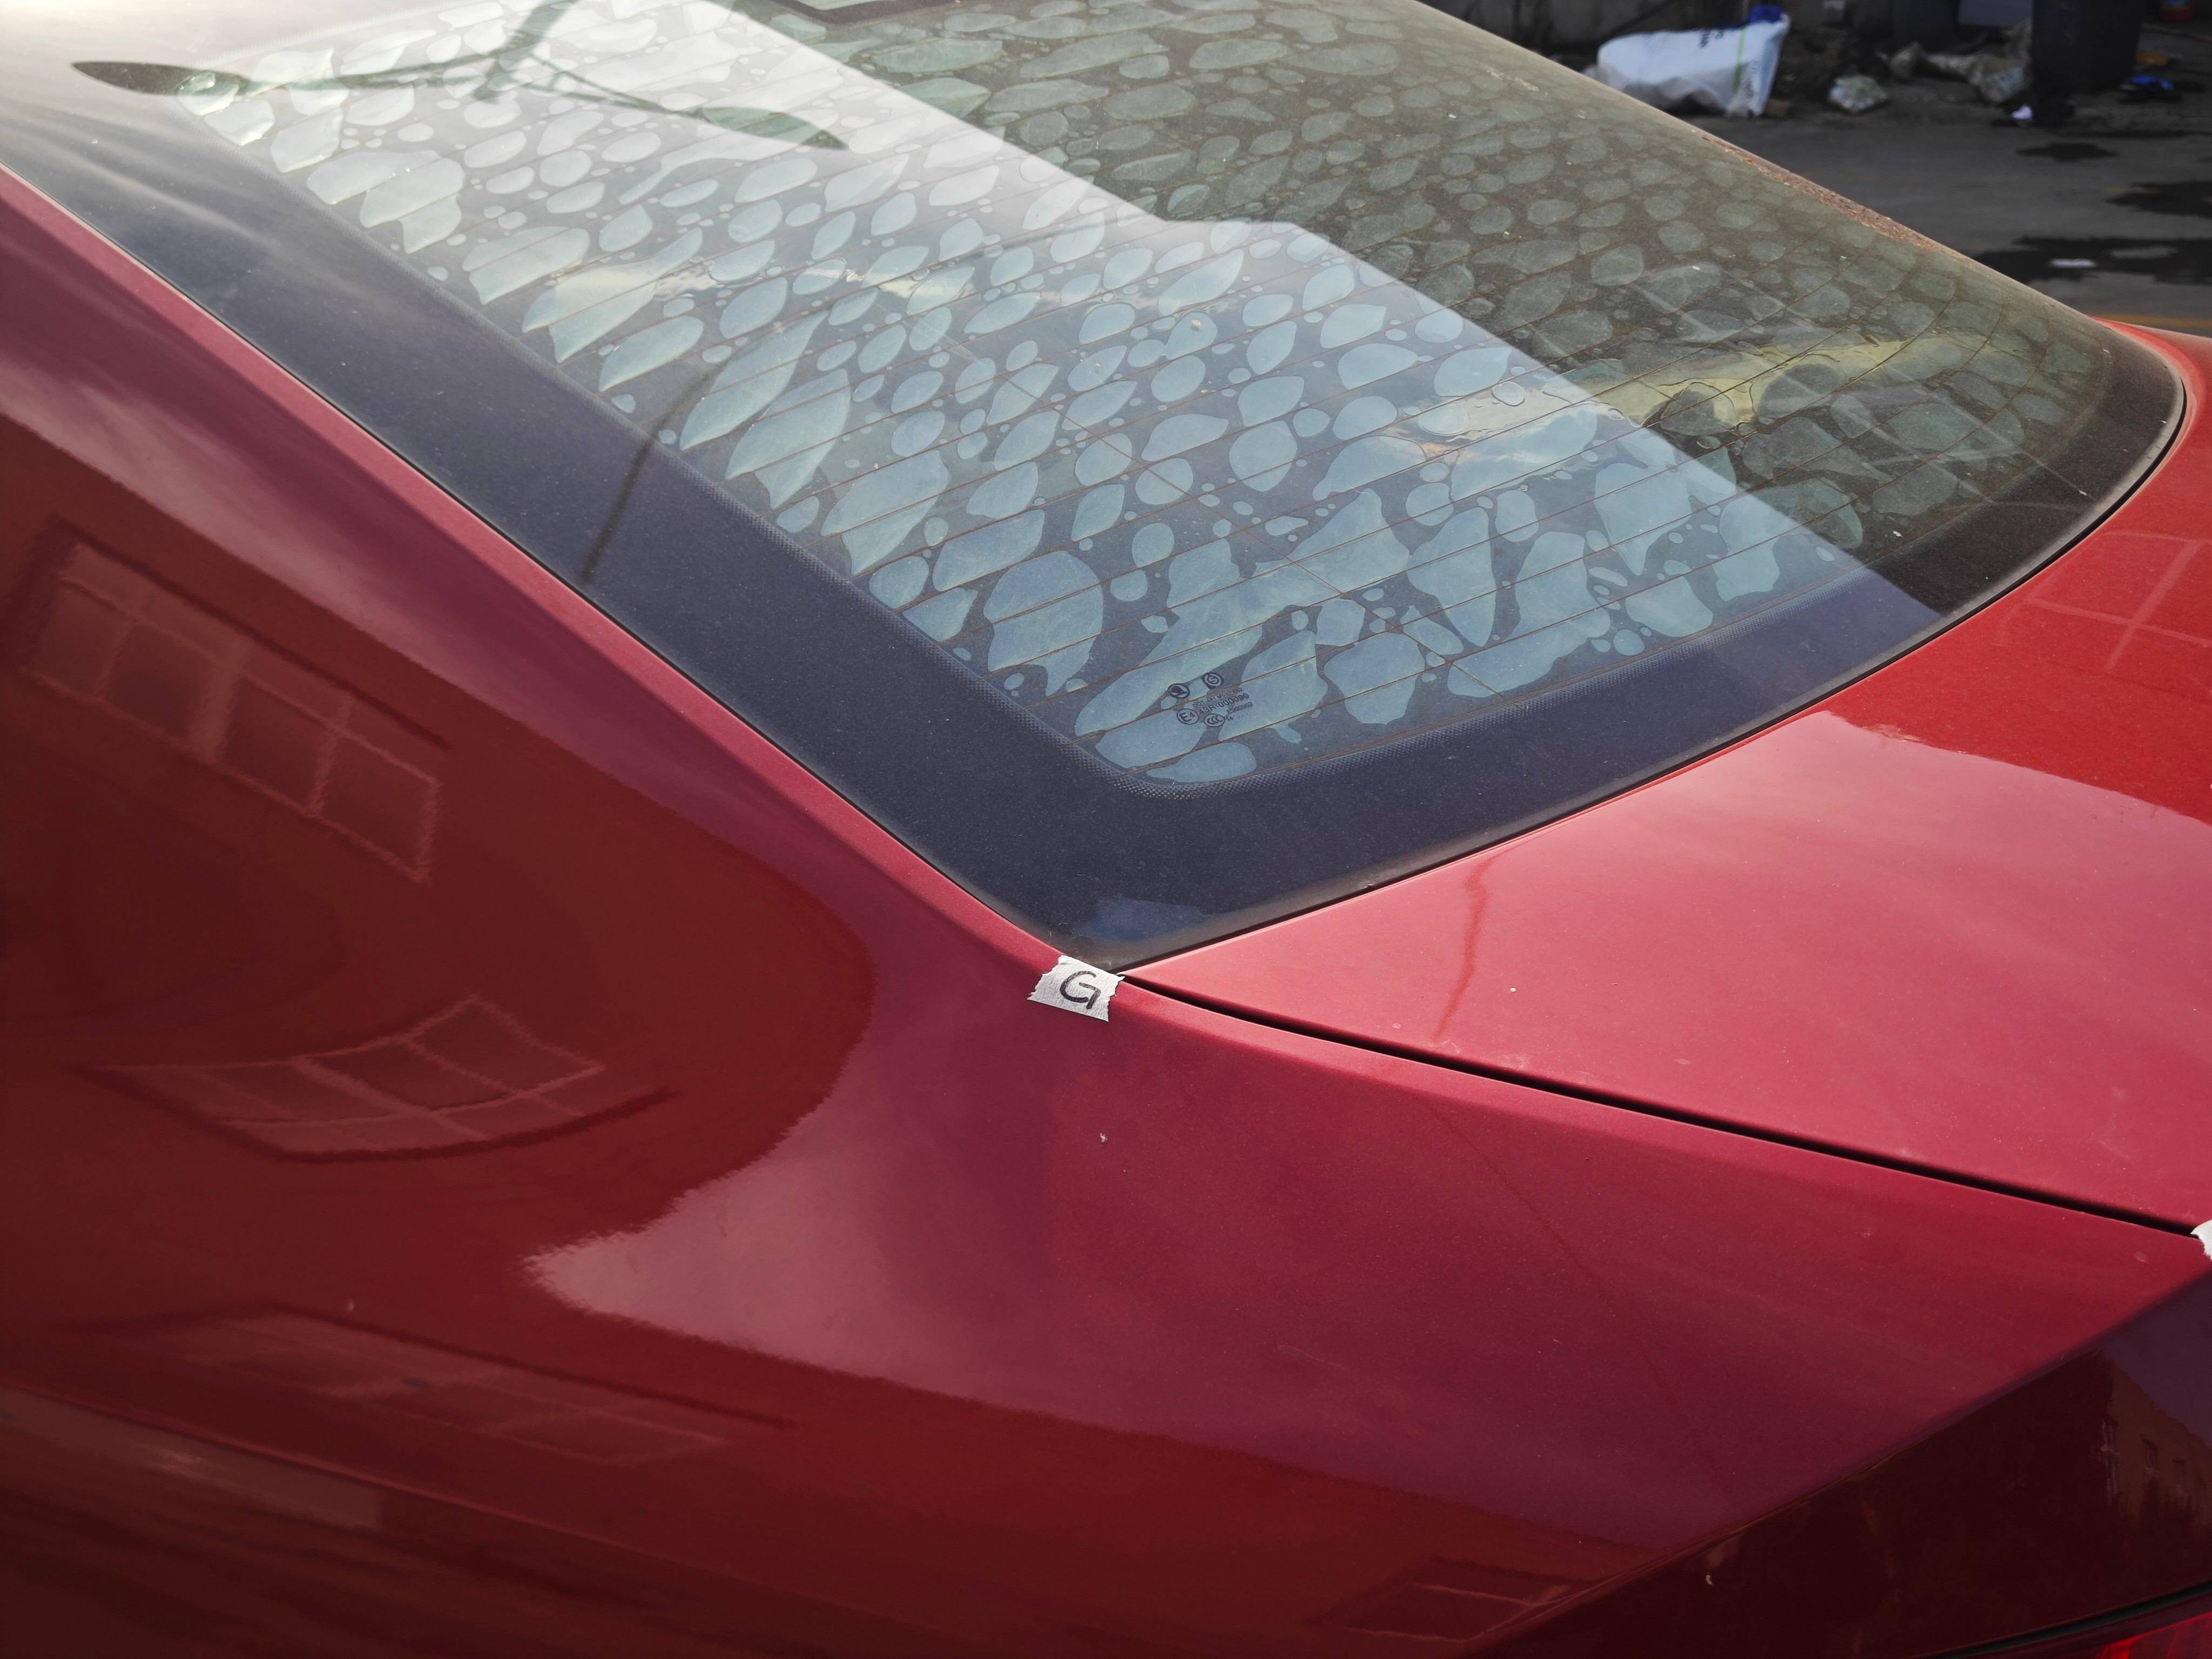
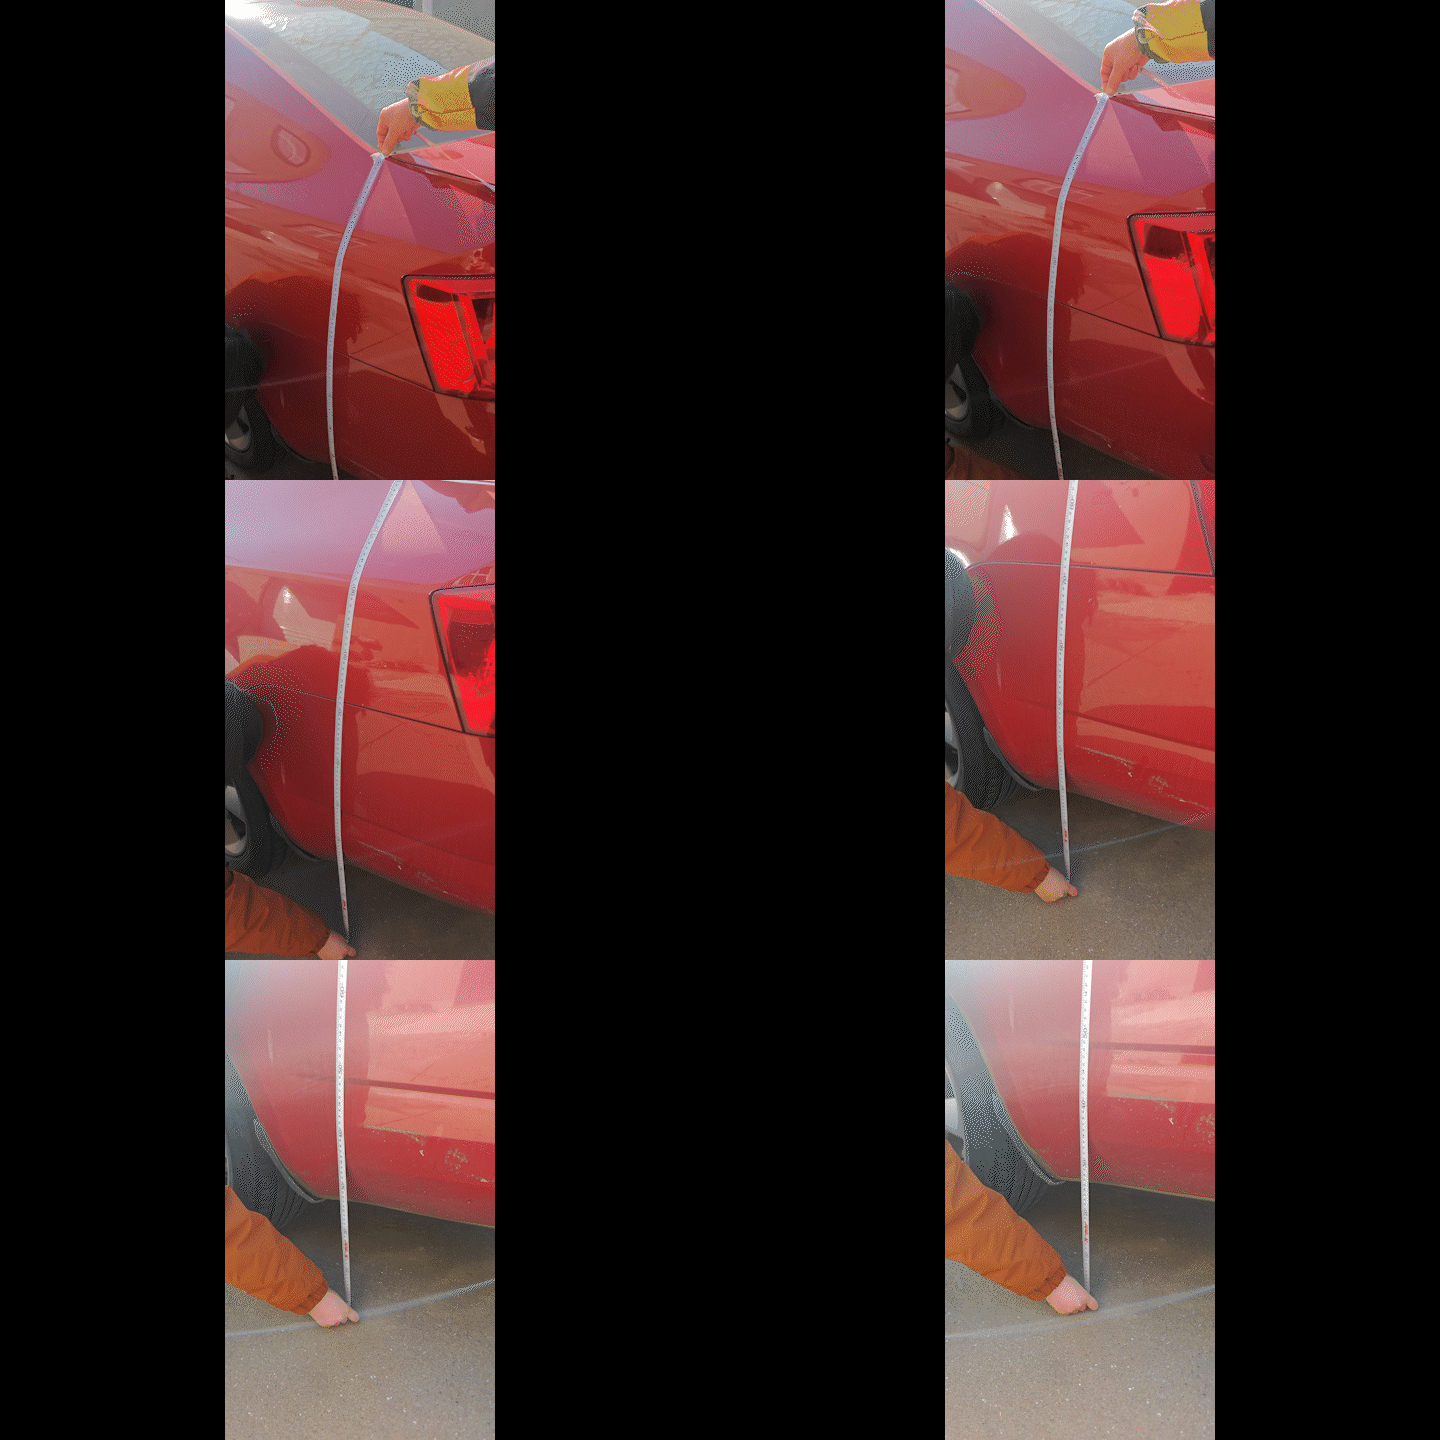
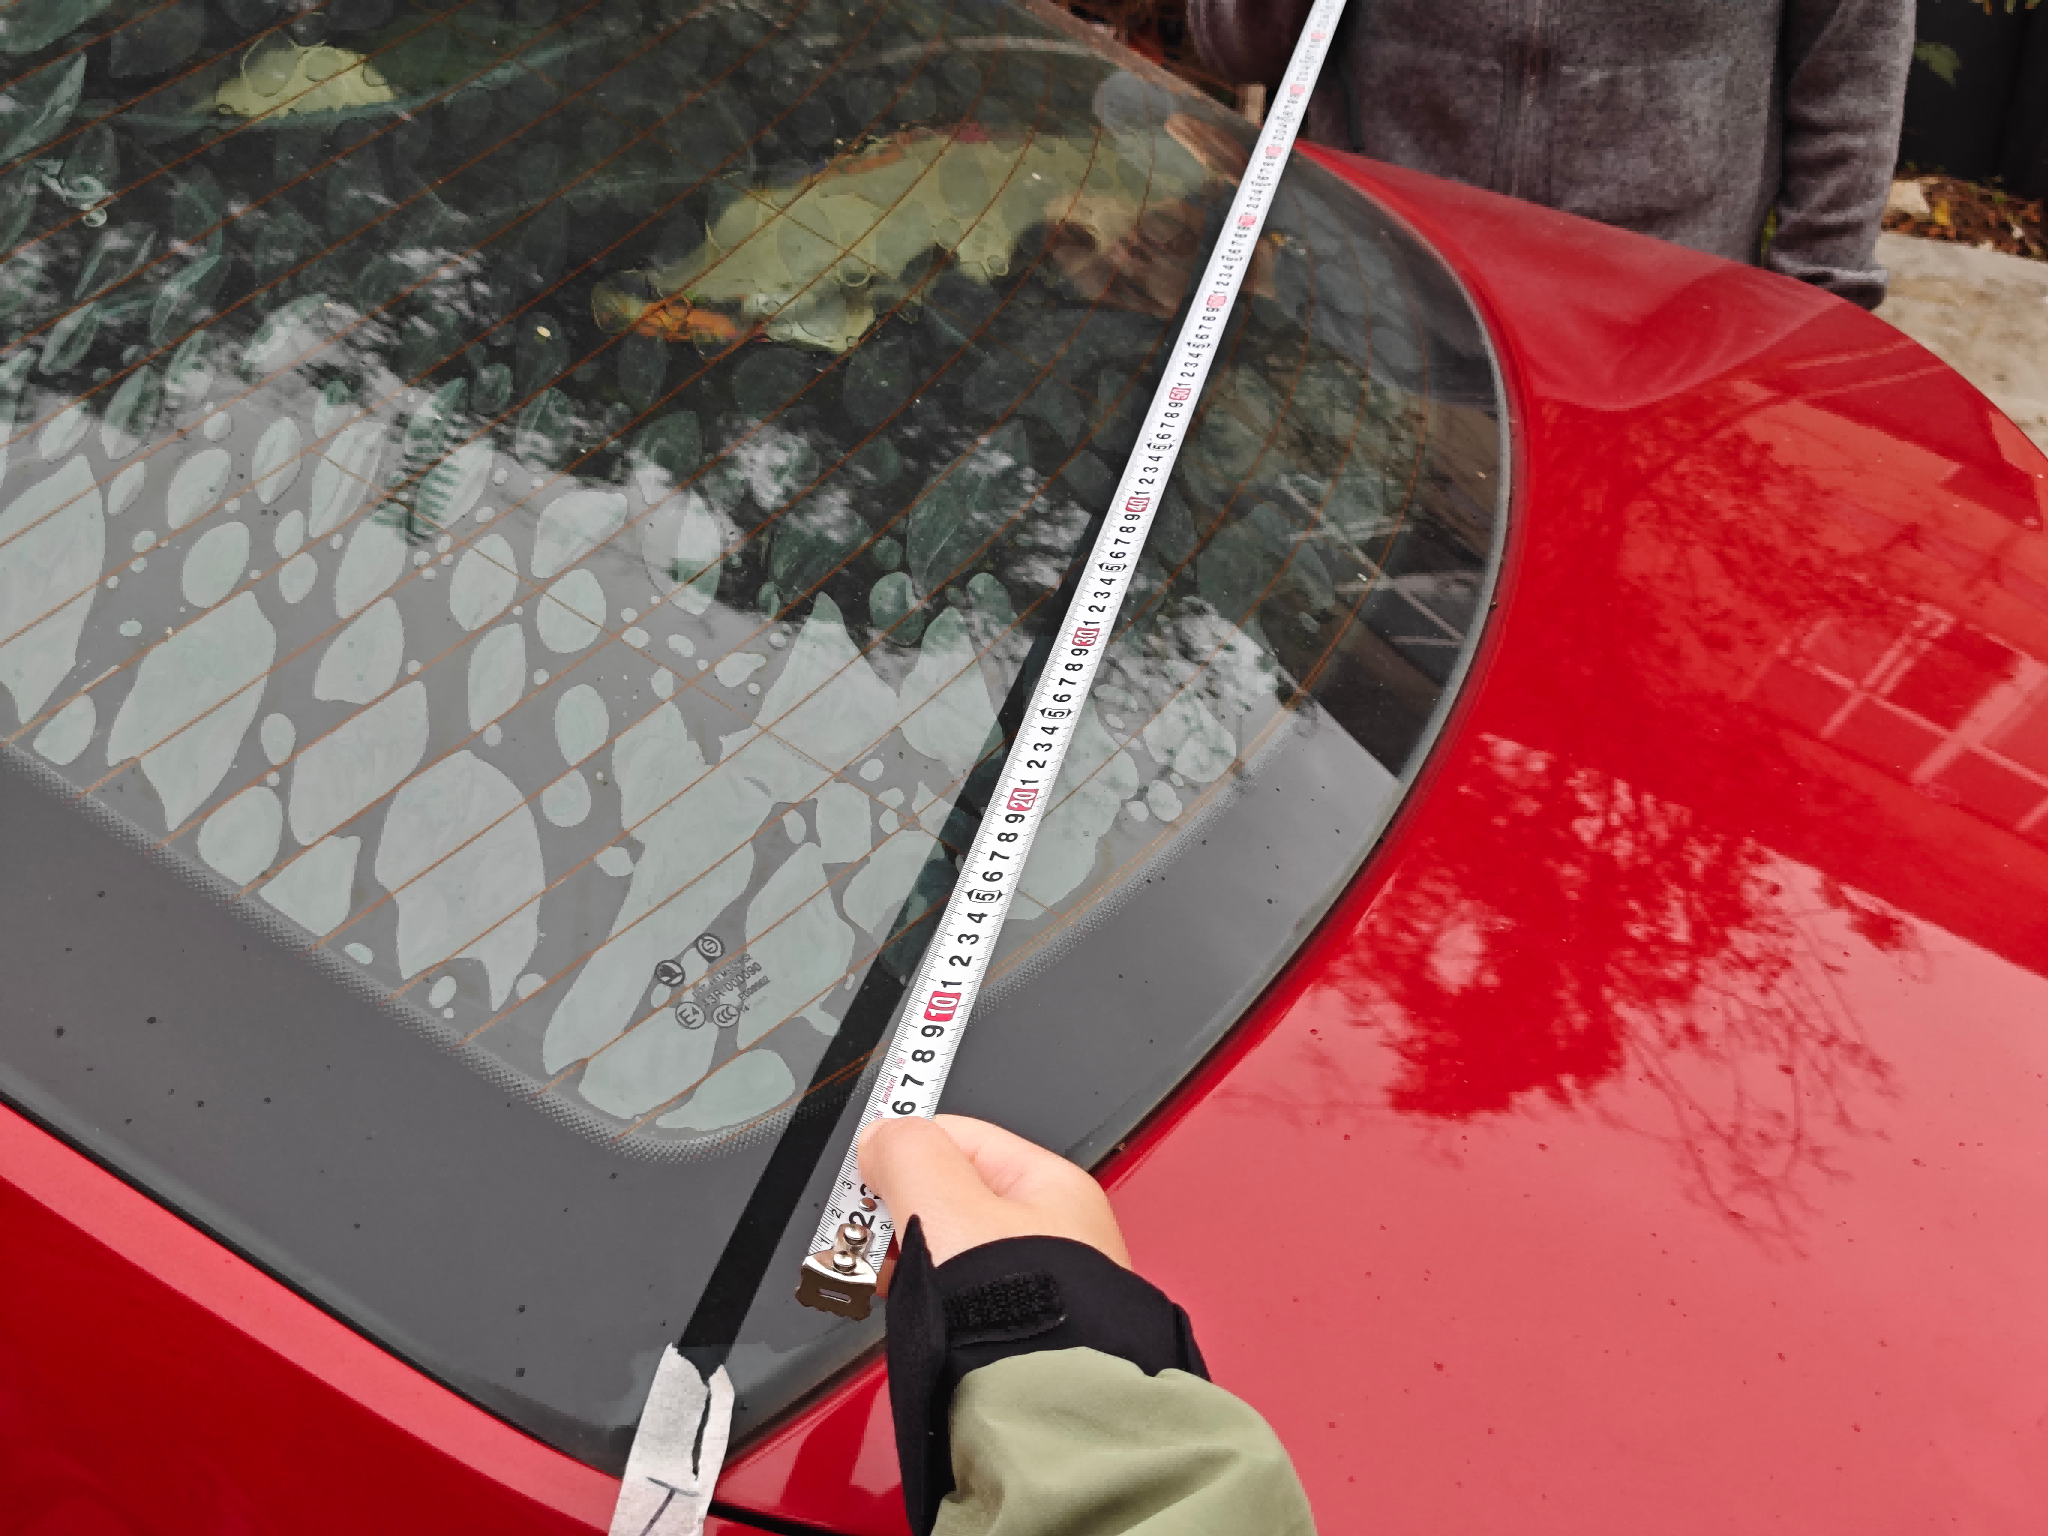
Point GLeft end of the lower edge of the rear window
How to mark: find the left end of the lower edge of the rear windscreen and apply painter’s tape there, keeping the mark clearly visible without damaging the paint.
What to measure:
- Vertical height from point G to the ground.
- Straight-line width from point G to the matching point on the opposite side.
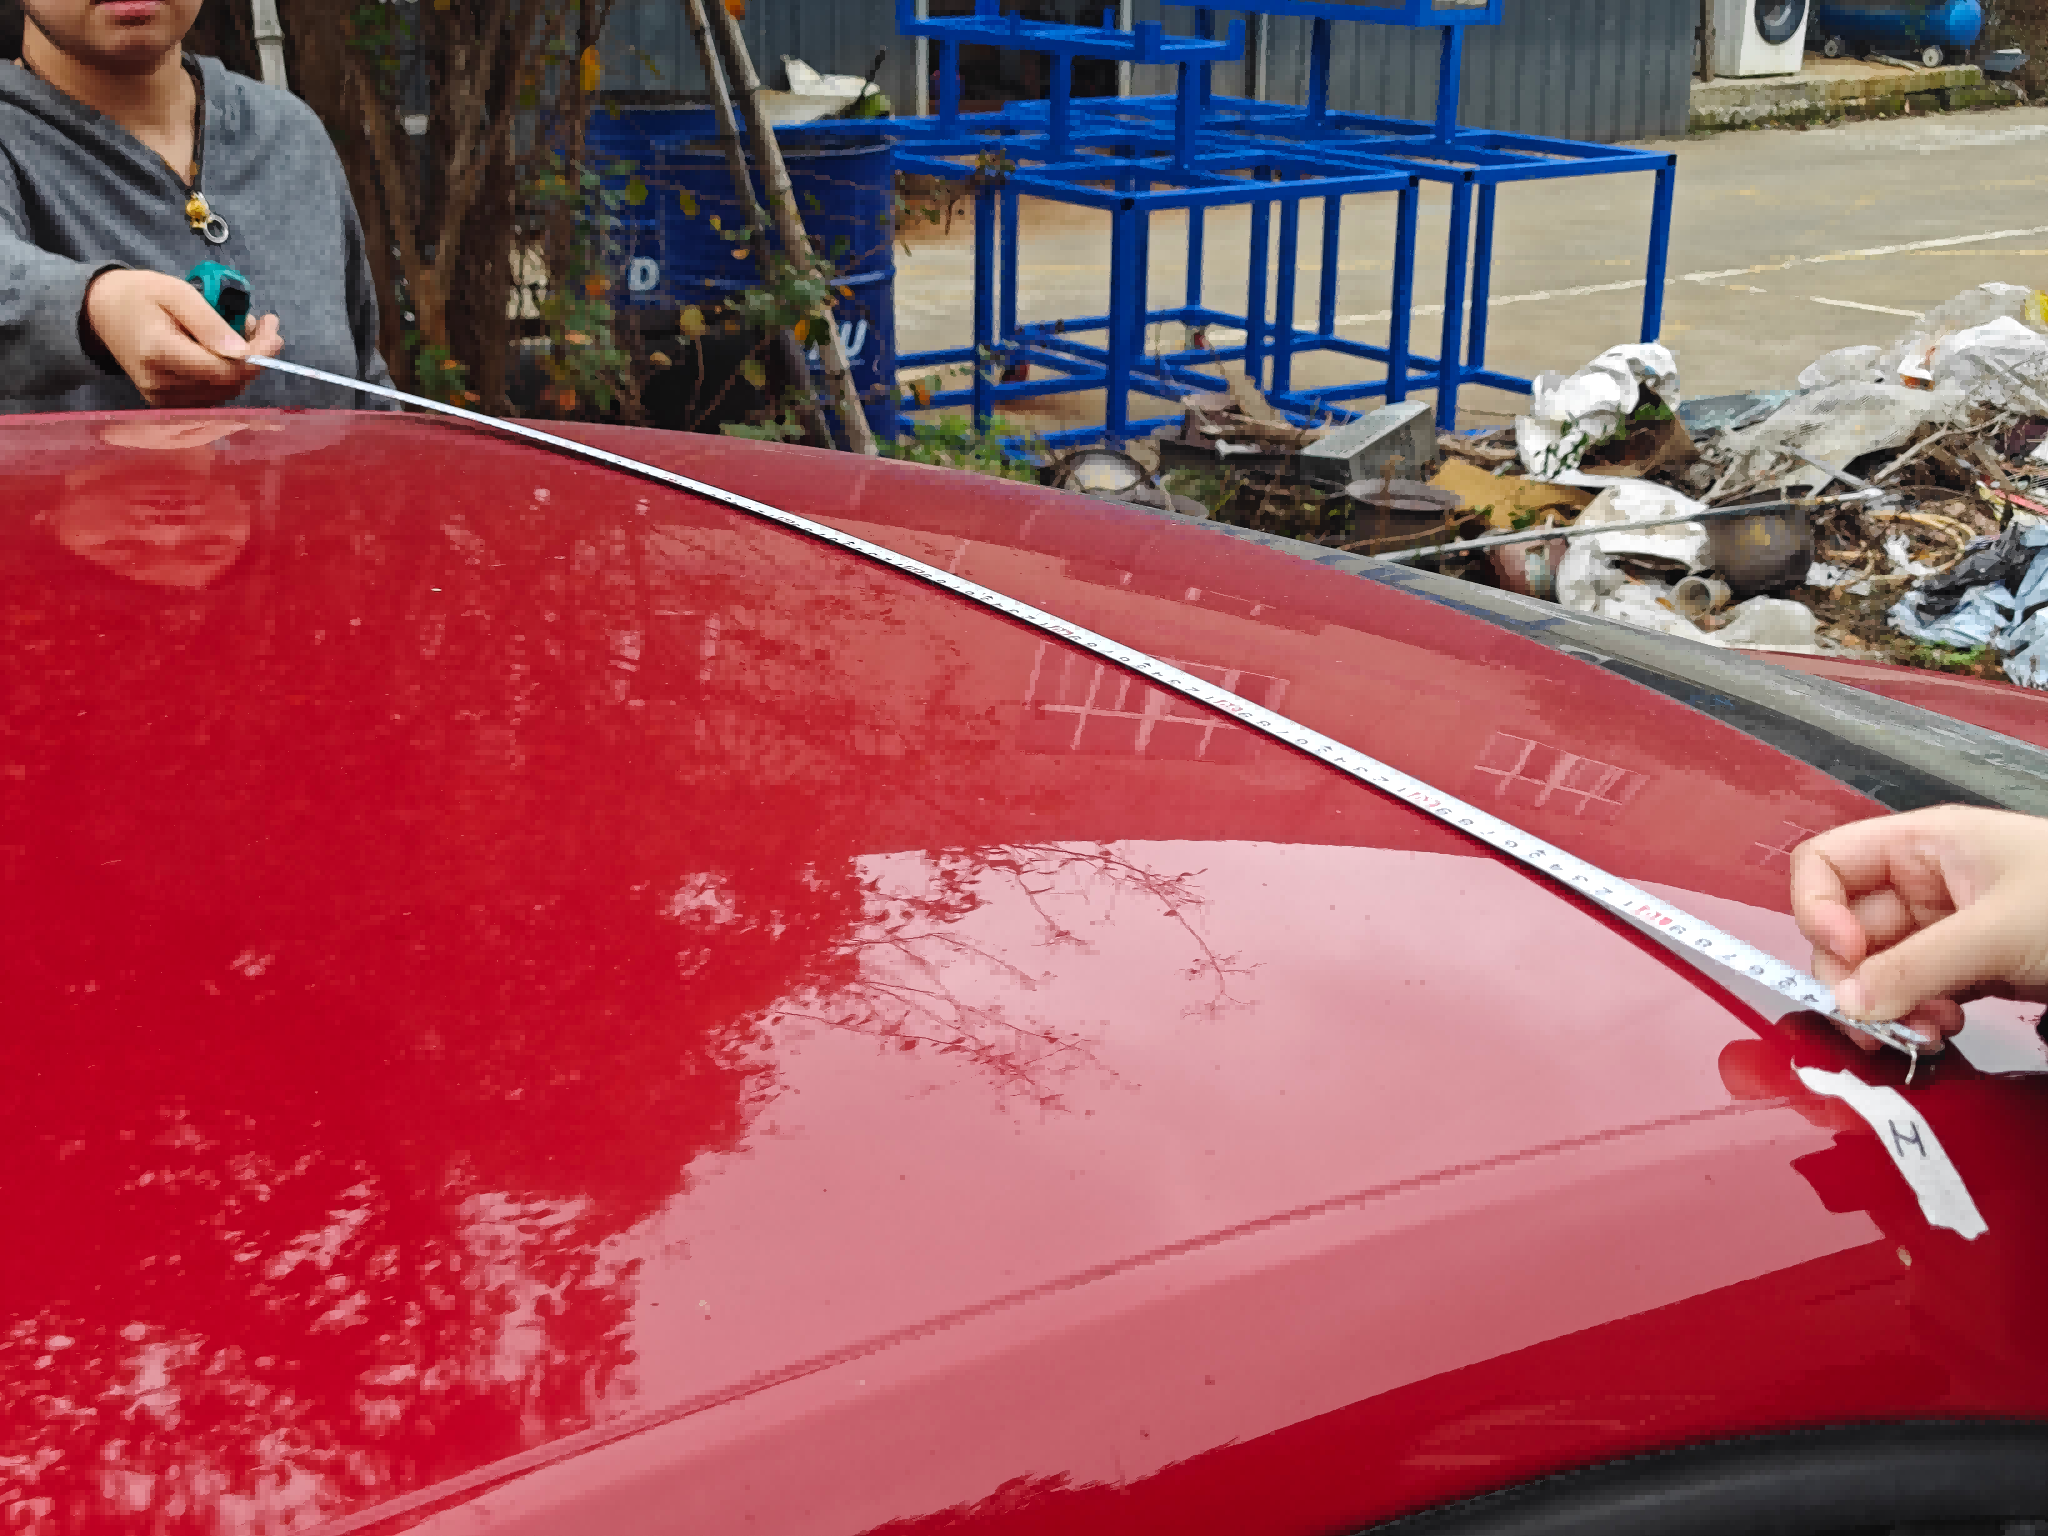
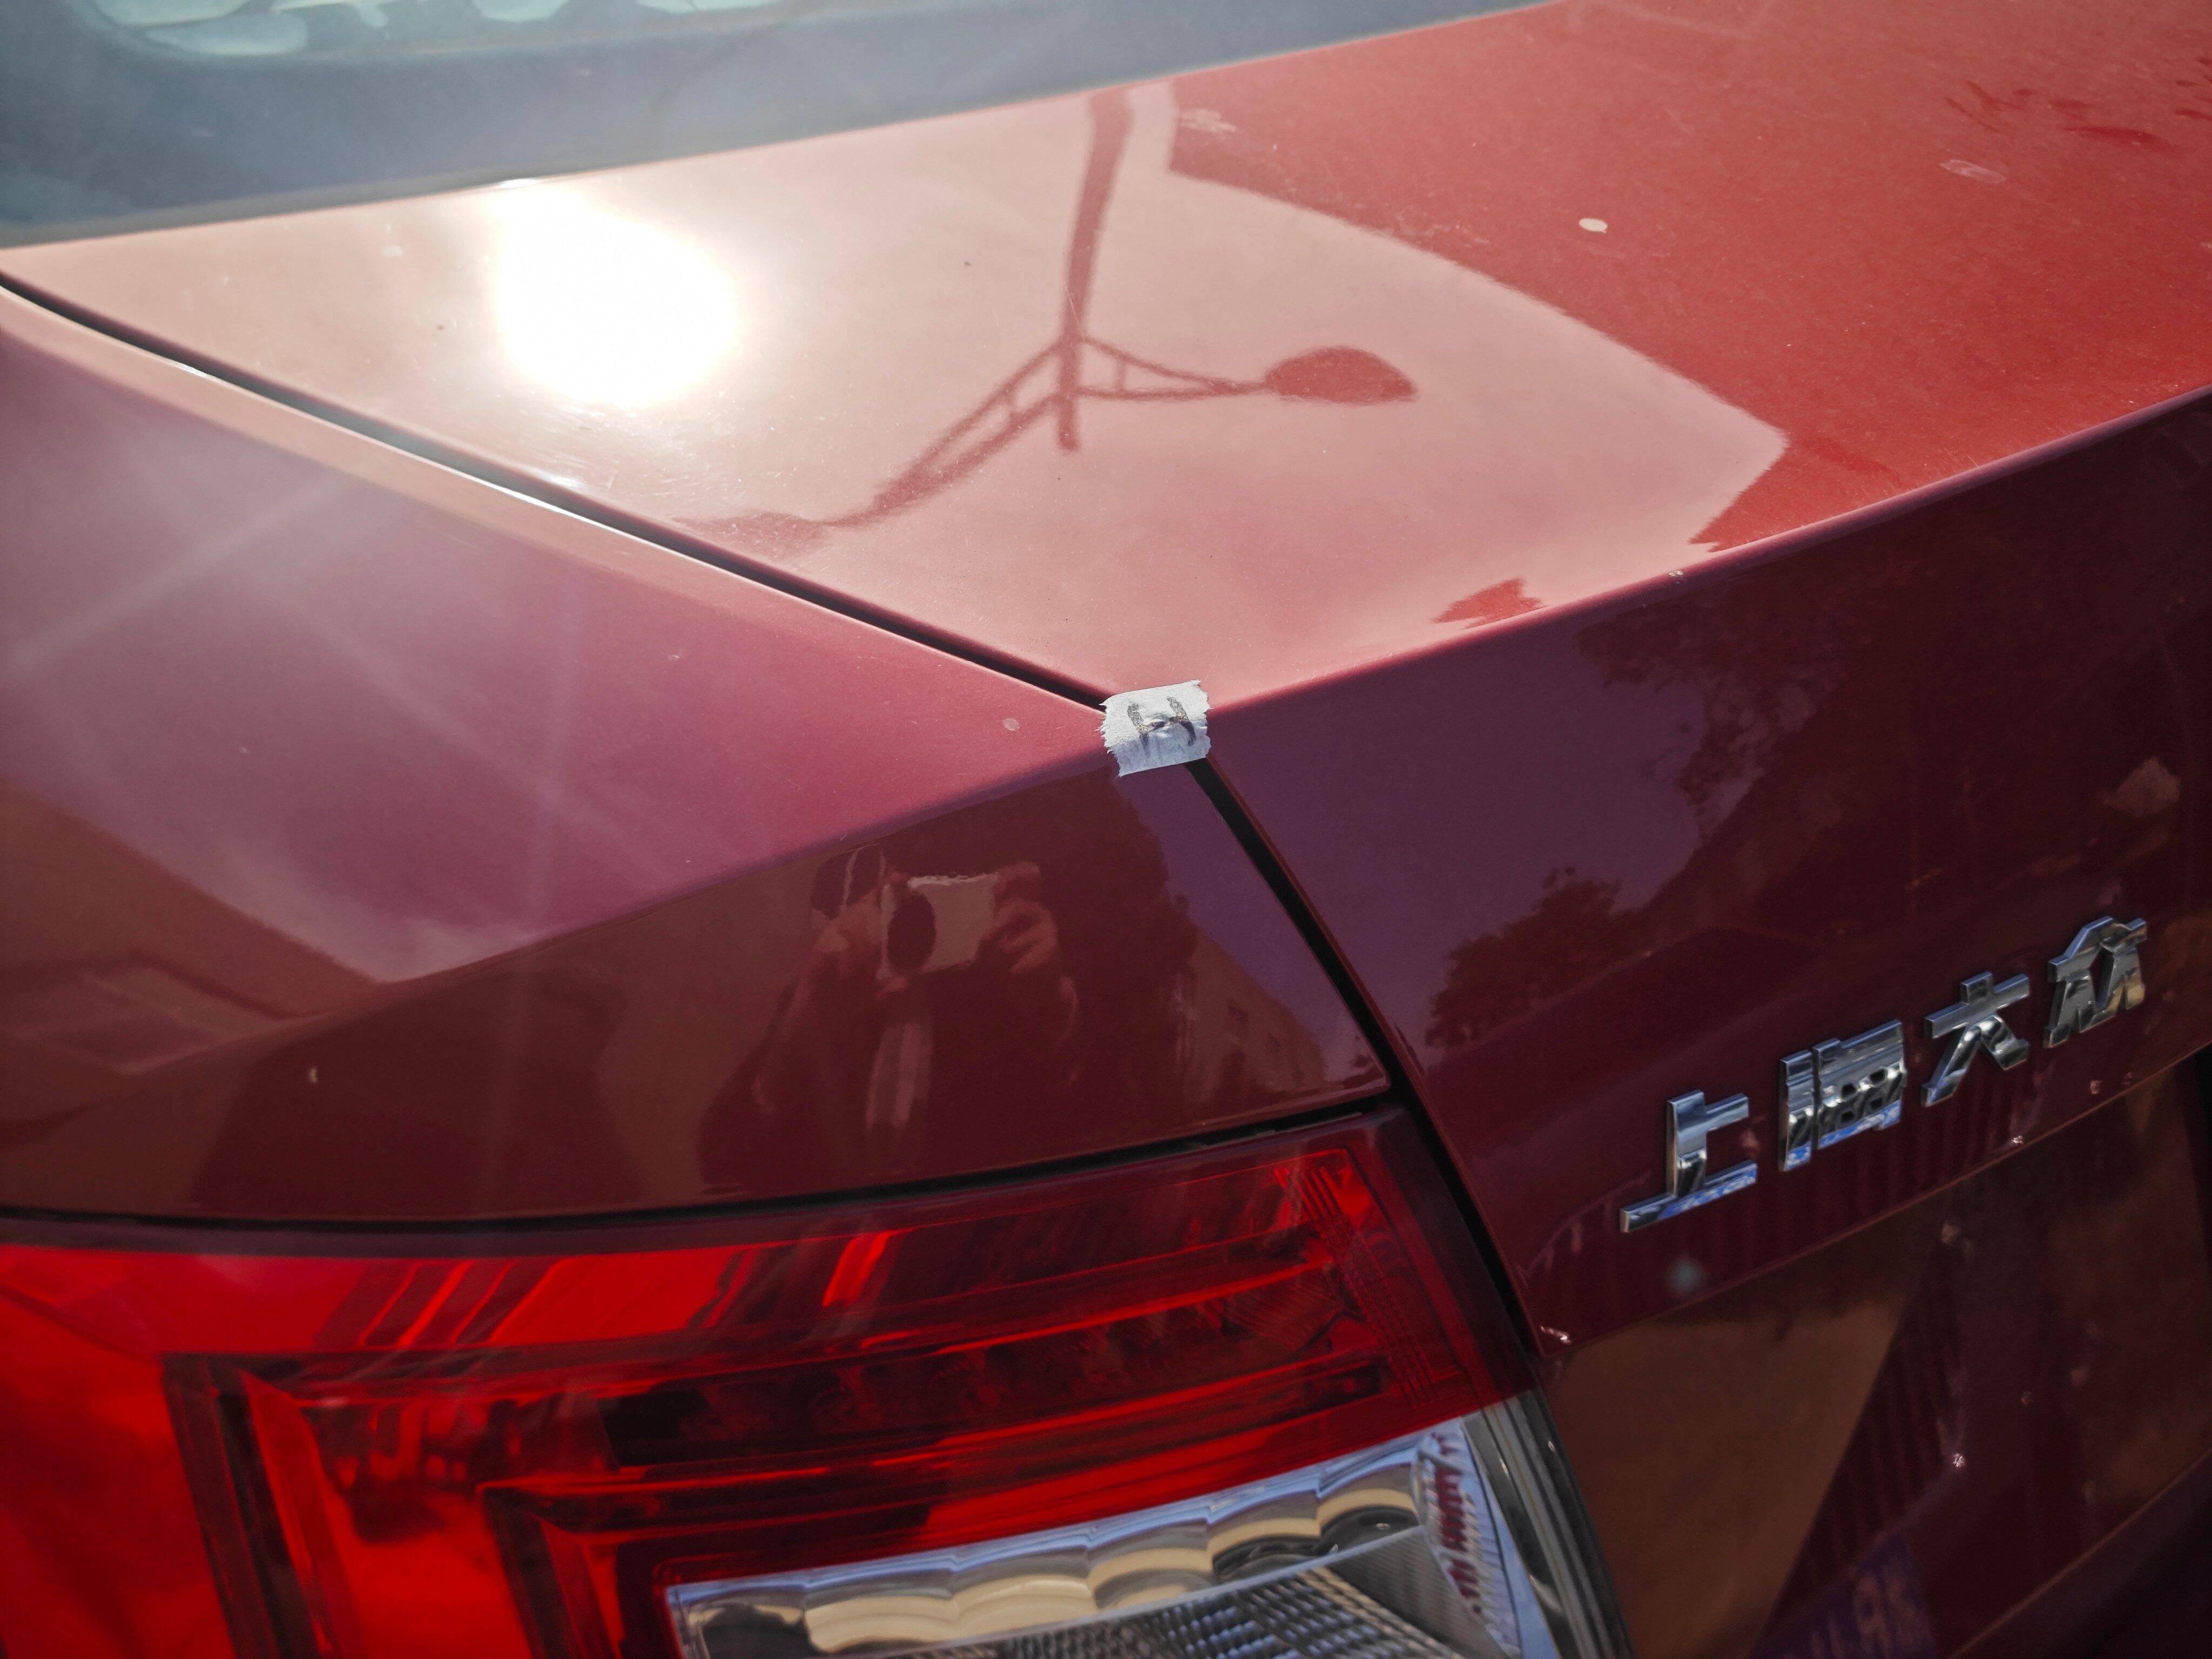
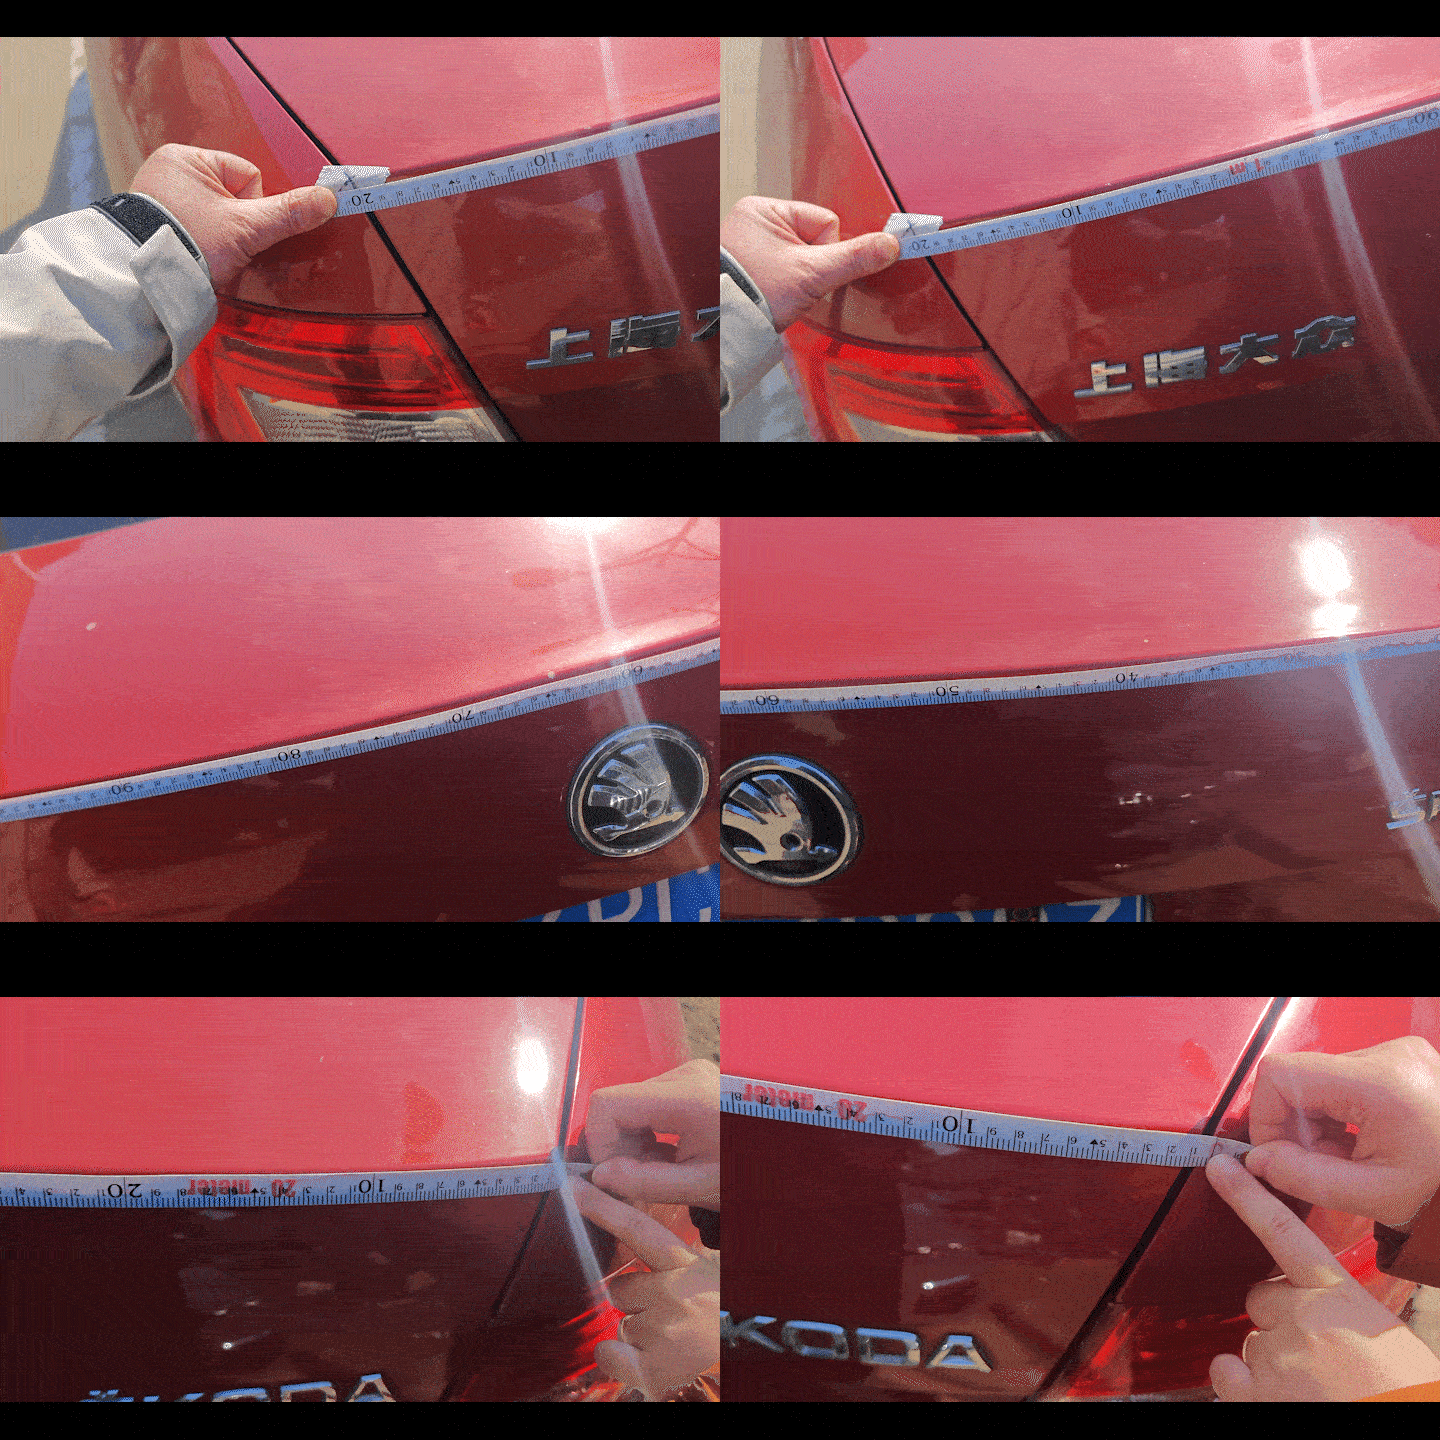
Point HLeft end of the rear edge of the boot lid
How to mark: locate the rear edge of the boot lid and apply painter’s tape at that position.
What to measure:
- Vertical height from point H to the ground.
- Straight-line width from point H to the matching point on the opposite side.
- Arc length from point H to the matching point on the opposite side, using a soft tape.
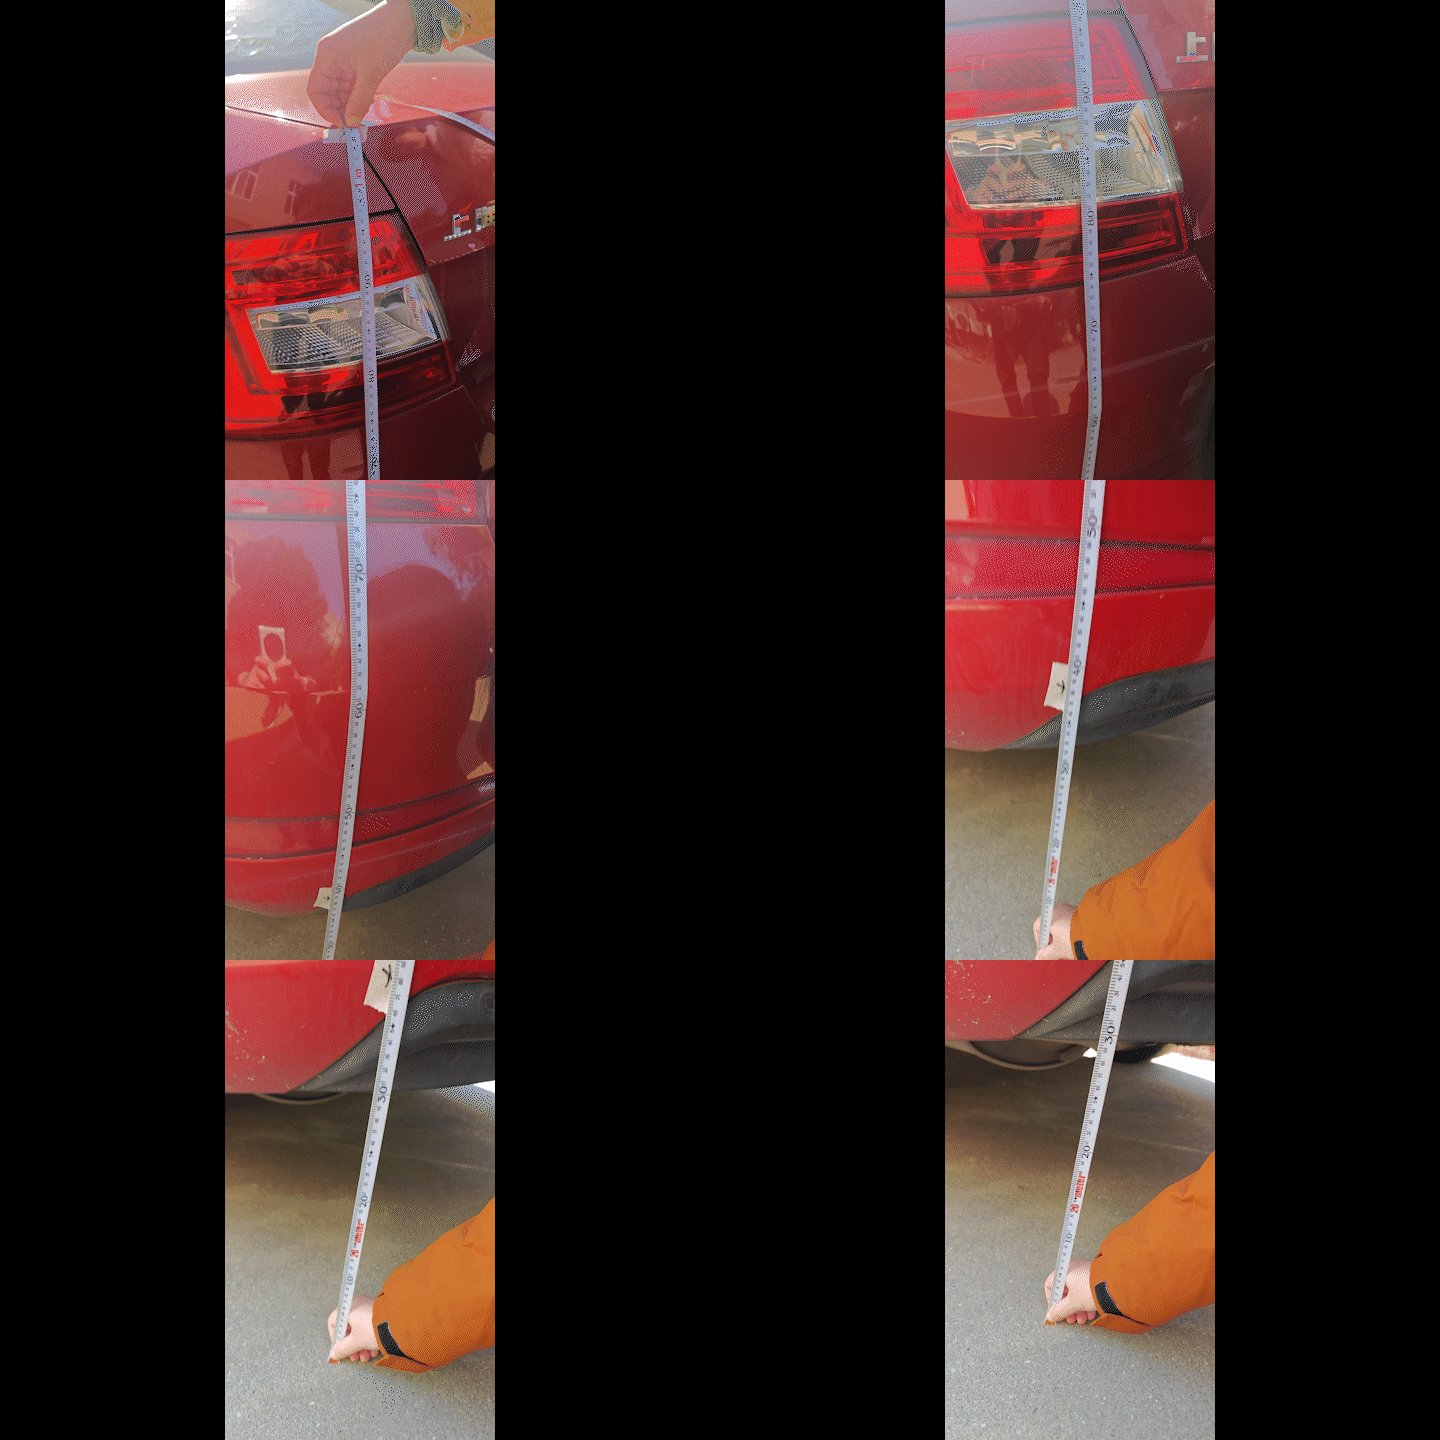
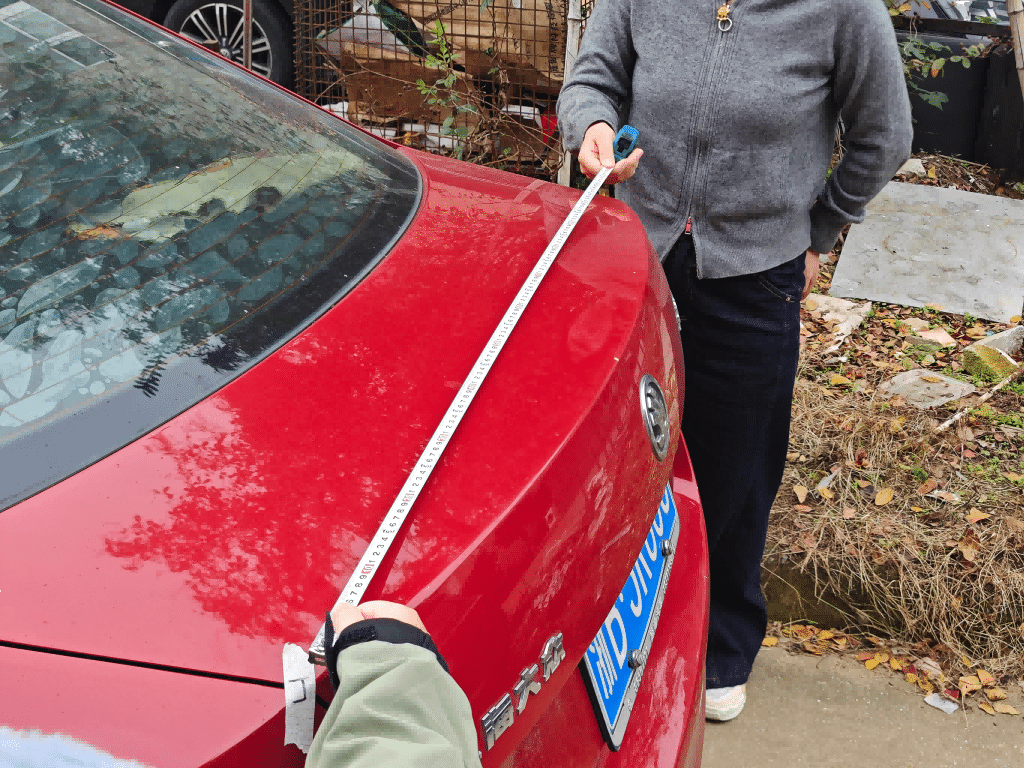
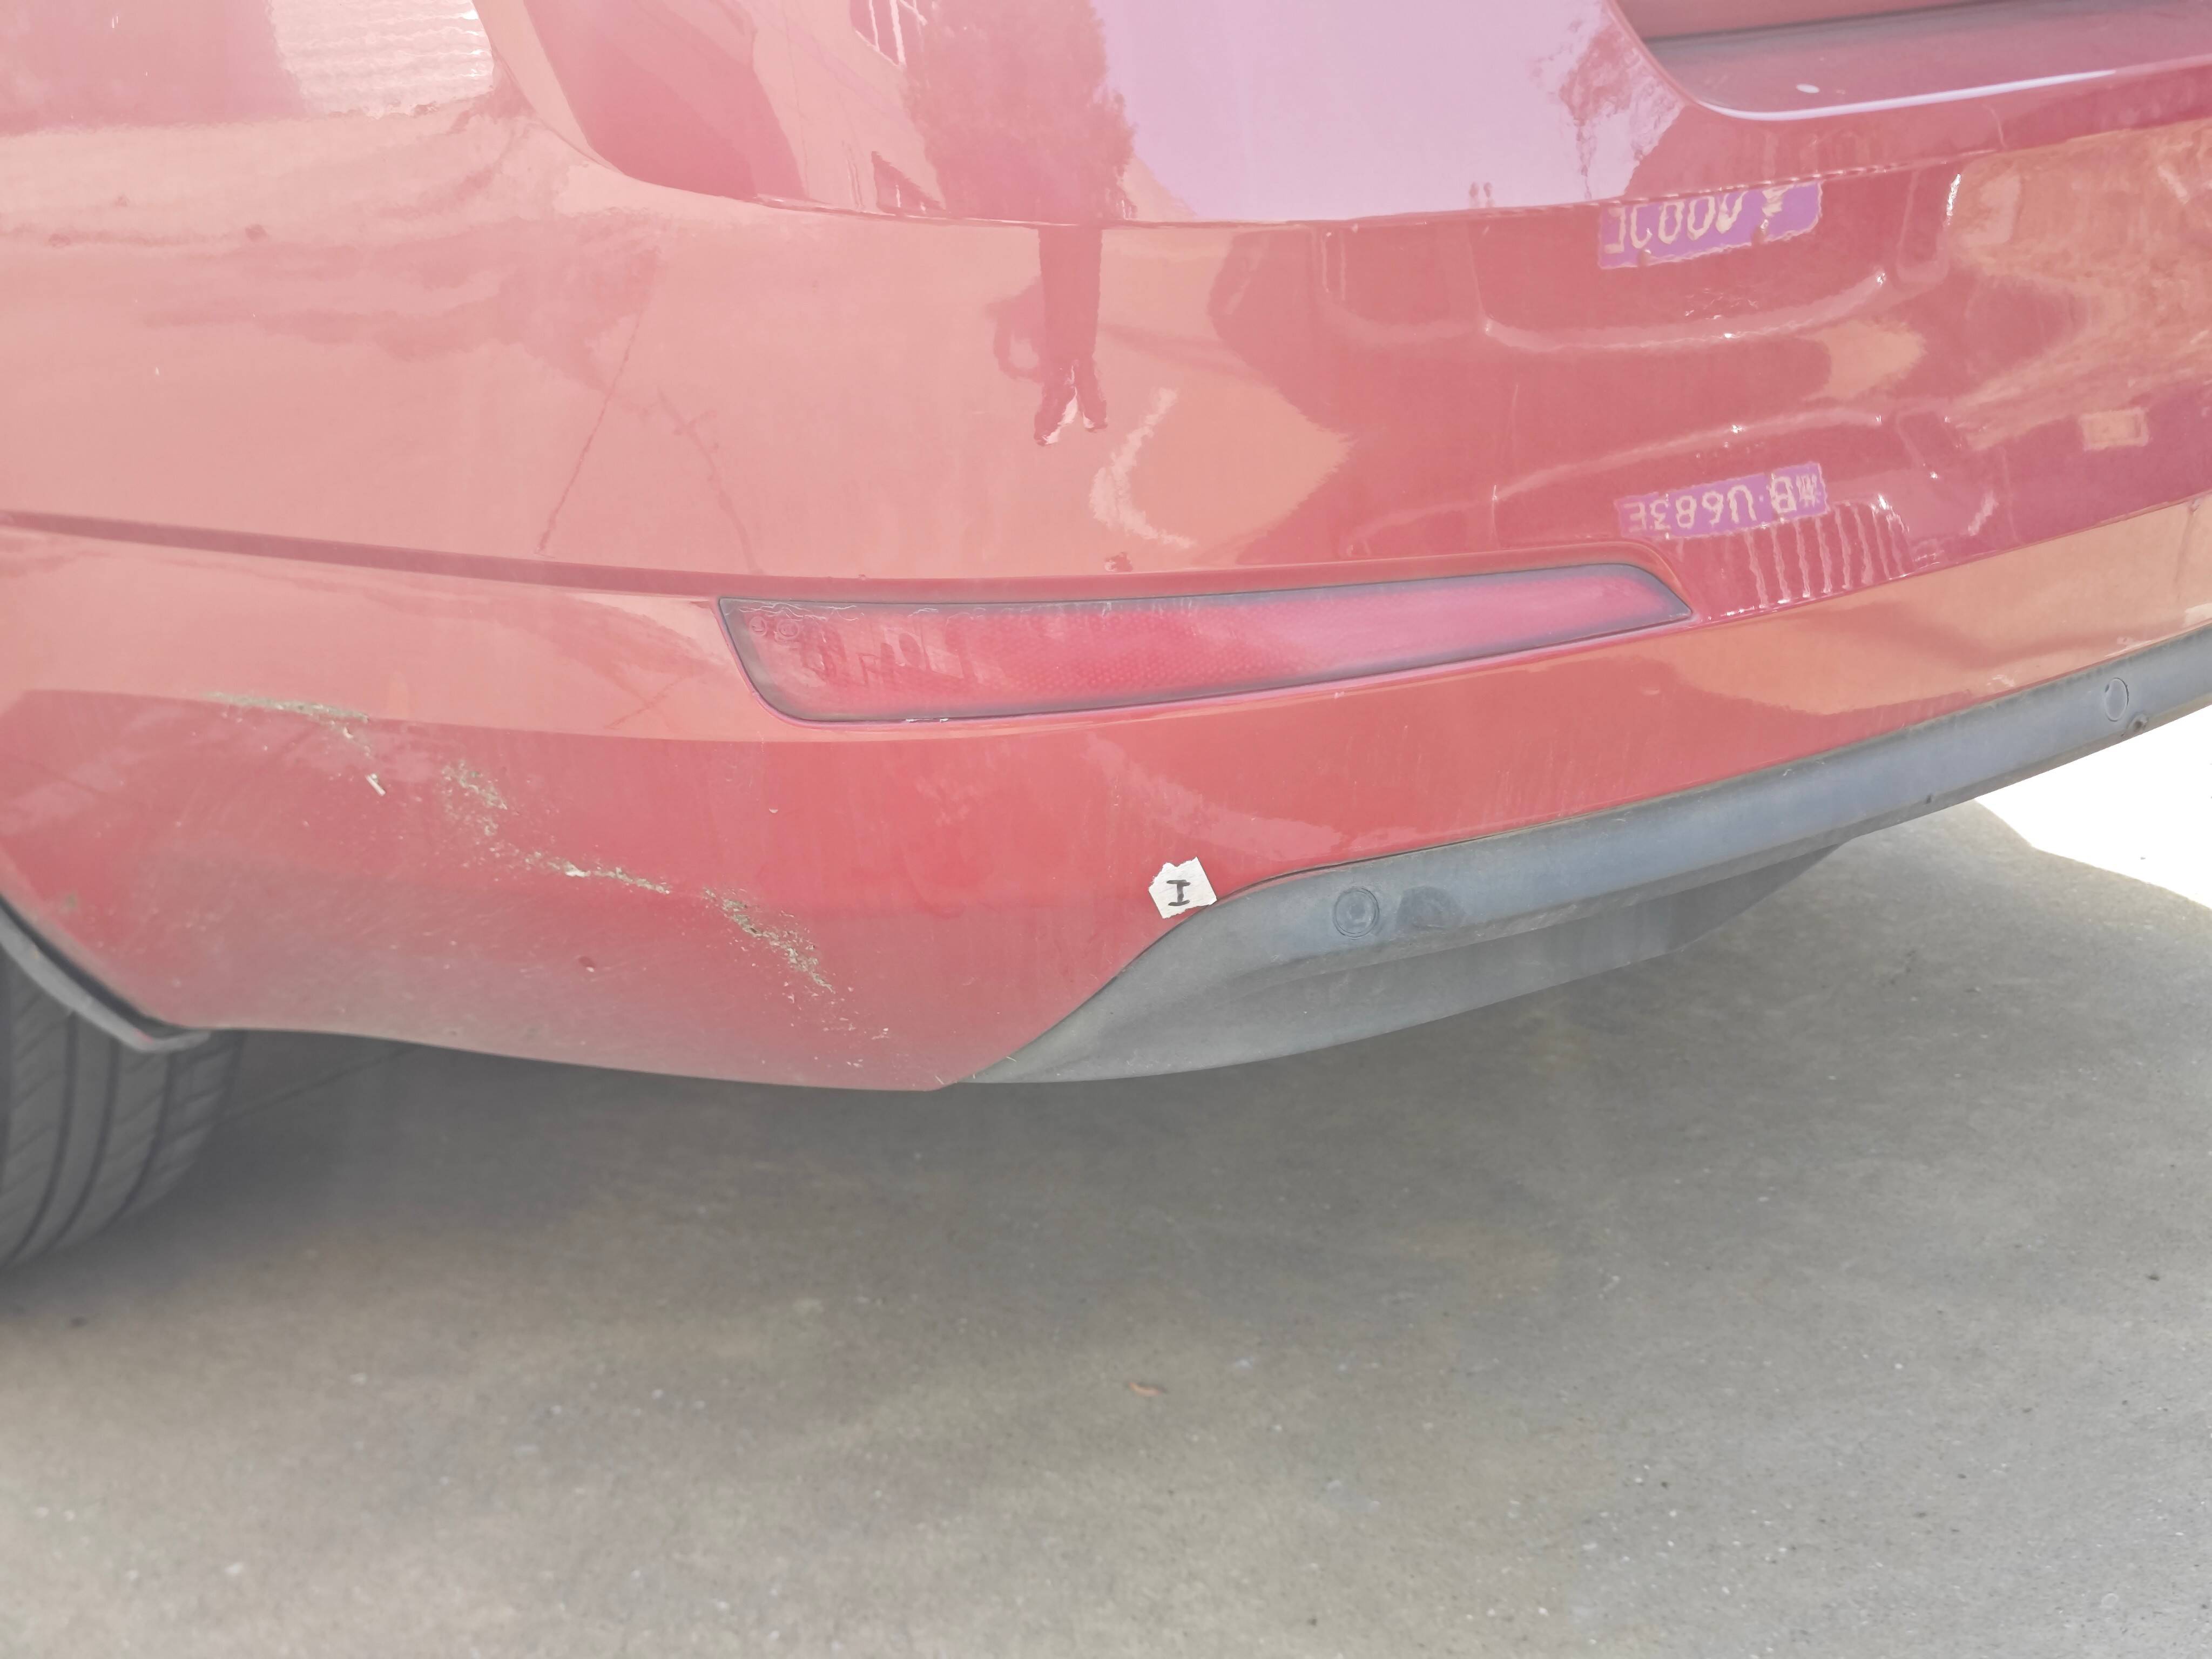
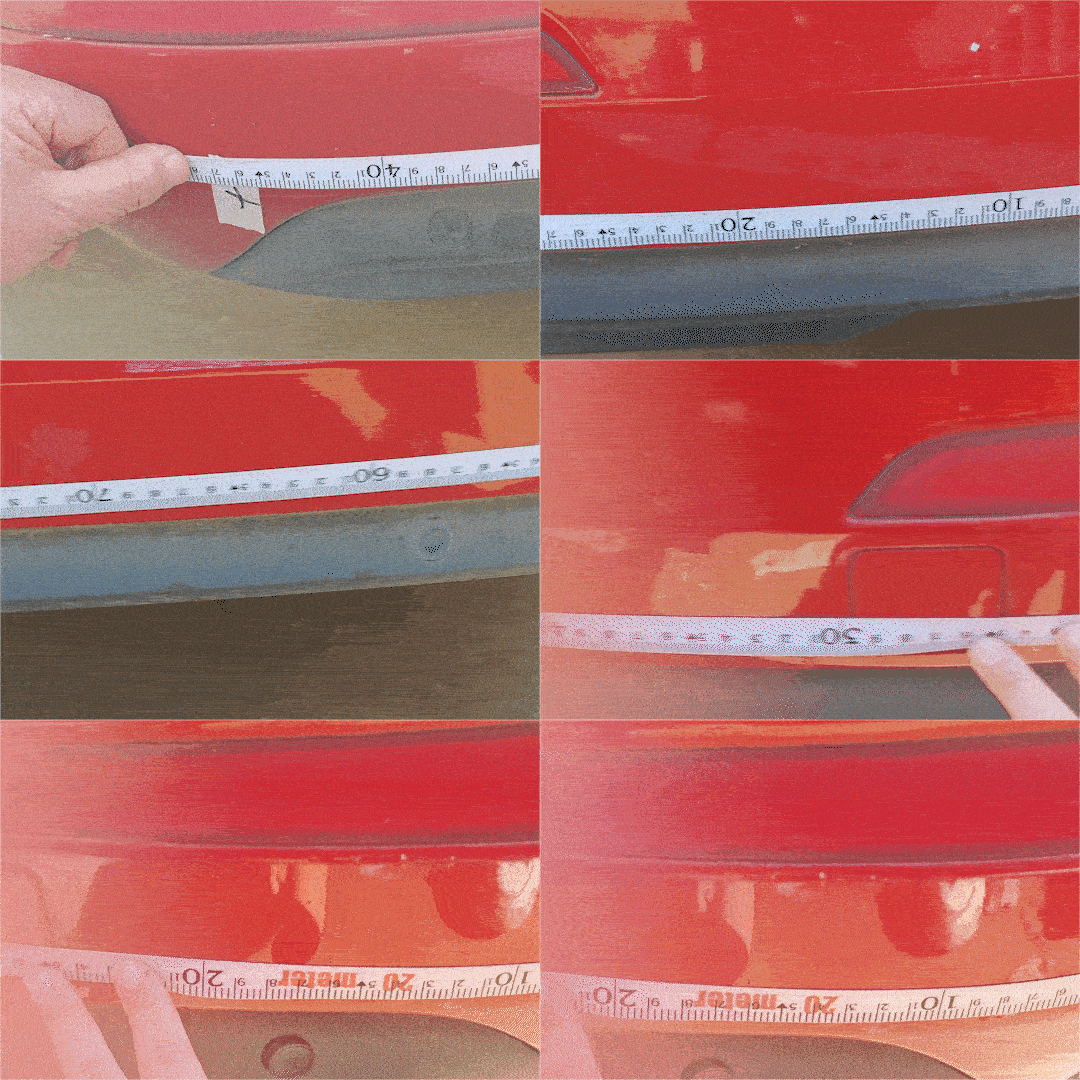
Point ILower edge of the rear bumper
How to mark: locate the left-hand end of the rear bumper and apply painter’s tape at that position.
What to measure:
- Arc length from point I to the matching point on the opposite side, using a soft tape.
Point JMidpoint on the bonnet between B and its opposite point
How to mark: use a tape to find the midpoint of the line from point B to the matching point, then apply painter’s tape there.
What to measure:
- Length from point J to point K, using a soft tape.
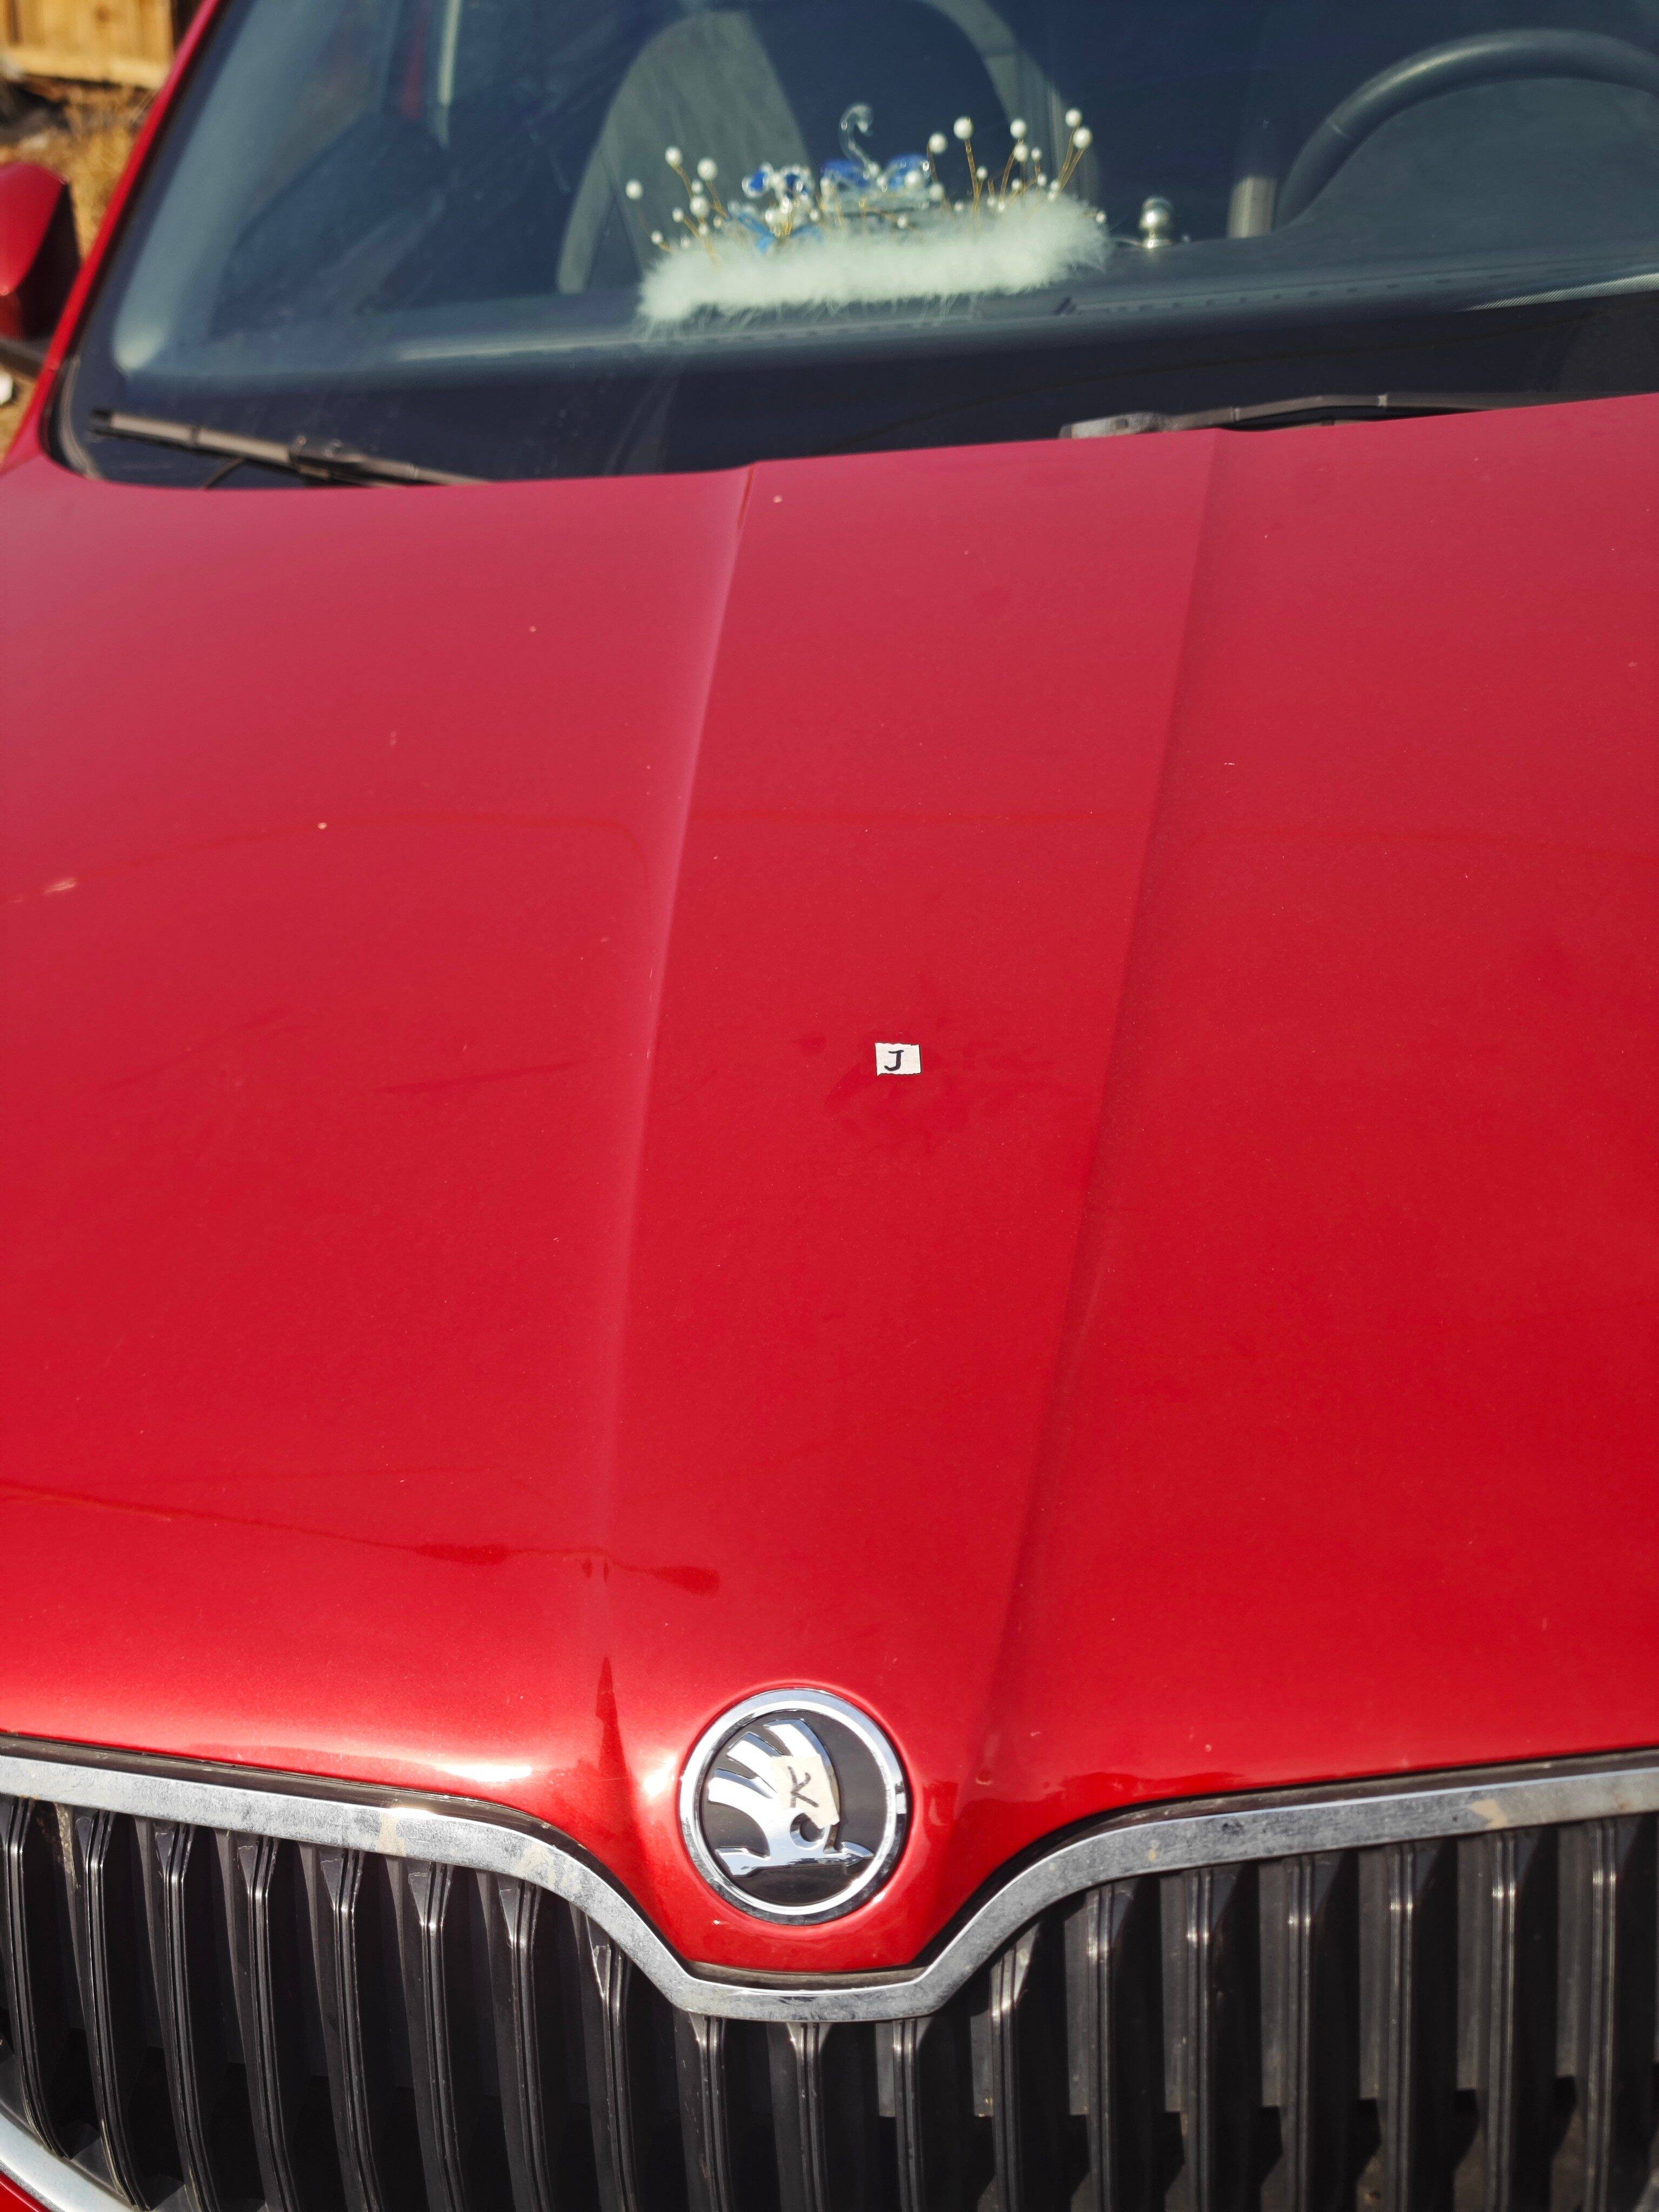
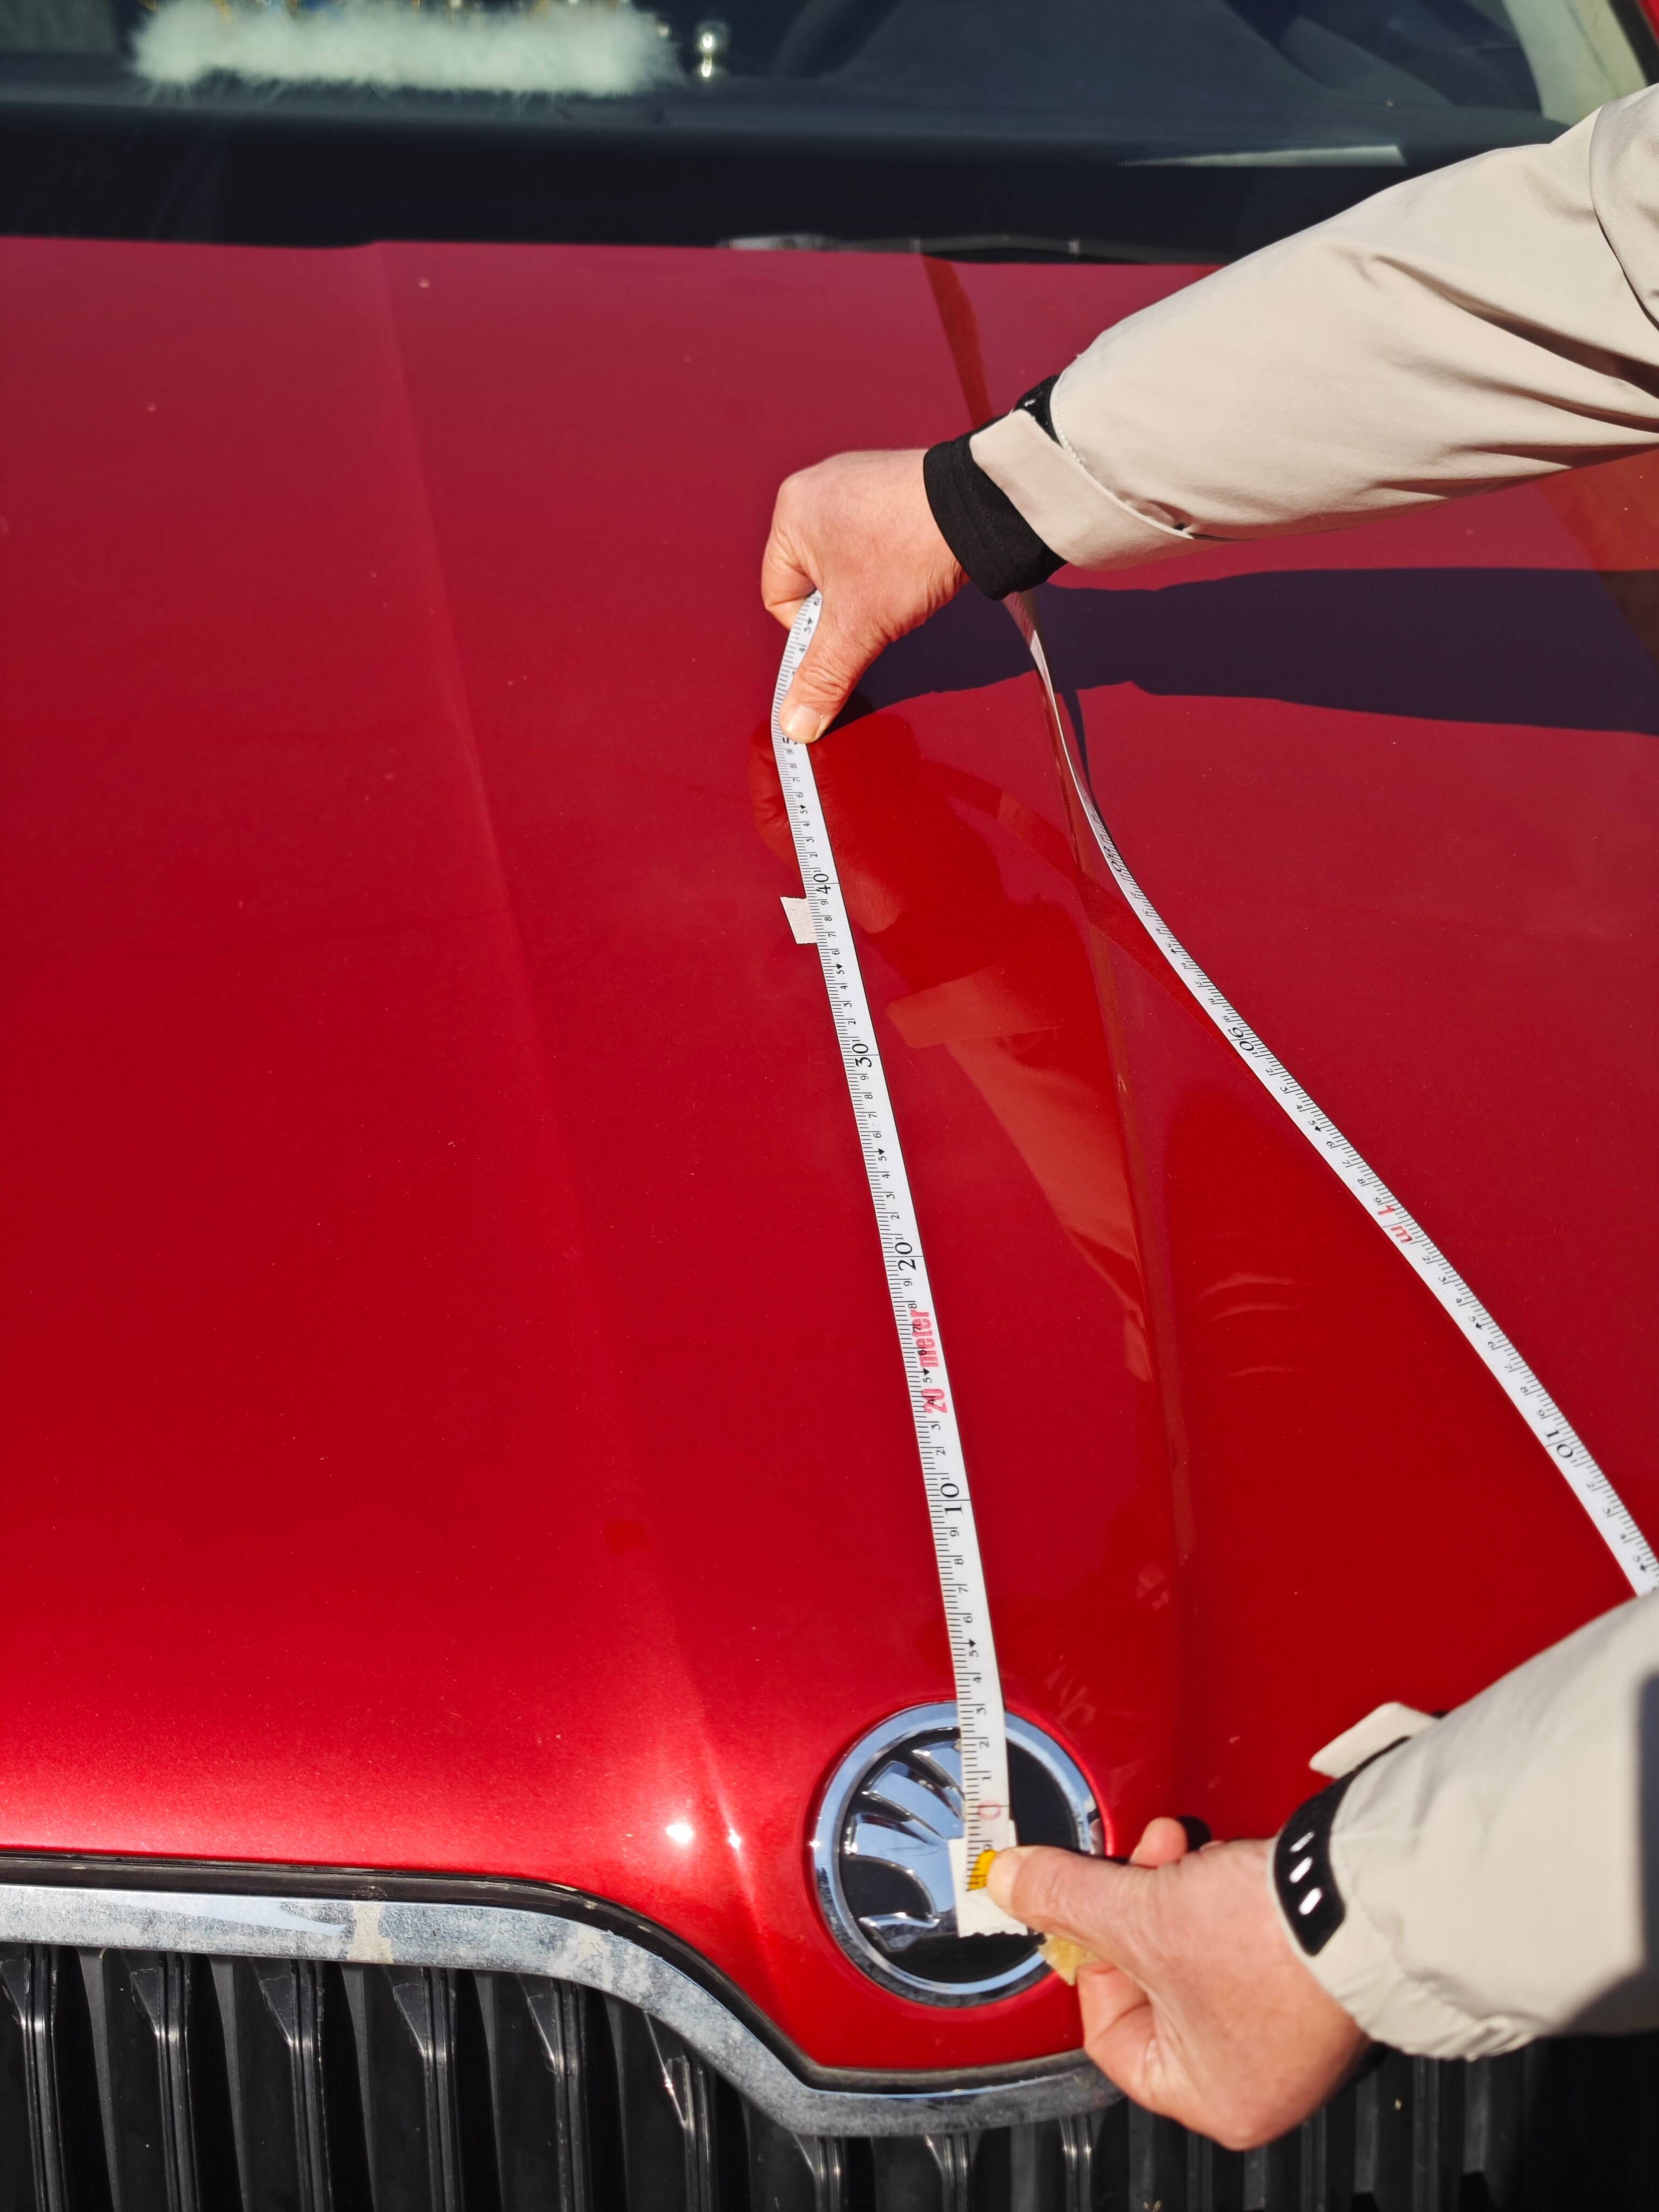
Point KCentre of the front edge of the bonnet
How to mark: find the centre of the front edge of the bonnet (usually the badge position) and apply painter’s tape there. This point is the reference for the J–K length.
Point K is recorded as a reference point; the corresponding reading is the J–K length recorded at point J.
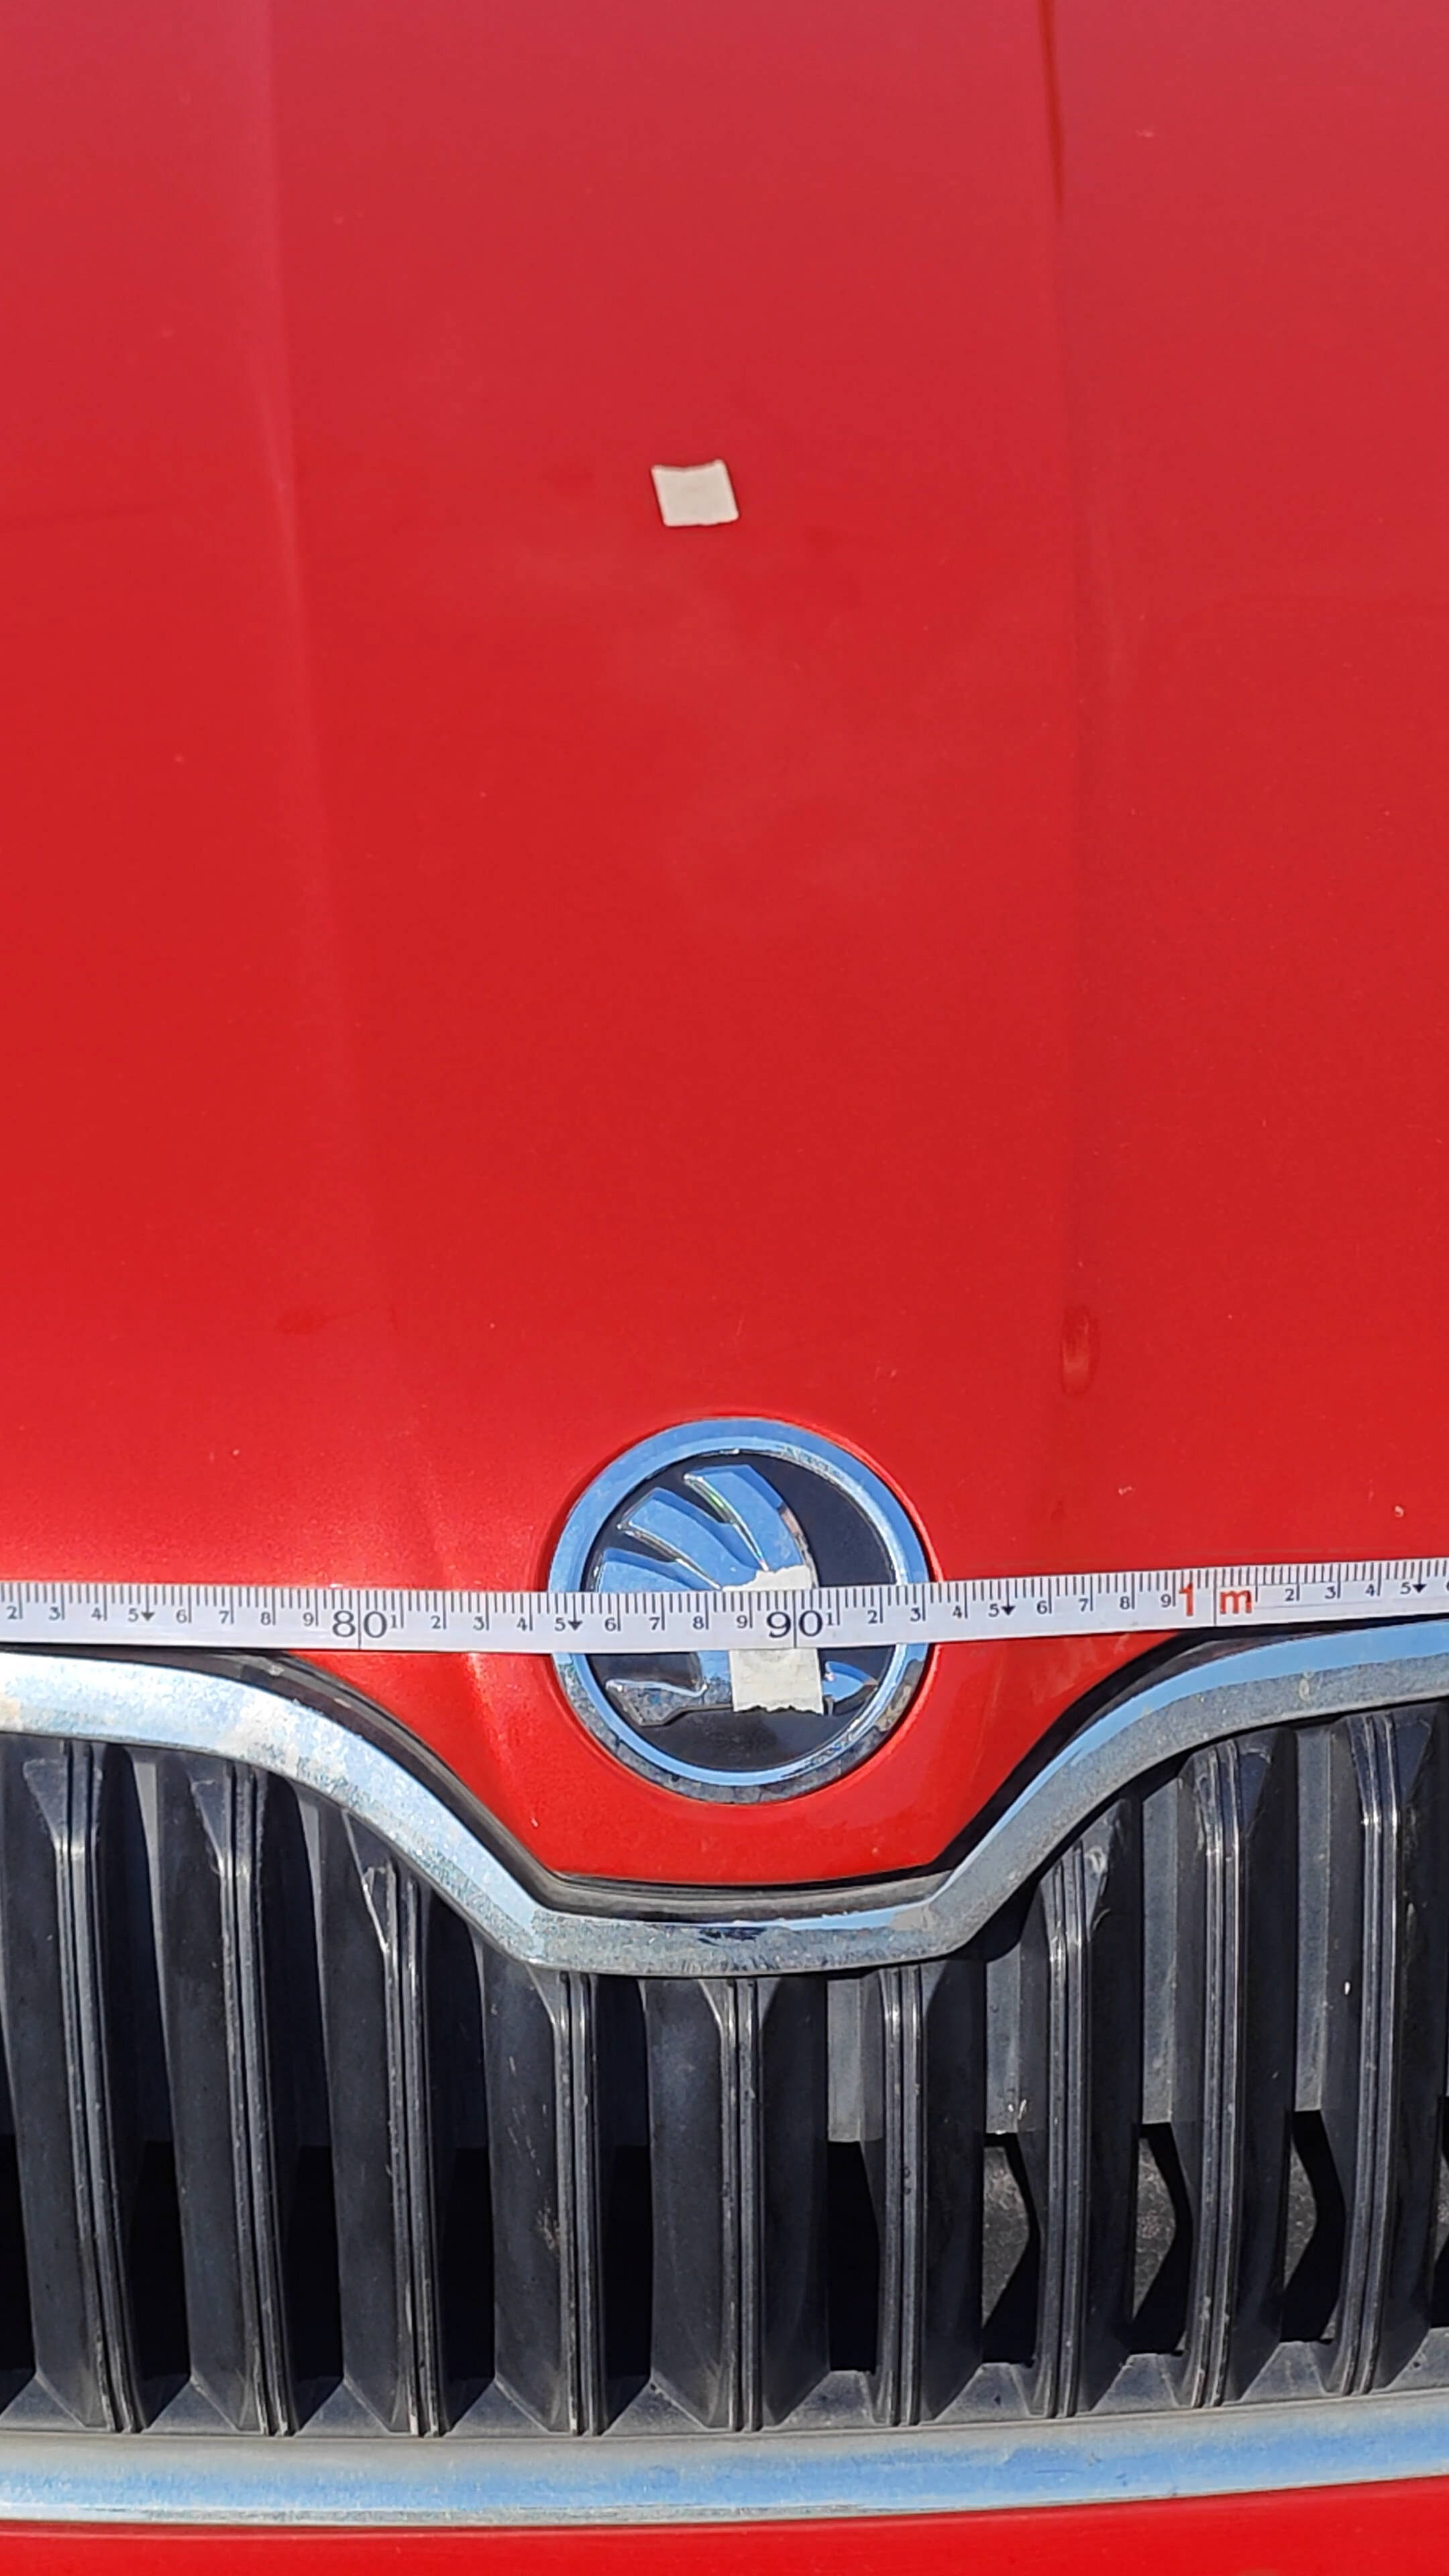
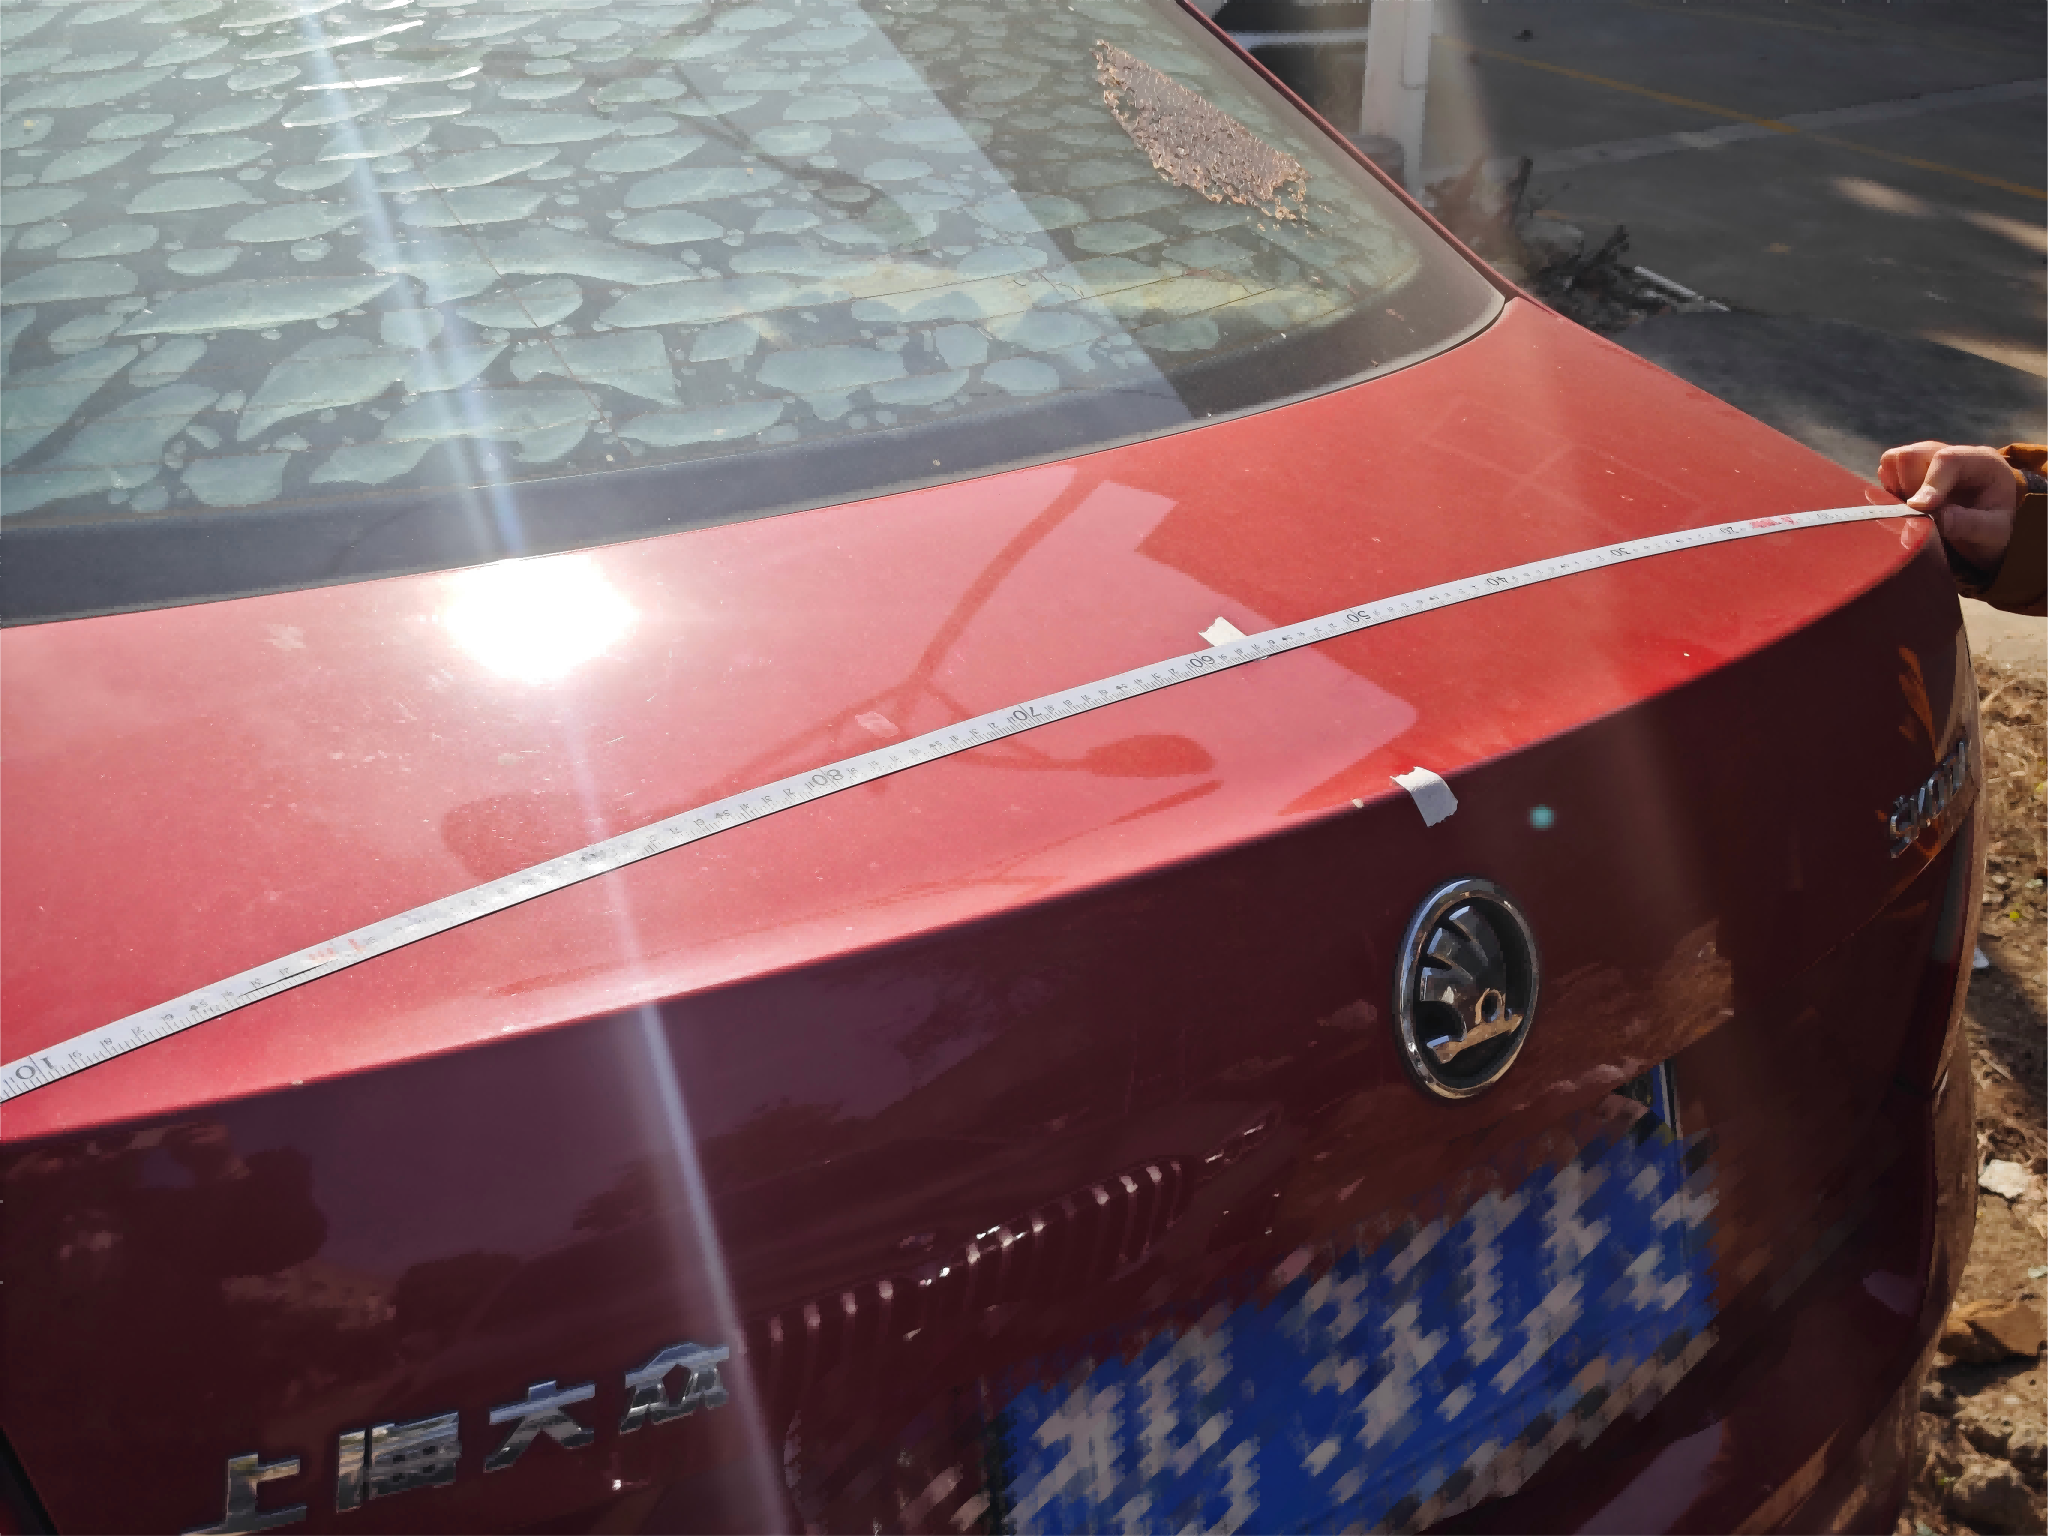
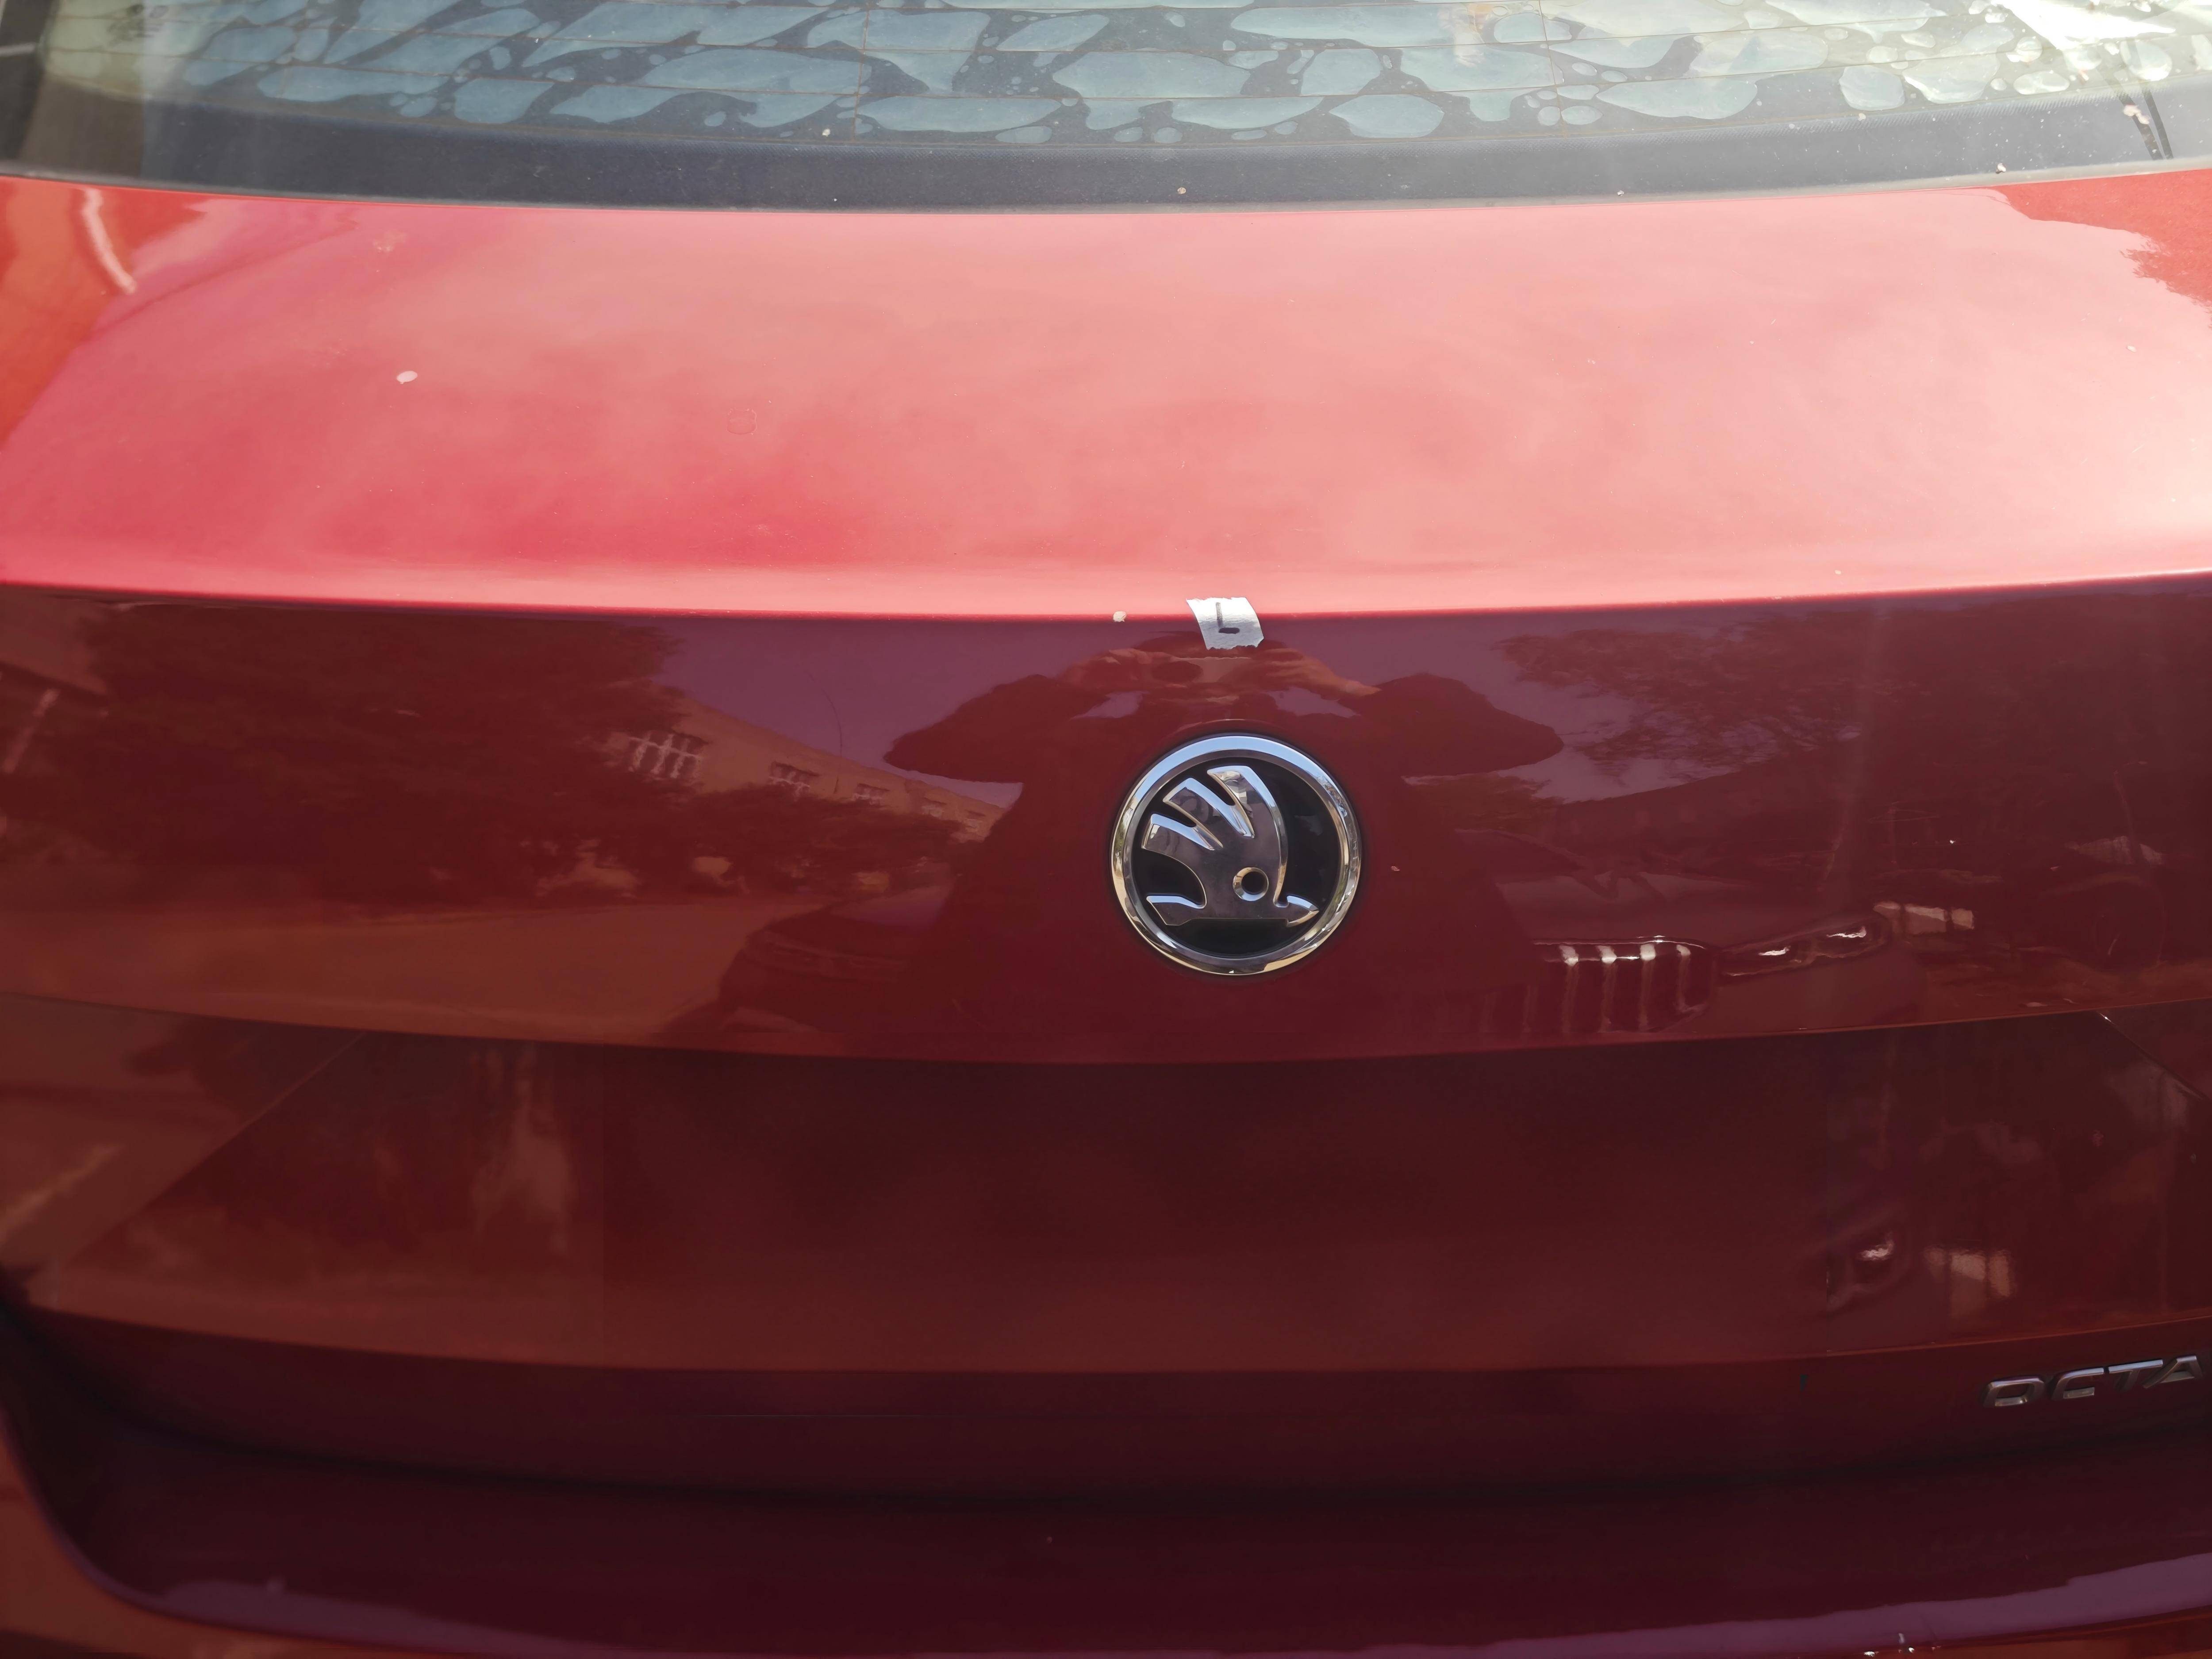
Point LMidpoint on the boot lid between H and its opposite point
How to mark: find the midpoint of the line from point H to the matching point on the boot lid, then apply painter’s tape there.
What to measure:
- Vertical height of point L, using a soft tape.
- The special length: from point L, measure squarely out to the vehicle edge.
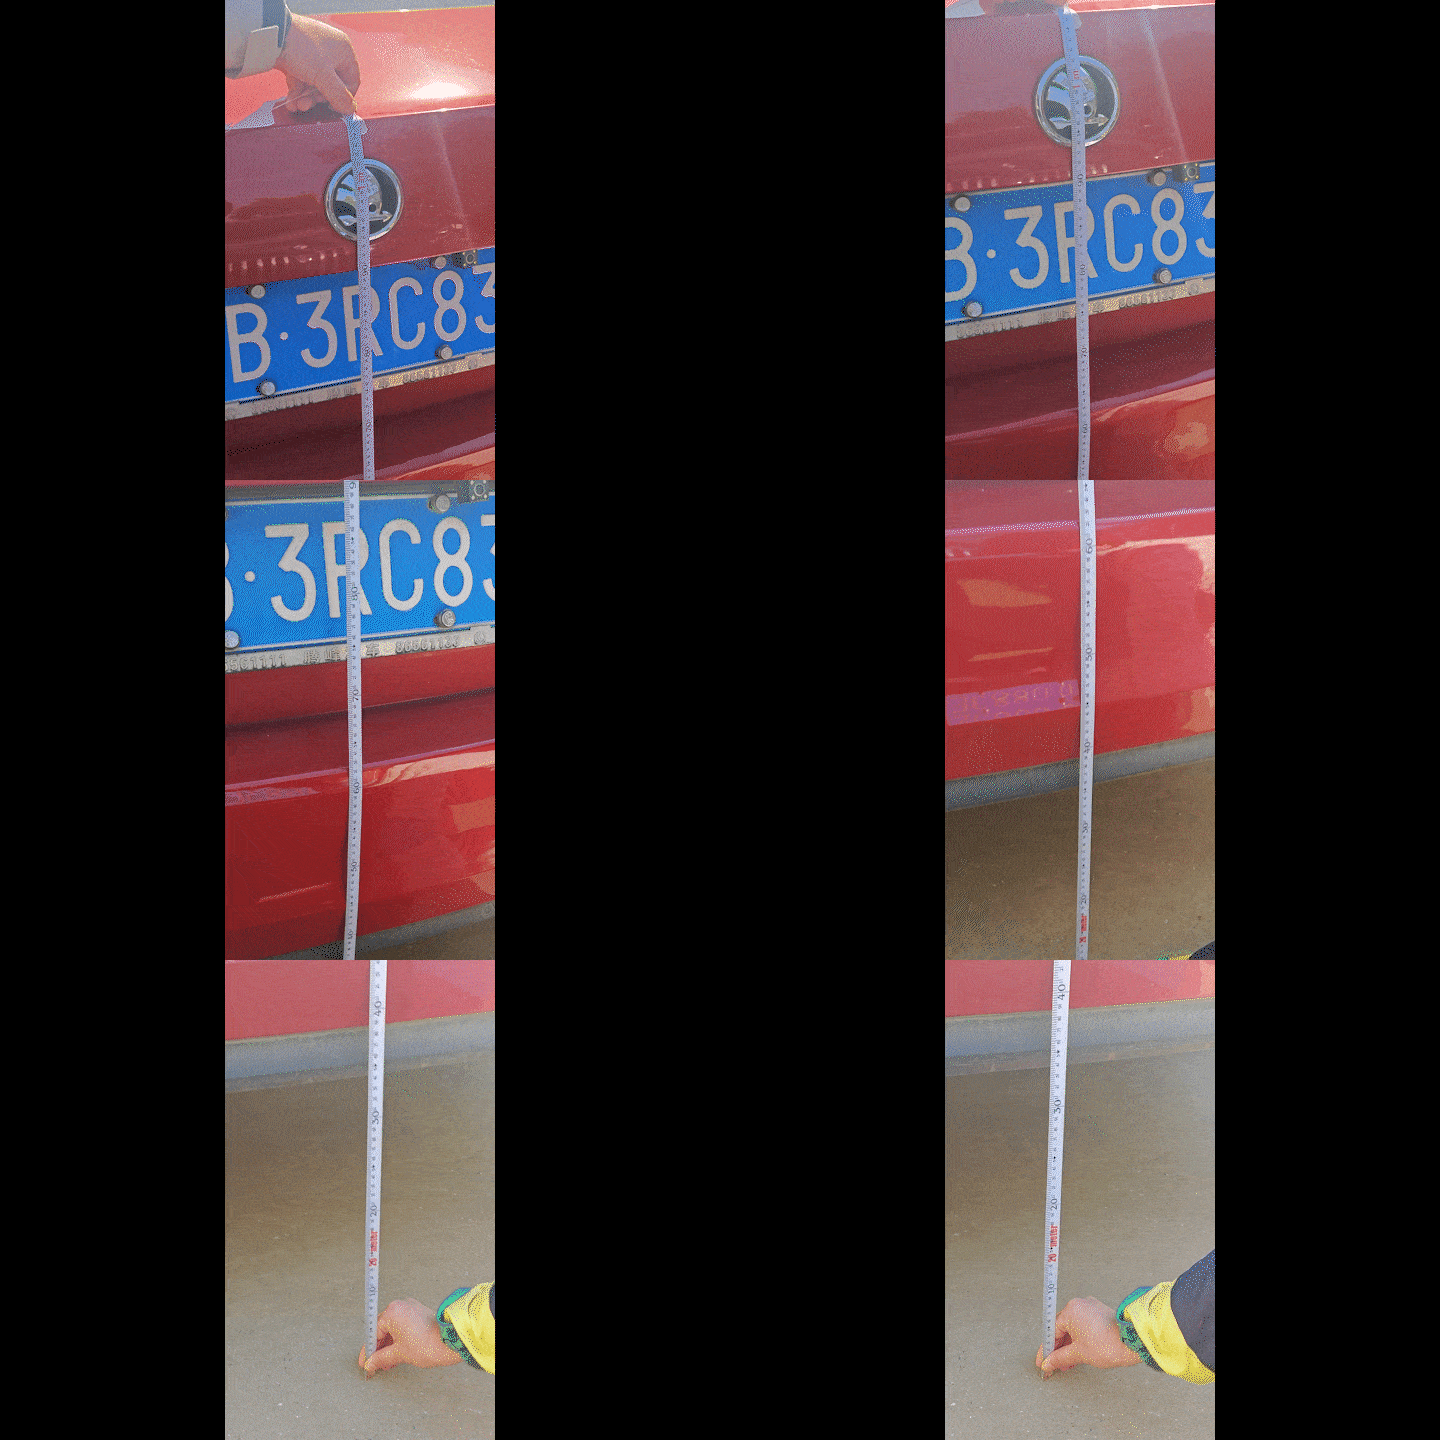
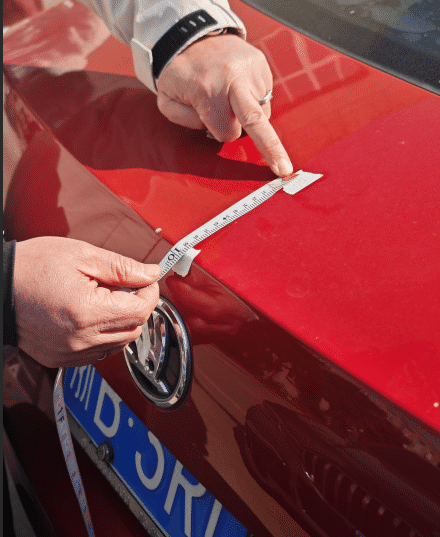
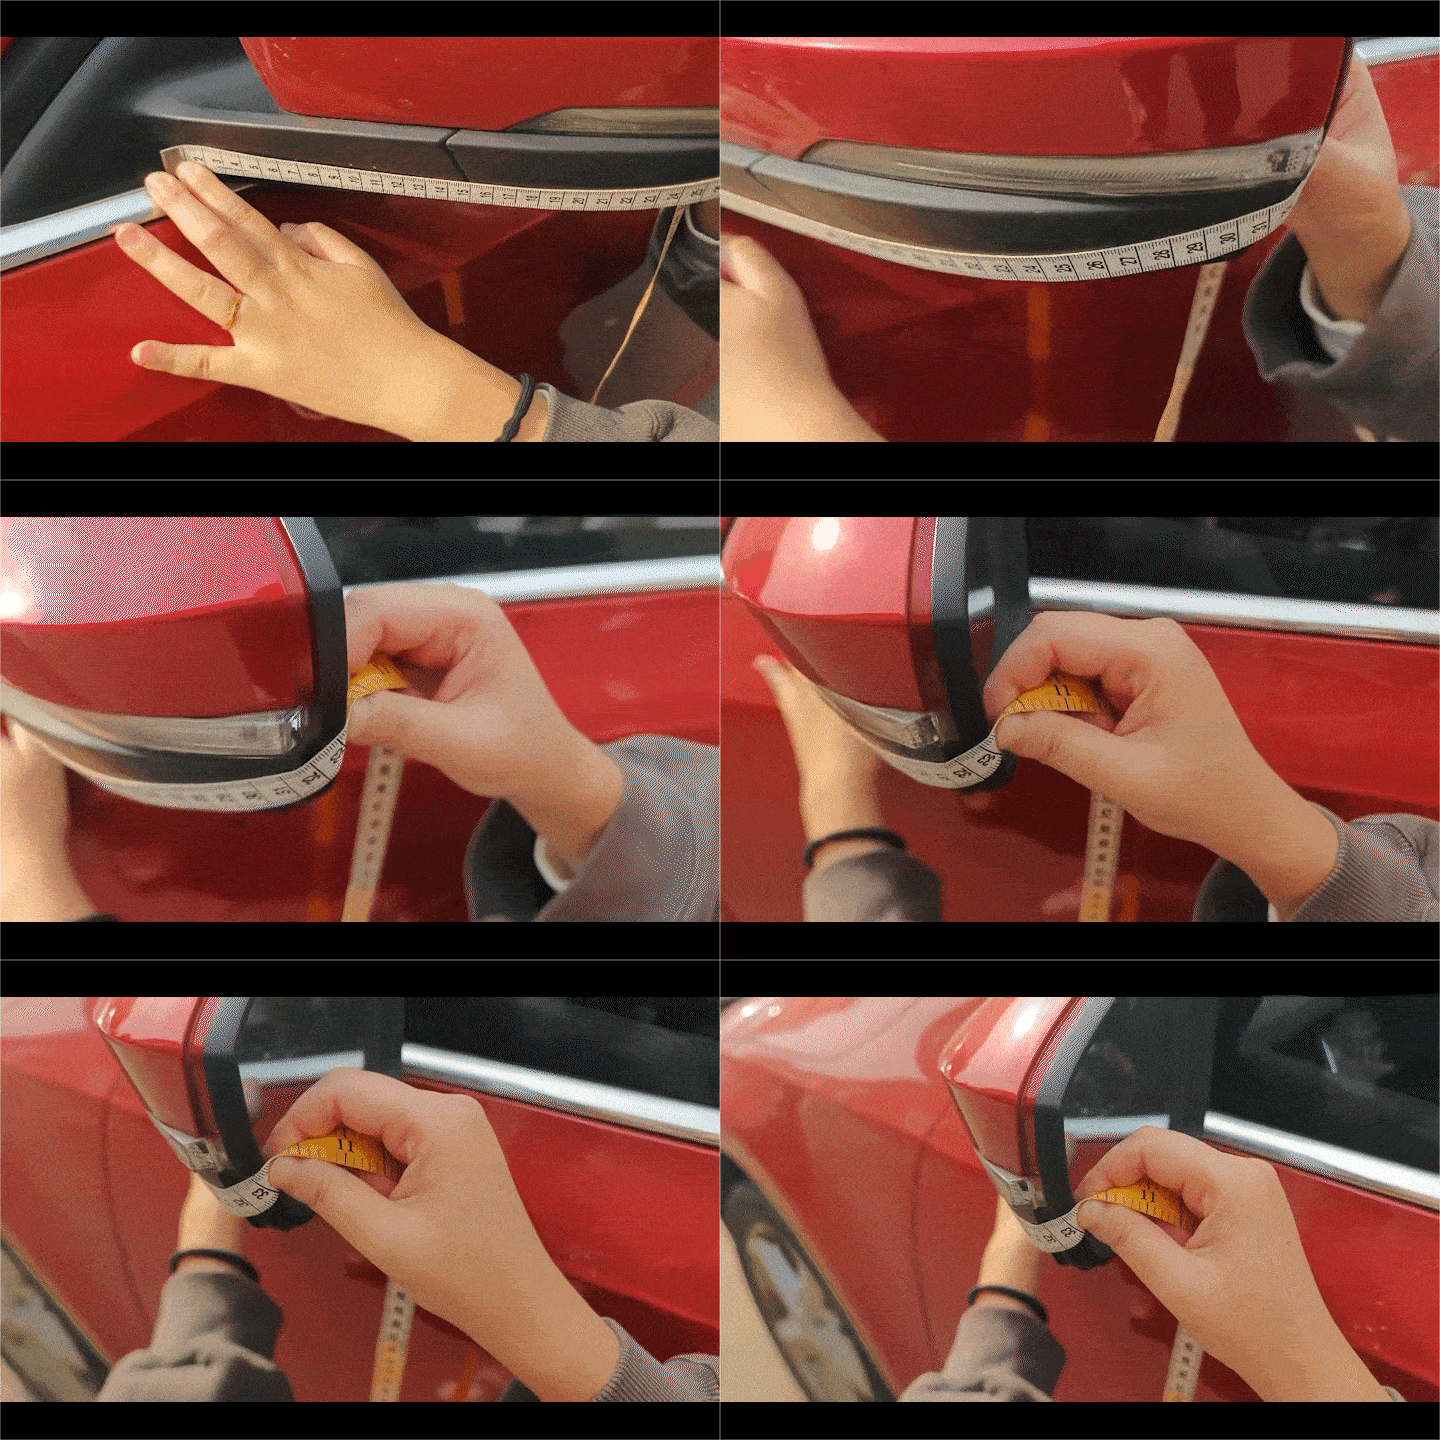
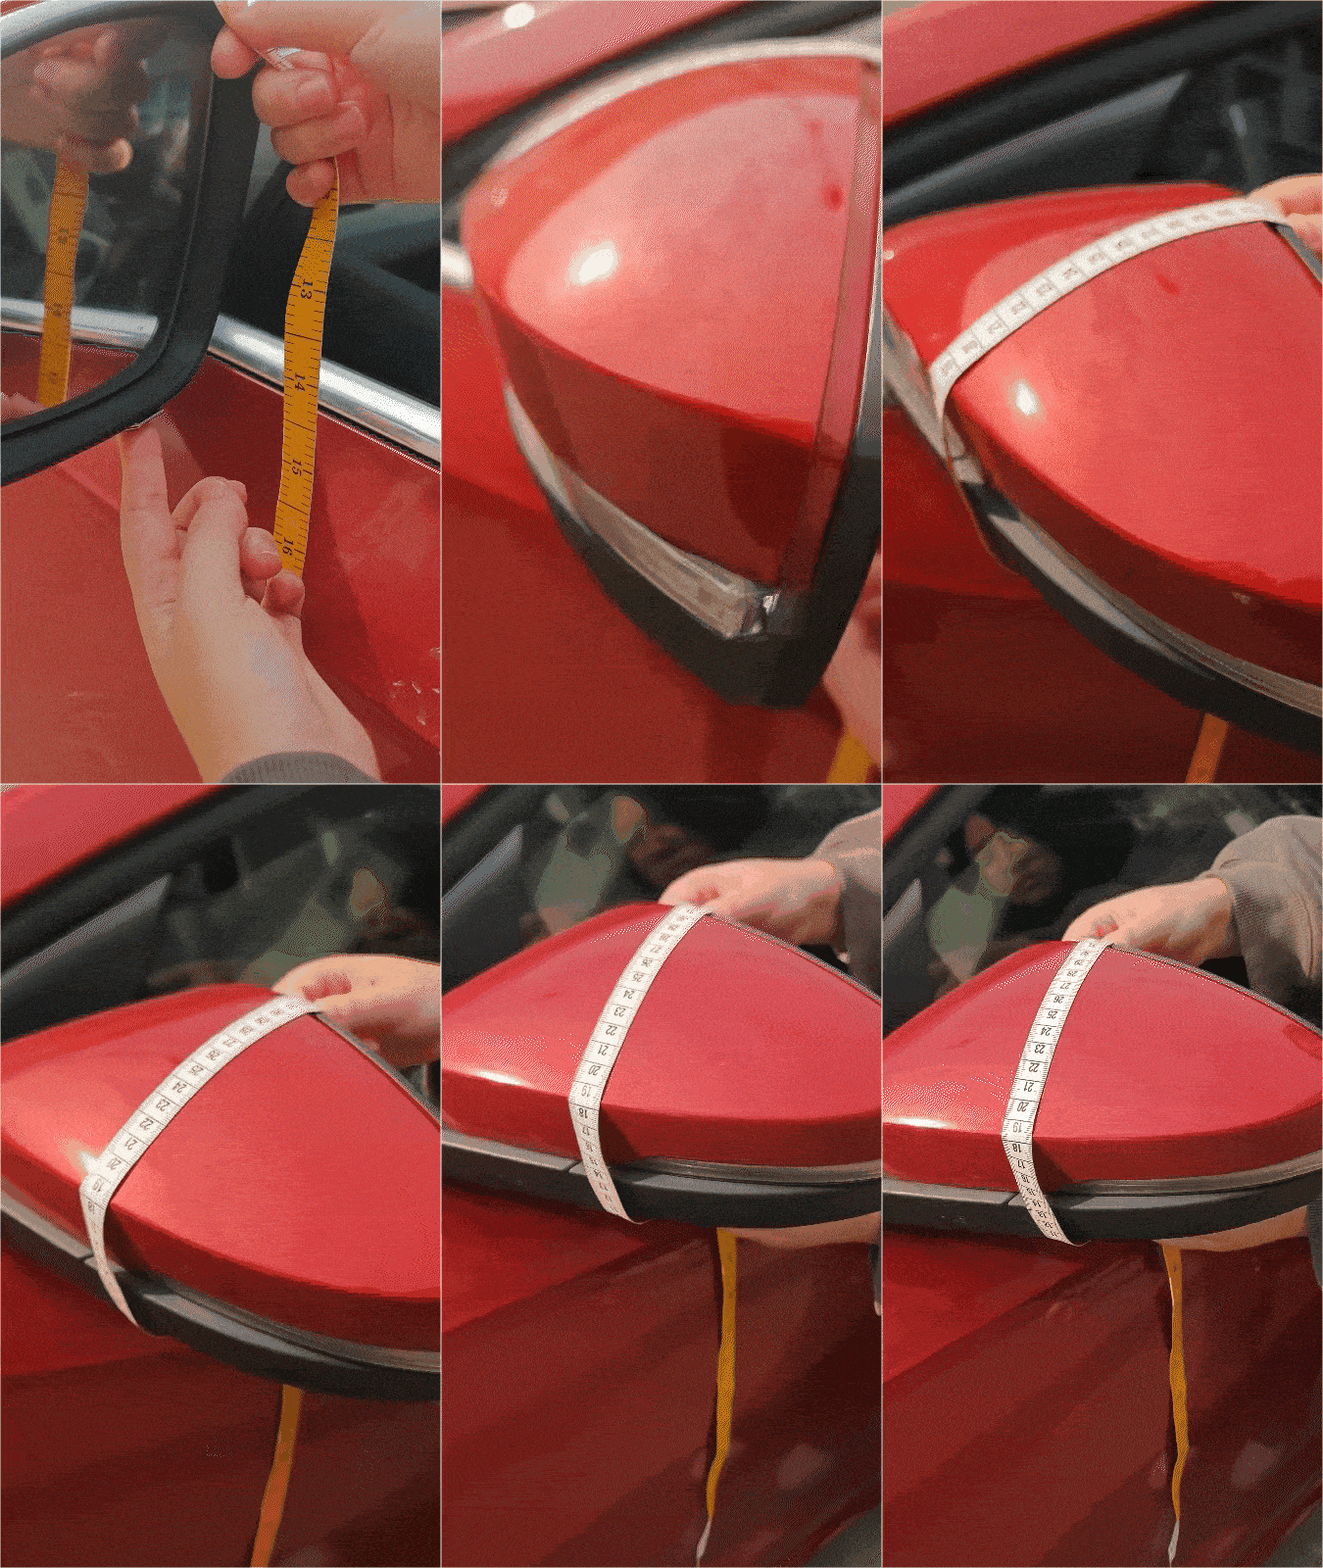
MPMirrors
What to measure:
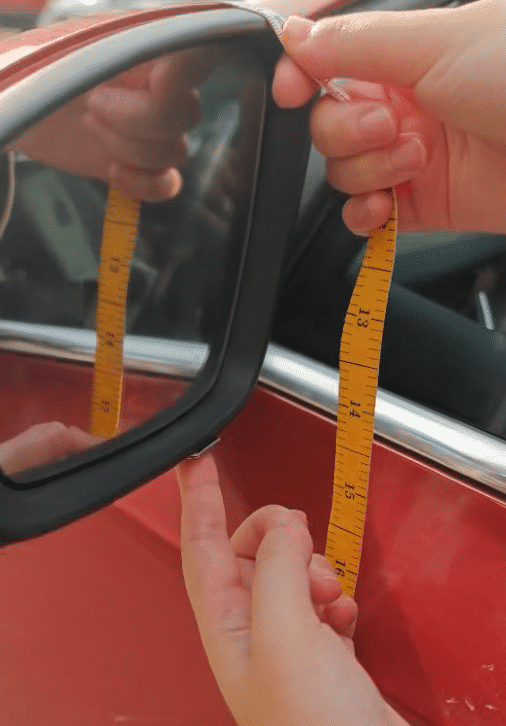
- Width across the mirror face, using a soft tape.
- Height of the mirror face, using a soft tape.
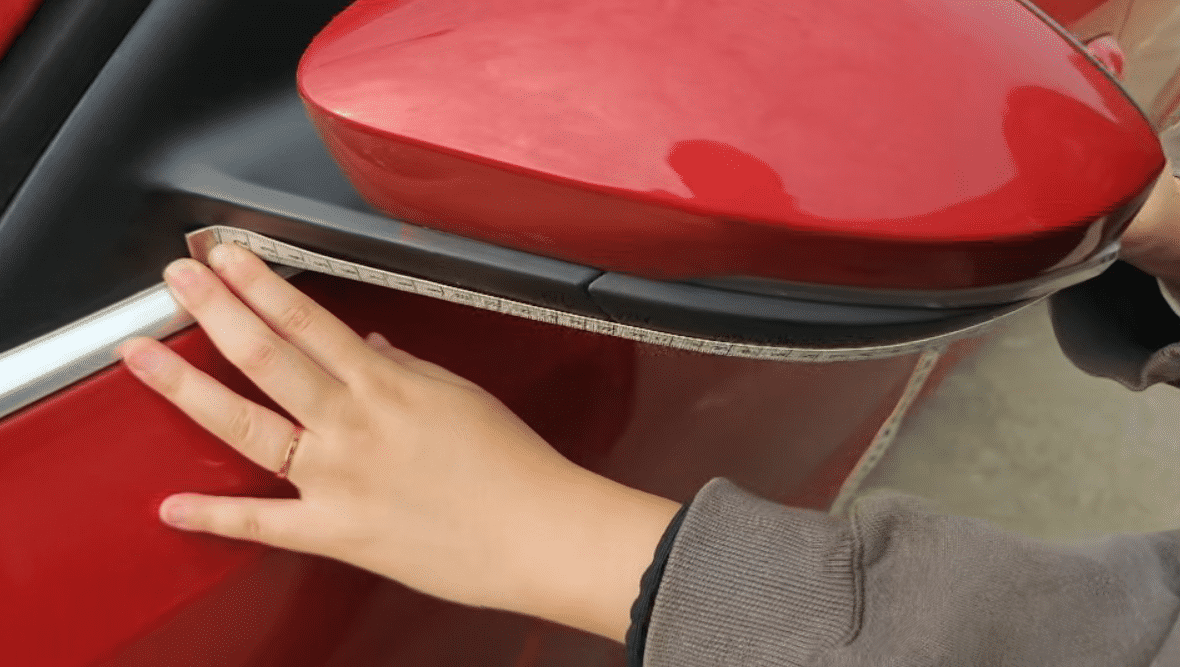
- Length from the vehicle body out to the outermost edge of the mirror, using a soft tape.
- Half the perimeter around the widest horizontal section of the mirror, using a soft tape.
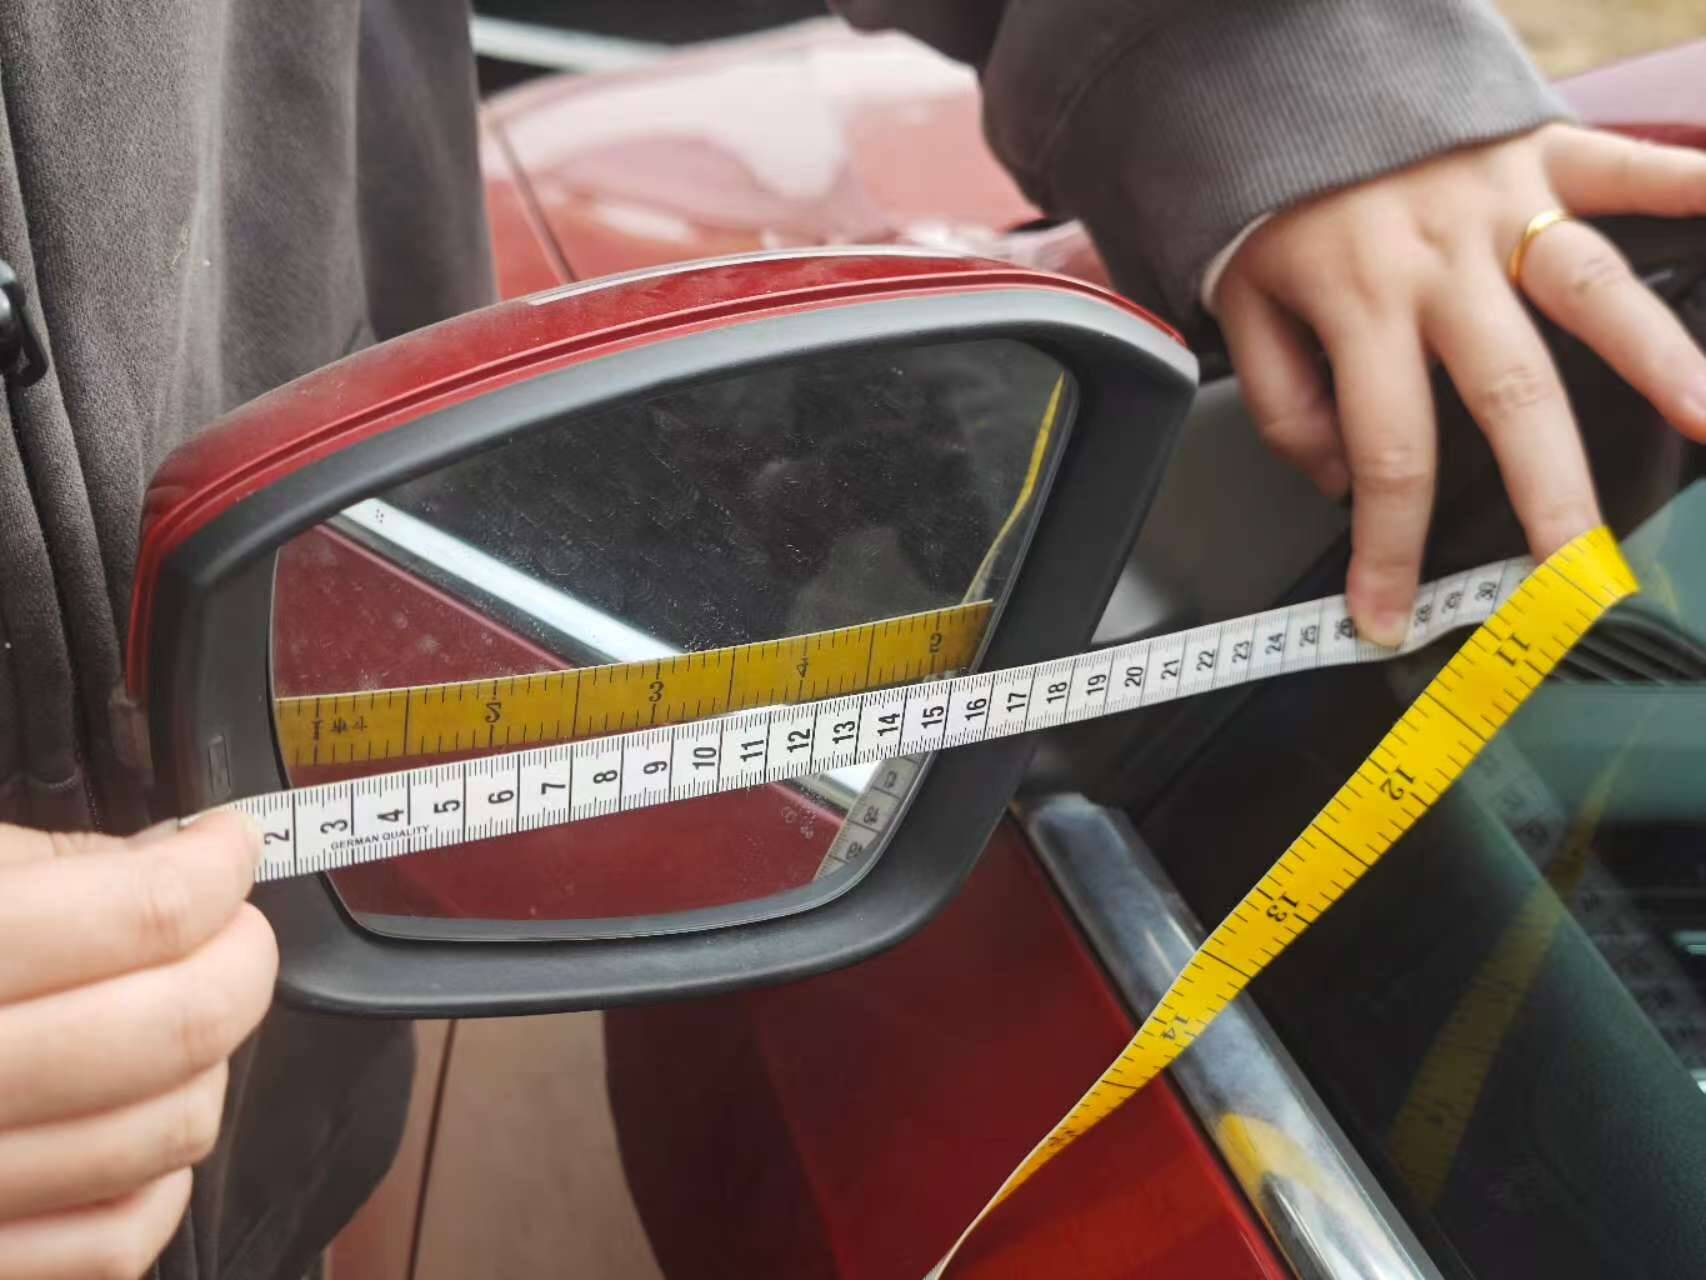
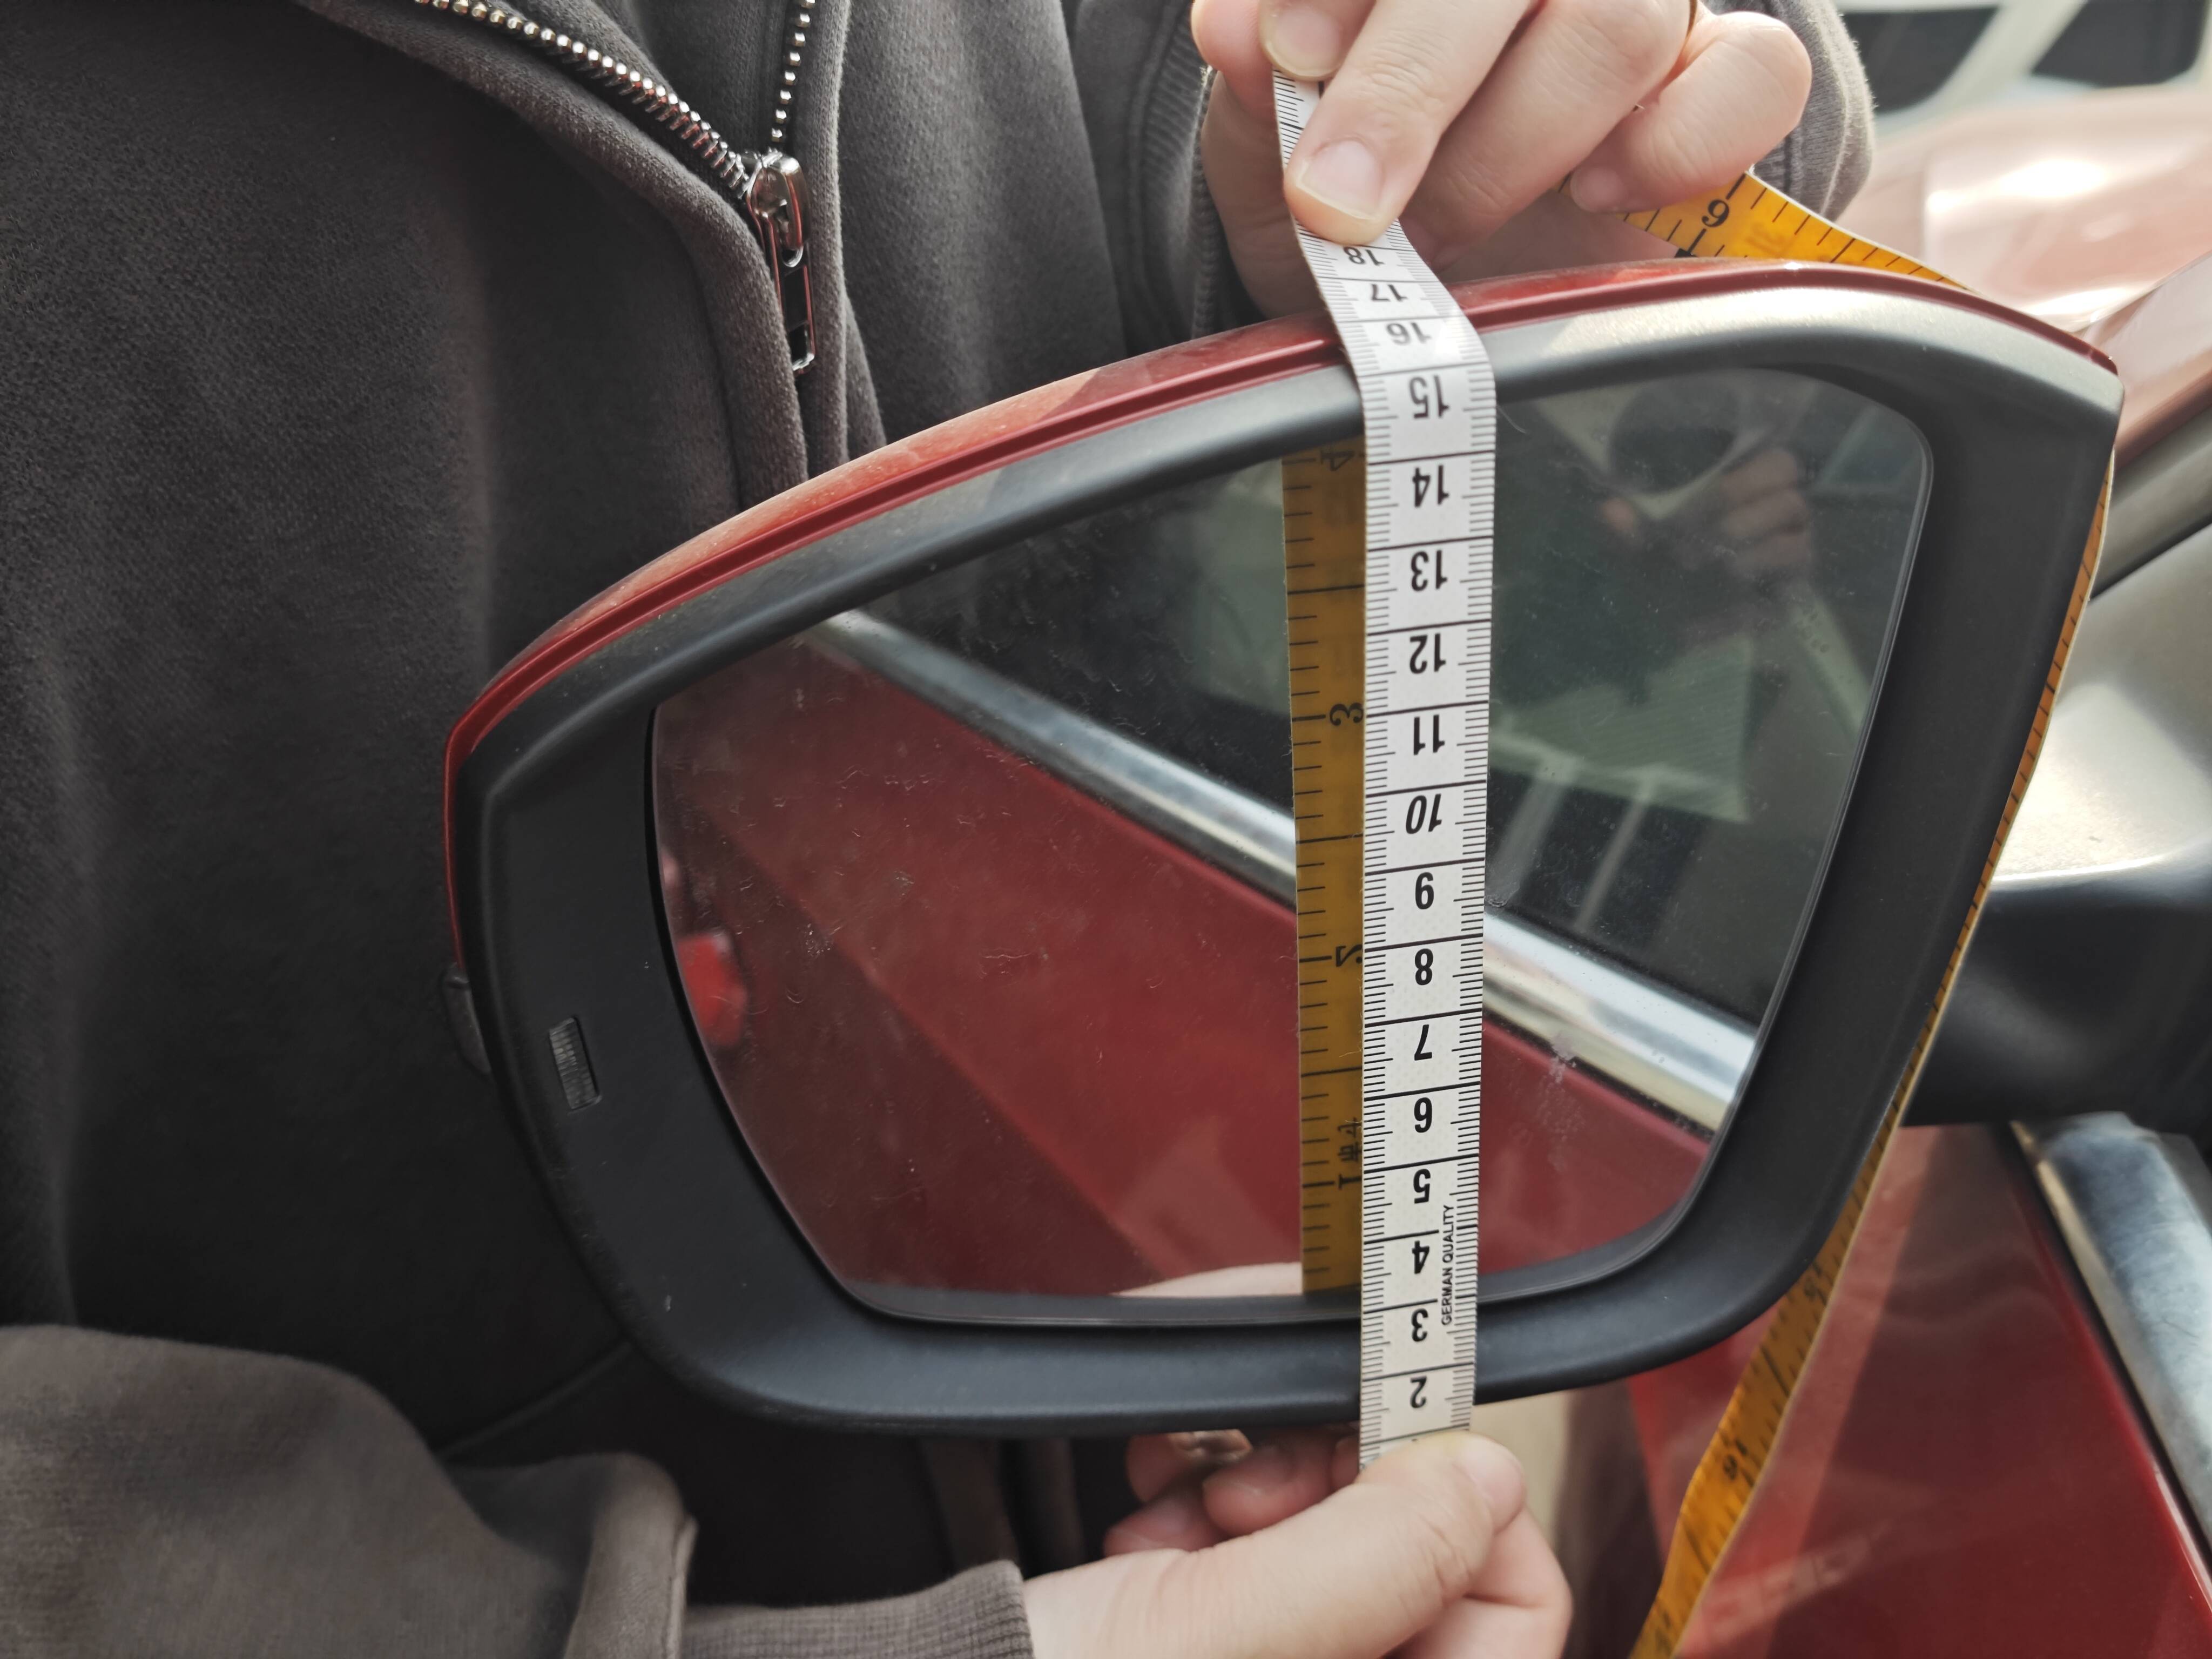
Measurement data record table
Record every reading in centimetres. Where a point has no value for a column, leave it blank.
| Point | Vertical height (cm) | Straight-line width (cm) | Arc length (cm) | Special (cm) |
|---|---|---|---|---|
| A | ||||
| B | ||||
| C | ||||
| D | ||||
| E | ||||
| F | ||||
| G | ||||
| H | ||||
| I | ||||
| J | ||||
| K | ||||
| L | ||||
| MP |
Photos, Drawings and Reference Samples
Measurements alone do not always describe a shape. The material below can be submitted with your measurements to support pattern development and project review:
- Photographs of each marked point — with the tape visible, plus an overall view of the vehicle or equipment from the front, rear, left and right.
- Existing drawings or technical files — outline drawings, dimension sketches or CAD files you already hold for the model or equipment.
- Reference samples — an existing cover, a fabric swatch or a sample of the current product, where one is available.
- Notes on the application — how the cover will be used, where it will be stored and what it has to protect against.
If your dimensions are incomplete, send what you have: our team will review the material and confirm which additional measurements, photographs or reference samples are still required.
How Measurement Supports Pattern Development
Recorded dimensions feed directly into the project workflow:
- Measurement — the point set above is recorded on site and returned with photographs and any drawings.
- Pattern and template review — the team reviews the readings against the model or equipment reference and prepares the pattern or template for discussion.
- Sample discussion and approval — a sample can be discussed on a project basis so that fit, material and construction are agreed before production planning.
- Production planning — the approved pattern and material specification are used for production planning.
Measurement, sampling, minimum order quantity and lead time are agreed per project and confirmed on inquiry. Trade terms are also confirmed with our team during the inquiry stage.
What to Send for a Project Review
Send the following with your inquiry so the project can be reviewed without a second round of questions:
- Model and type — vehicle make, model and model year, or the equipment type and working envelope.
- Dimensions — the recorded readings for points A–L and mirrors (MP), in centimetres.
- Photos and drawings — marked-point photographs, overall views, and any outline or CAD files you hold.
- Application environment — where the cover will be used (indoor or outdoor, storage or transport) and what it needs to protect against.
- Material and construction preferences — fabric, lining, seams, reinforcement or padding preferences.
- Openings and fasteners — required access points, zips, buckles, straps, vents or elastic details.
- Target quantity — the quantity you are planning for the project.
- Packaging and labelling — required packaging format, barcode, hang tag or label content.
Related B2B Resources
- OEM/ODM Custom Cover SolutionsHow JK Covers works with brands, importers and distributors on custom cover projects.
- JK Covers Product Catalog (PDF)Download the catalog to review product ranges before a project discussion.
- Custom Cover Case StudiesProject examples showing how custom cover requirements were developed.
- Standard Product RangeBrowse standard cover products that can be adapted for private-label programs.
- Contact JK CoversAsk about measurement requirements, sampling or project review.
- Send an InquirySubmit your dimensions, photos and project requirements directly.
Send Your Measurements — Start an OEM/ODM Project
Send your A–L readings, mirror measurements, photographs and drawings. If your measurement set is incomplete, send what you have and our team will confirm the remaining details.
Send Your Measurements Contact the JK Covers Team